Review: Affinity Photo – A New Image Editor Contender?
The problem with a lot of reasonably priced image editing programs is the fact that they lack a lot of features that professionals need to get the job done. When you sacrifice the price, you typically sacrifice the features you can expect to see.
Affinity Photo is a new image editor that shatters this concept, with a reasonable price, and all of the features you'd expect from a high-cost photo editor. I found when doing a side-by-side comparison with the established photo editors, it's close – really close.
Affinity Photo is a program by Serif, the same company who makes Affinity Designer, the vector graphics equivalent of Adobe Illustrator. Their new program, Affinity Photo is their equivalent to Photoshop.
Before we go any further, do note that Serif currently only make Mac software, and there’s no prospect of that changing in the foreseeable future.
Let's take a look at Affinity Photo and it's features.
Speed
The first thing I noticed when booting up Affinity Photo was a pure speed. I am running a Macbook Pro 15" with 16GB of RAM and a 1TB Hybrid Drive.
As a rough comparison, my Photoshop install typically takes between 45 seconds to 2 minutes to boot up and start running. Affinity Photo takes between 10-20 seconds.
Processing different tasks is quicker, too. Filters and effects are applied in real time. I applied filter after filter and never experienced a pause or a "beach ball" effect. Everything runs smooth as silk.
Serif, the makers of Affinity Photo, claim that the reason this is, is because they leverage the hardware to get the most out of the performance of your machine. Their goal was to make their software run as efficiently as possible.
Selections & Masks
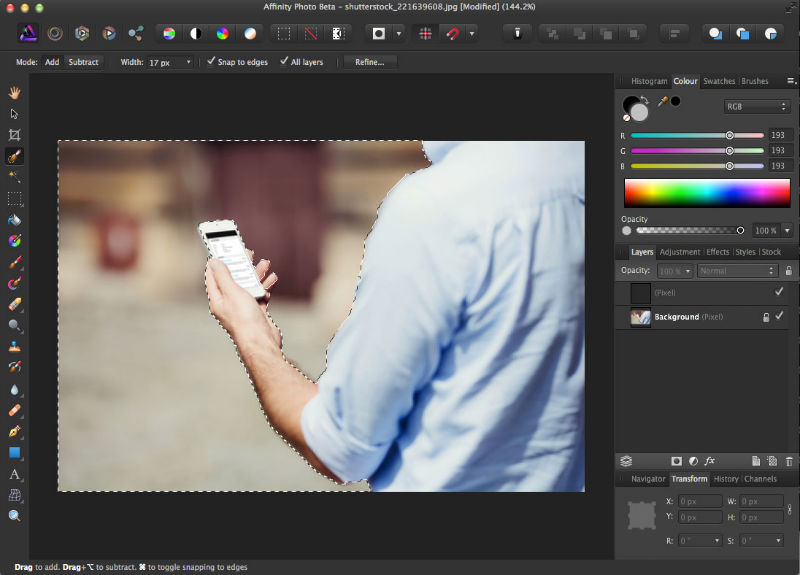
Affinity has the awesome feature of being able to use a brush to make your selection, as well as being able to refine that selection with different settings. I’ve found this an essential feature in Photoshop, and it's great to see it in Affinity Photo. You can paint masks on your images, too, making it easy to combine images and create layered layouts.
Filters
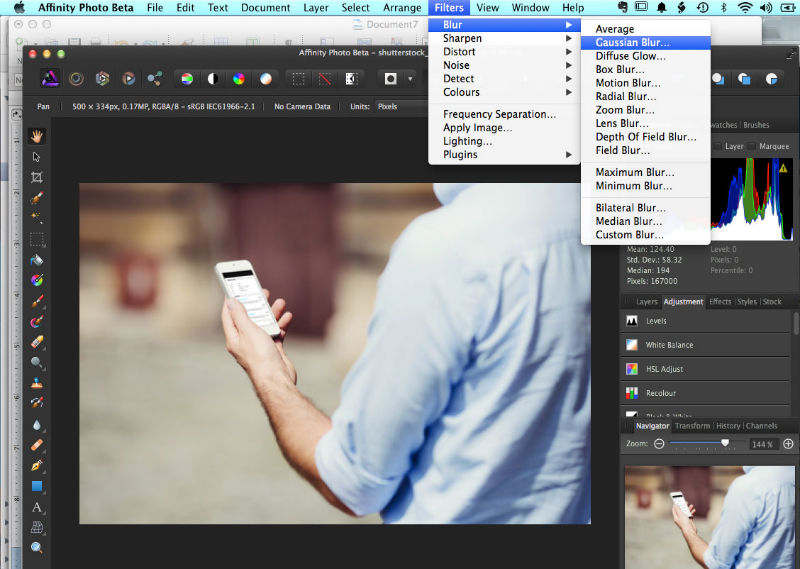
What I like about Affinity Photo's filters are that you have everything you need, without the bloat. When you run filters, you're typically doing 1 of 4 things. You're likely blurring an image, sharpening it, distorting it, or removing noise. Affinity Photo has lighting effects too.
Layers
Layer work just like layers in Photoshop or almost any standard graphics editor. I've been using Photoshop for roughly 15 years now, and the transition took minutes. You can stack layers and rearrange them. You have the ability to change the opacity of layers and lock them, so you have a lot of flexibility.
Layer Effects
One of the most important and widely used features of Photoshop are its layer styles. Affinity Photo has those, which are called layer effects. You have Inner Glow, Outer Glow, Inner Shadow, Outer Shadow, Gaussian Blur, Outline, Bevel and Emboss, Color Overlay, and Gradient Overlay. You can double-click the ‘fx’ icon after applying effects to go back in and edit them.
Blend Modes
Blend modes are available, which is great for applying color effects and combining images and effects. You'll find all of the typical blend modes you'd hope for, such as multiply, darken, screen, overlay, and more.
Adjustments
They work just like Adjustment layers, remaining completely editable. You can go back and make changes when necessary. The great thing about adjustments is that you can save your settings as presets for later use.
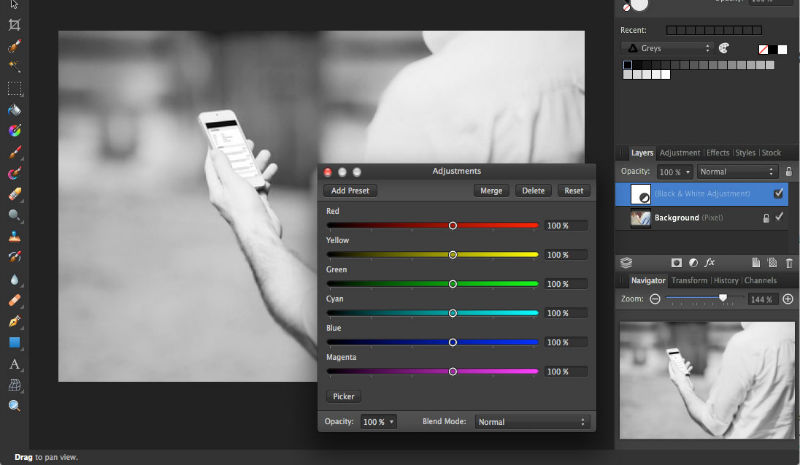
You have all of the typical Adjustment Layers, such as Hue/Saturation, Black and White, Posterize, Channel Mixer, Exposure, Curves, Gradient Maps, Threshold, Levels, and Brightness/Contrast. If you've been using Photoshop for as long as I have, then you'll recognize all of these.
Shapes
Honestly, working with shapes inside of Affinity Photo feels easier than in most pixel editors. There are a lot of presets already, or you can draw your own.
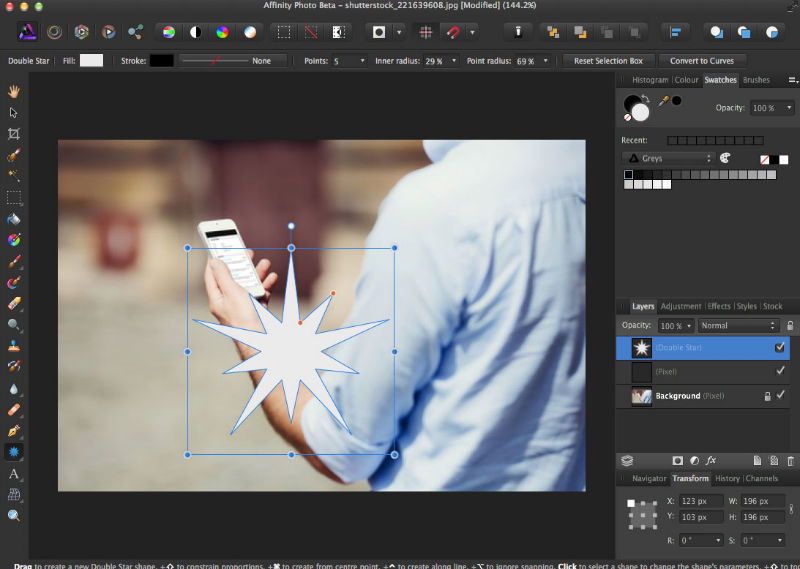
The presets have editing handles that make adjustments easy. The orange dots in the screenshot above allow you to edit all of the inner points at once and all of the outer pints at once separately. It's quick, and you don't have to select each point individually. It even gives you guides, letting you know when things align.
Editing shapes is easy, with a lot of great options. You can click an option to change a preset shape to curves, where you can edit each anchor point individually. You can use the tools at the top of the interface to change anchor points to round ones, snap points as you specify, as well as smooth and join paths.
Inpainting
Although the term 'inpainting' probably doesn't mean much to most of us, you might recognize this feature by its Photoshop name — 'Content Aware Fill'. This feature lets you sample the pixel information around the selection, blends it all together, and generates a fill.
It has a different name in Affinity Photo, but seems ro work just as well, as you can see from the before and after example.
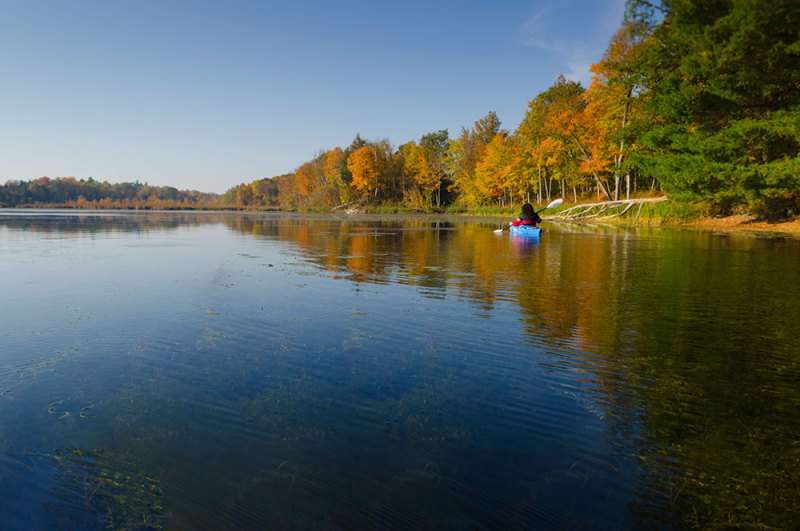
Inpainting: The canoe is deleted and replaced by auto-generated lake surface.
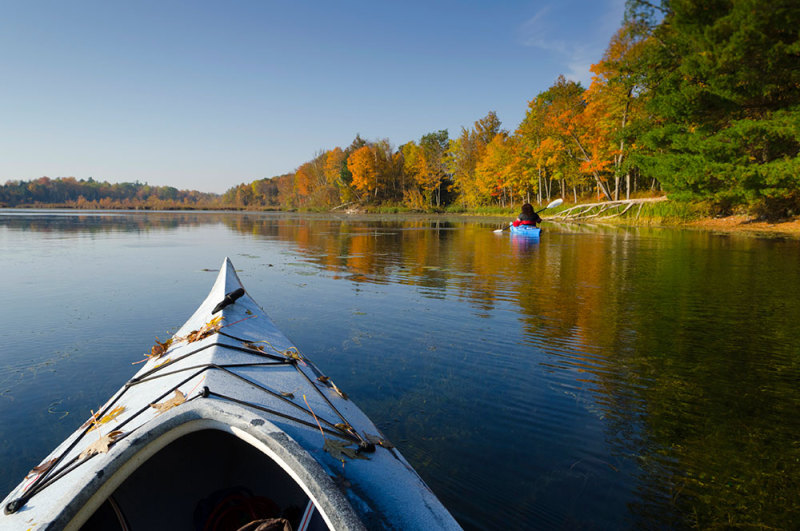
Inpainting: In this example the original shot has a canoe bow filling the foreground.
Personas
So, what is a Persona? It's kind of like a module for performing specific tasks.
Affinity Photo uses Personas for specific tasks, such as editing Photos, performing the liquefy filter, developing Camera Raw photos, performing specific affects to images, such as tone mapping and filter presets, and exporting your images in specific formats.
This is a great way to keep all of your tasks compact and organized. This also allows you to focus on specific tasks without distractions.
Exporting graphics
Affinity Photo has dedicated an entire section to exporting images for different purposes. All of your exporting needs are in one place, to make things simple. You can export images at 1x, 2x and 3x by default. Also, you can export graphics in different formats.
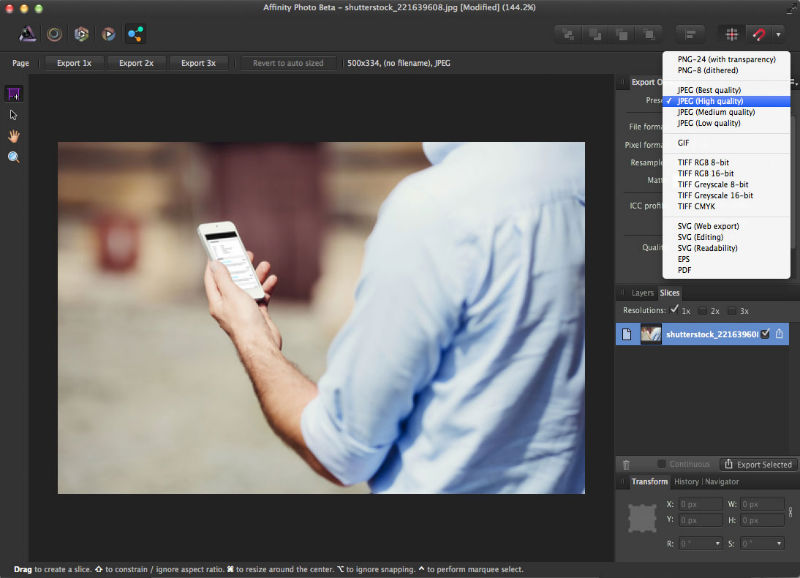
JPEG
As you might rightly expect, you can export your images at different qualities, depending on your project needs. You can export them at best or high quality for print, or medium and low quality for the web. You can also change the quality, as well as the color mode. Being able to switch from RGB to CMYK at the exporting process makes sense.
PNG
Affinity Photo supports PNG 8 and PNG 24 for transparency. This allows you to create full color images with full transparency for the web. You can also export grayscale PNGs from this section of Affinity's interface.
GIF
Affinity Photo enables you to create GIFs with all of the color settings you'd expect, from 2 to 256 colors in one GIF. You can select from different color palettes, from automatic and web safe to your own custom color palette.
TIFF
You can export your images in TIFF format, from RGB to grayscale and CYMK TIFFs.
SVG
This feature has been long-awaited in Photoshop, and happily it can be found in the beta version of Affinity Photo. You can export your vector graphics as SVG files in different formats. You have the ability to customize and tweak your settings.
EPS
For postscript printing, the EPS format is available, with several settings you'd expect when exporting your images.
PDFs are one the most commonly viewed and supported file formats around the world. You can export your images and files as PDFs, making it easy for you to send a quick proof to a client.
Differences Between Affinity Photo and Photoshop
As of right now, there are a few extended features in Photoshop that aren't found in Affinity Photo.
There isn't a 3D capability, like the one inside of Photoshop, which is fine, because I suspect most designers don't regularly use that feature anyway. Affinity Photo’s masking feature could use a little more visibility, because editing the actual mask after the fact can be a little tedious.
Conclusion
Where Affinity really shines is its speed and price. It is definitely affordable, and its performance is spectacular. It is fast, well organized and has almost everything that most image editors might require on a daily basis. It has all of the brushes you need to get the job done, with a lot of customization features.
If you're looking for a quality image and graphics editor without a hefty price tag, Affinity Photo is a great choice.