How to Send Emails with React Using Resend

In this article, we’ll look at how to send emails with React Email and Resend. We’ll also build a typical portfolio contact form for sending those emails using Next.js.
Until recently, creating and sending emails in React was extremely difficult, as there was no proper documentation on how to create email templates with hacky <table> tag tricks, or documentation on how to send emails.
Much of the difficulty with using emails has been alleviated by the creation of React Email and Resend. These products — which were developed by the same team — have created an amazing developer experience for working with emails.
Setting Up the Next App
Let’s start by setting up Next.js. Clone the starter branch of this GitHub repo to get the starter code. The image below shows what we should see when we run the development server.
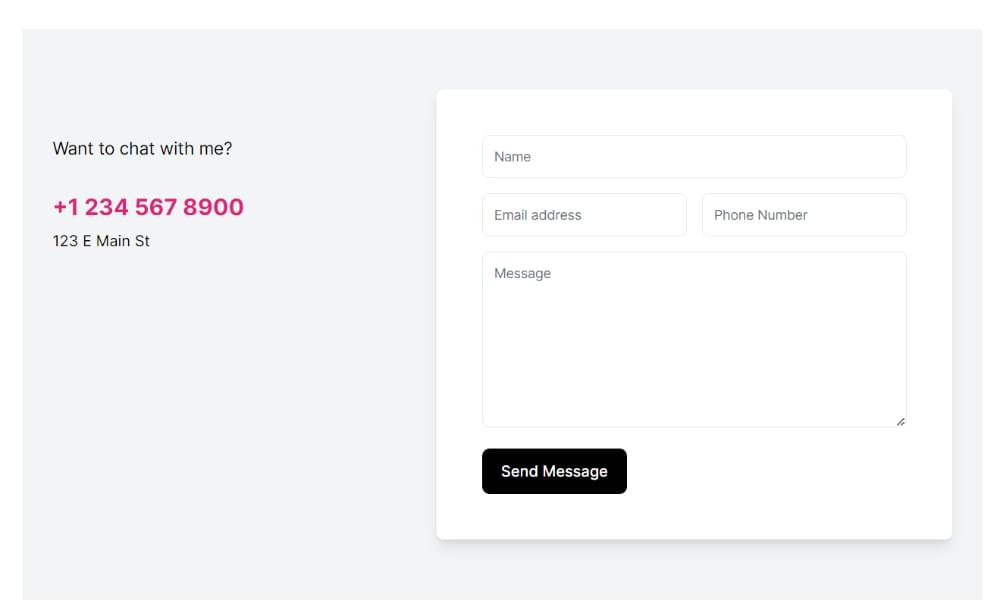
The starter code consists of a simple Next.js 13 app (with the App Router) that has a contact form component with proper validation using Zod and React Hook Form.
We’ll be implementing the onSubmit function in the contact form component:
function onSubmit(values: z.infer<typeof formSchema>) {
  // TODO: implement
  console.log(values);
}
Note: we won’t cover how to build the form or how to style the email itself, as that can be done with Tailwind or regular CSS.
Setting Up Resend
Le’t now look at how to set up Resend.
Getting the API key
To send the email with the Resend SDK, we first need to retrieve an API key. Head over to Resend’s website and log in or create an account with your email or GitHub details.
After you’ve logged in, you should see the dashboard as pictured below.

Press the Add API Key button to get the API key. Once you have your API key, go to the root of the project and create a .env.local file and paste the API key as follows:
RESEND_API_KEY=************
This will allow us, later on, to use Resend services within our app.
Verifying a domain
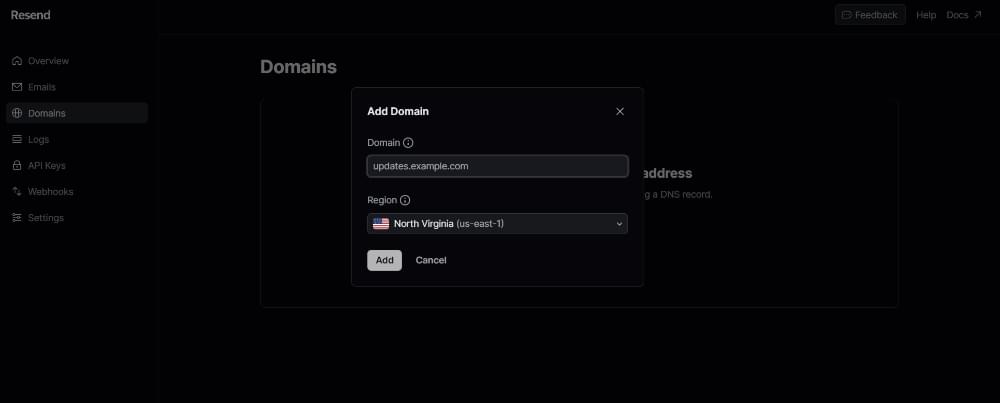
Resend requires that we verify a domain from which we want to send unlimited emails by adding a DNS record on their website.
To do this, head over to the Resend dashboard and go to the Domains tab and press the Add Domain button, as pictured below.
From there, we can verify the domain and use that specific email address. For this simple tutorial, we won’t be verifying any email addresses.
Creating the Email Component
It’s now time to create the email component. In the components folder, create a file called Email.tsx and import the following components from React Email:
import {
  Body,
  Container,
  Head,
  Heading,
  Hr,
  Html,
  Preview,
  Tailwind,
  Text,
} from "@react-email/components";
import * as React from "react";
For the email, the only things that will change will be the form data values (that is, the name, message, email address, and phone number of the person). These values can be used as props for the email, so let’s create an interface for that:
interface ContactMeEmailProps {
  name: string;
  emailAddress: string;
  phoneNumber: string;
  content: string;
}
The actual email component would look like this:
const VercelInviteUserEmail = ({
  name,
  content,
  emailAddress,
  phoneNumber,
}: ContactMeEmailProps) => {};
For the preview text of the email, we could just say that “so and so has a message”. It would be implemented like this:
const previewText = `${name} has a message`;
Now for the actual JSX. We’ll first need to wrap our email in an <Html> tag and render the <Head> and <Preview> tags (for the preview text). Then we need to wrap the content in a <Tailwind> tag to use Tailwind styling, and a <Body> tag:
<Html>
  <Head />
  <Preview>{previewText}</Preview>
  <Tailwind>
    <Body className="bg-white my-auto mx-auto font-sans">
      {...}
    </Body>
  </Tailwind>
</Html>
We can then add a <Container> component with some general styling to make the container in which the email is rendered look nicer:
<Container className="border border-solid border-[#eaeaea] rounded
my-[40px] mx-auto p-[20px] w-[465px]">
</Container>
Then inside the container, we can add a simple heading with some styles labeled “Someone would like to contact you about something!”
<Heading className="text-black text-[24px] font-normal text-center p-0 my-[30px] mx-0">
  <strong>{name}</strong> would like to contact you about something!
</Heading>
Then we can render out the actual content of the email with the built-in <Text> component:
<Text className="text-black text-[14px] leading-[24px]">
  Here is the message:
</Text>

<Text className="text-black text-[14px] leading-[24px]">
  {content}
</Text>
Finally, we can add an <Hr> component and another <Text> component with the sender’s contact information for future conversations:
<Hr className="border border-solid border-[#eaeaea] my-[26px] mx-0 w-full" />
<Text className="text-[#666666] text-[12px] leading-[24px]">
  This message was sent by ${name}. You can contact him through his
  email {emailAddress} or his phone number {phoneNumber}
</Text>
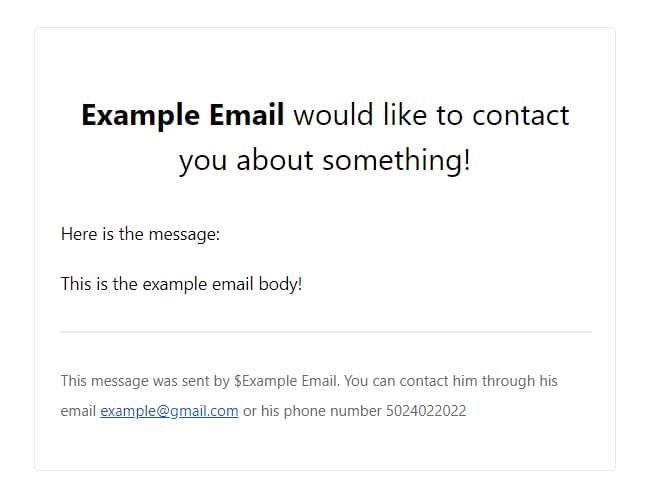
And with that, our email is done. As you’ve probably noticed, React Email makes it simple to make emails, because its built-in components are practically identical to regular HTML tags.
The email should look something like the image below.
Now we’re ready to send the email with Resend!
Sending the Email with Resend
To send the email, we first need to implement the API endpoint. In the file api/send/route.ts (already created in starter files), make sure the following imports are present:
import ContactMeEmail from "@/components/Email";
import { NextRequest, NextResponse } from "next/server";
import { Resend } from "resend";
import * as z from "zod";
Then, create an instance of the Resend SDK, as follows:
const resend = new Resend(process.env.RESEND_API_KEY);
Note: if you used a different environment variable name for your API key, make sure to replace it properly.
Then paste in the following Zod schema:
const sendRouteSchema = z.object({
  name: z.string().min(2),
  emailAddress: z.string().email(),
  phoneNumber: z.string().min(2),
  content: z.string().min(2),
});
This schema represents the request body that was sent from the client. Now let’s destructure the request body to get these fields in the POST function:
const { name, emailAddress, phoneNumber, content } = await req
  .json()
  .then((body) => sendRouteSchema.parse(body));
Now, to send the email, we use the send function from our Resend instance like this:
const data = await resend.emails.send({
  from: "from email",
  to: ["delivery email"],
  subject: `${name} has a message!`,
  react: ContactMeEmail({ name, emailAddress, phoneNumber, content }),
});
If you verified your domain on Vercel, you can use an email address with that domain on the from field, and the to field should be your email. If you want to be extra secure with the email addresses, you can set them as environment variables.
Now we need to implement the actual fetch action on the client. In the contact form component (components/ContactForm.tsx), we need to fetch the API endpoint like this inside of the onSubmit function:
await fetch("/api/send", {
  method: "POST",
  body: JSON.stringify({
    name: values.name,
    emailAddress: values.email,
    phoneNumber: values.phone,
    content: values.content,
  }),
});
Make sure to mark the function as async due to the await statement. It’s up to you to decide how you want to implement loading and error-handling states. (You can read more about async/await here.)
And with that, we have successfully sent the email with Resend!
Conclusion
Much of the headache with creating and sending emails in React has been solved with React Email and Resend. It’s a two-hit combo that provides an amazing developer experience and gets the job done extremely quickly.
Consult the docs for React Email and Resend if you want to learn more about these frameworks. React Email also provides many example templates for you to base your emails off.
You can find the finished source code on GitHub.