WordPress Hybrid Client: WordPress Powered iOS/Android Apps

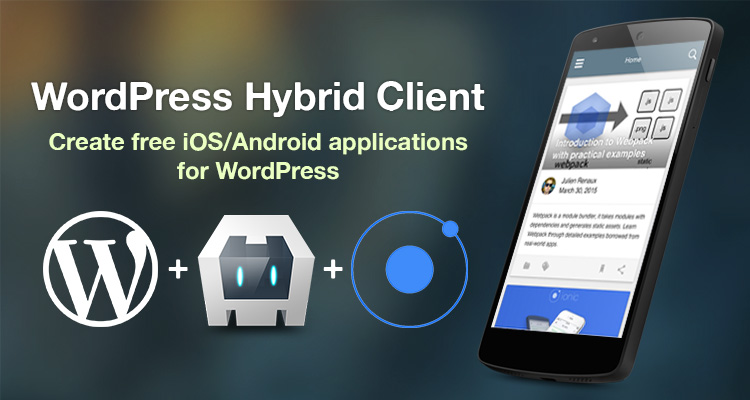
WordPress Hybrid Client (WPHC) is an Open Source project available on GitHub that lets you easily create iOS and Android versions of your WordPress website for free.
WPHC is based on the Open Source hybrid stack Ionic SDK, Cordova, and Crosswalk .
Features
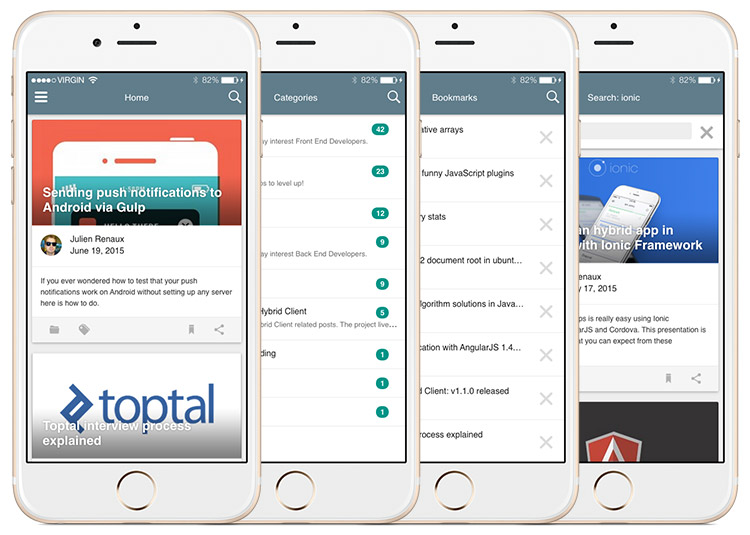
- Push notifications
- Bookmarks (offline mode)
- Google Analytics support
- Automatic content updates
- Social buttons
- Accessibility (post font size)
- Multi languages (English, French, Chinese)
- Infinite scroll
- Syntax highlighter for tech blogs
- Image cache
- App rate
Built with WPHC
Here are a few examples of projects built using WPHC:
- https://play.google.com/store/apps/details?id=com.shprinkinc.wordpresshybridclient
- http://hiwaldorf.com/app/
Installation
Warning: This installation works on both OS X and Linux. Windows is not supported yet.
First of all you’ll need to clone the project (no need to fork it):
$ git clone https://github.com/shprink/wordpress-hybrid-client.git

# Open the project folder
$ cd wordpress-hybrid-client

# List all tags
$ git tag
v1.0.0
v1.1.0
v1.2.0
v1.3.0
v1.3.1
v1.4.2

# checkout the latest version available
$ git checkout v1.4.2
Then, all you need to do is run the following script and wait:
sh ./install.shYou can find more information on installation here.
Configuration
Now that the installation is done, you will have two config files created at the project root:
config.jsonfor the application configurationconfig.scssfor the style configuration.
Application
Most of the application behavior is configurable through the config.json file. Here is a simple view of what you can configure:
- title
- api
- baseUrl
- timeout
- maxAttempt
- menu
- exposeAsideWhen
- list
- settings
- cache
- views
- forward
- img
- data
- bookmark
- post
- syntaxHighlighter
- taxonomies
- posts
- translation
- available
- prefered
- analytics
- cordova
- statubar
- appRate
- pushNotifications
You can find more information here.
Style
You can overwrite any Ionic or WPHC Sass variables within the config.scss file. This is also the place to add any specific styles that you may require.
You can find more information here.
Web Service
Install this plugin https://wordpress.org/plugins/json-rest-api/ and activate it, then modify config.json:
"api": {
    "baseUrl": "http://YourDomain.com/wp-json"
},
Now your web service is ready to be queried.
Push Notifications
Install this plugin https://wordpress.org/plugins/push-notifications-for-wp/ and activate it, then modify config.json accordingly. If you do not want push notifications enabled, set "enabled": false and skip this section.
"pushNotifications": {
    "enabled": true,
    "baseUrl" : "http://yourDomain.com/pnfw",
    "android": {
        "senderID": ""
    },
    "ios": {
        "badge": true,
        "sound": true,
        "alert": true
    }
}
Android
If you have not already done so, you will need to set up a Google API project, to generate your senderID. Follow these steps to do so.
Get your senderID by following the Cloud messaging steps at https://developers.google.com/mobile/add.
Tip: the senderID is a 12 digit number.
Open your WordPress admin page and go to Push Notifications > Settings to check the following checkboxes:
- Basic Options > Send push notifications when a new post is published
- Basic Options > Android devices
- Send Push Notifications for > Posts
- Misc > In the Android notification payload add the message field
Then go to ‘Android Push Notifications (via GMC)’ section and enter your Google API key.
Don’t forget to save.
iOS
Open your WordPress admin page and go to Push Notifications > Settings to check the following checkboxes:
- Basic Options > Send push notifications when a new post is published
- Basic Options > iOS devices
- Send Push Notifications for > Posts
Get .perm files and upload them in the iOS Push Notifications section.
You can find more information on push notifications here.
Development (Web)
Now that the installation is done, make sure the project is running properly. To do so, run the following command:
npm run devserverThen open http://localhost:8080/webpack-dev-server/ and check if everything runs as expected. Every source code modification (or config) will build the project automatically and live reload the application. You will immediately see the result.
Build (native)
Install Cordova’s Platforms and Plugins
All you need to do is to run one command and answer the questions: npm run installCordova
$ npm run installCordova

> wordpress-hybrid-client@1.4.0 installCordova /Users/shprink/Sites/demos/wphc-1.4
> sh ./install_cordova.sh

Which platforms do you want to build? (android ios):
Once you’ve selected the platforms you want to build for, the script will install all the necessary Cordova plugins.
Android
Prerequisites
- Android SDK
- Ant
Build and Run the Dev Version (non minified and debug ON)
Plug your device in if you have one (make sure your device is listed by running: $ adb devices) or let Android emulator handle it.
# Dump dev files within the www folder
npm run dumpdev

npm run runAndroid
Pro tip: If you want to test the minification you could also run the prod version on debug mode by using npm run dumpprod instead of npm run dumpdev
iOS
Prerequisites
- OS X
- Xcode
- Provisioning profile
- iOS Simulator
sudo npm install -g ios-sim npm install ios-deployBuild and Run the Dev Version (non minified and debug ON)
Plug in your device if you have one or let the iOS simulator handle it.
# Dump dev files within the www folder
npm run dumpdev

npm run runIOS
Pro tip: If you want to test the minification you could also run the prod version on debug mode by using npm run dumpprod instead of npm run dumpdev
You can find more information here.
Release
Make sure you have iOS and/or Android platforms installed. If you’ve correctly run npm run installCordova it should be fine.
Android
Get and Save the Licence Key
https://support.google.com/googleplay/android-developer/answer/186113?hl=en
Copy and paste the key within your ~/.ssh folder with that name android_wphc.keystore
NB: You can put the key wherever you want and even rename it. But if you do that, you will need to modify release.sh accordingly.
Build PROD APKs
npm run buildThen, follow the prompts.
iOS
Documentation
Building for iOS can be painful if you have not read the following documentation first:
https://developer.apple.com/programs/ios/gettingstarted/
http://codewithchris.com/submit-your-app-to-the-app-store/
Install sigh
‘Sigh’ allows us to sign .app’s with a provisioning file via the terminal.
# https://github.com/KrauseFx/sigh
sudo gem install sigh
Build PROD IPA
npm run buildAgain, follow the prompts.
You can find more information here.
Conclusion
By now you should have a running application of your WordPress website. If you like this project, you can contribute (there are many great features coming), follow the blog or even chat with us!
Also if your application is available on stores, feel free to share it with us, we will promote it in our “Built with WPHC” section!
If WPHC isn’t exactly what you’re looking for, here’s a list of my favorite paid services: