How to Create a Reddit Clone Using React and Firebase
React is a fantastic front-end library for building user interfaces. When picking a back end to use alongside it, you can’t go far wrong with Firebase, a Backend-as-a-Service (Baas) that makes it easy to add data persistence (and much more besides) to your React app.
In this tutorial, we’ll be using Firebase along with Create React App to build an application that will function similarly to Reddit. It will allow the user to submit a new post that can then be voted on. I’ll also demonstrate how to deploy our Reddit clone to Vercel.
Once you’ve finished reading, you’ll understand how to set up Firebase, how to connect it to your React app and how to deploy the result.

Why Firebase?
One of Firebase’s strengths is that it makes it very easy for us to show real-time data to the user. Once a user votes on a link, the feedback will be instantaneous. Firebase’s Realtime Database will help us in developing this feature. Also, it will help us to understand how to bootstrap a React application with Firebase.
Why React?
React is particularly known for creating user interfaces using a component architecture. Each component can contain internal state or be passed data as props. State and props are the two most important concepts in React. These two things help us determine the state of our application at any point in time. If you’re not familiar with these terms, please head over to the React docs first.
Note: you can also use a state container like Redux or MobX, but for the sake of simplicity, we won’t be using one for this tutorial.
Here’s a live demo of what we’ll be building. The code for this application is available on GitHub.
Setting up the Project
To follow along, you’ll need to have Node and npm installed on your machine. If you haven’t, head to the Node.js download page and grab the latest version for your system (npm comes bundled with Node). Alternatively, you can consult our tutorial on installing Node using a version manager.
Let’s walk through the steps to set up our project structure and any necessary dependencies.
Bootstrapping a React App
We can create a new React application with the help of Create React App using the following command:
npx create-react-app reddit-clone
This will scaffold a new create-react-app project inside the reddit-clone directory. Our directory structure should be as follows:
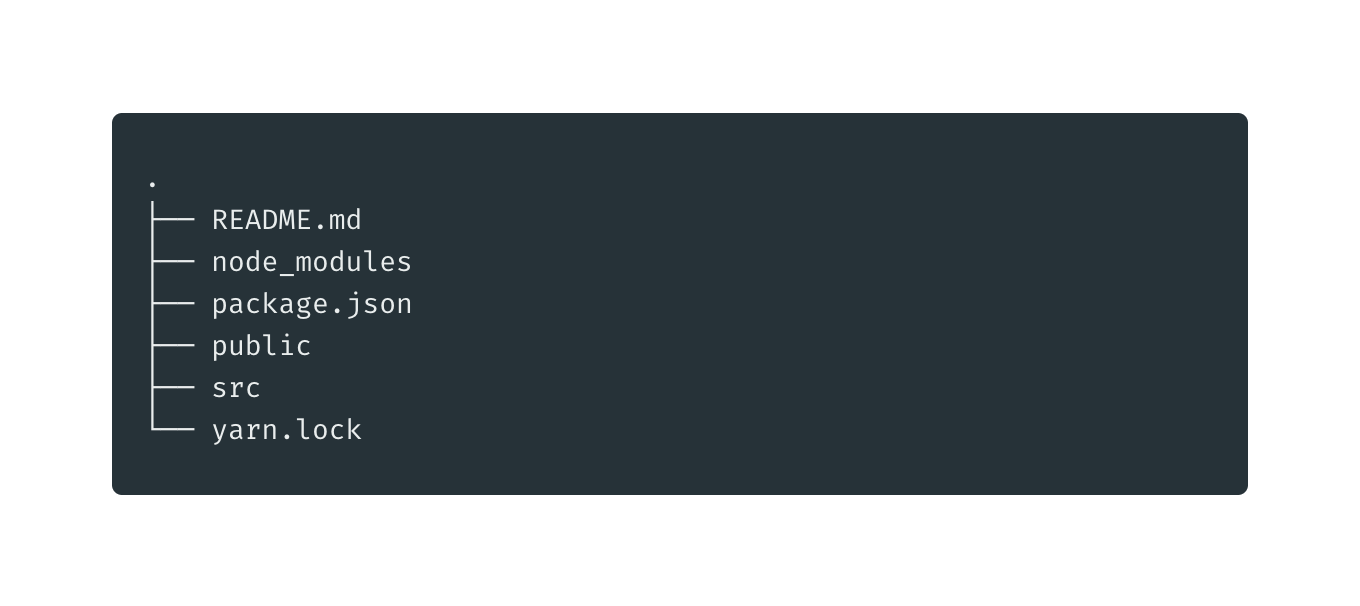
Once the bootstrapping is done, we can enter the reddit-clone directory and fire up the development server:
cd reddit-clone && npm start
At this point, we can visit http://localhost:3000/ and see our application up and running.

Structuring the App
It’s always a good practice to remove all the files that we don’t need after bootstrapping any application. There are a few files generated by Create React App that we won’t need, so we’ll remove them.
We can remove the following files:
src/App.csssrc/App.test.jssrc/index.csssrc/logo.svgsrc/serviceWorker.jssrc/setupTests.js
We can also remove the following dependencies from our package.json file:
@testing-library/jest-dom@testing-library/react@testing-library/user-event
We can also remove the test script from our package.json file. This is because we won’t be writing any tests for our application. If testing a React app is something you’d like to look into, please consult our tutorial, “How to Test React Components Using Jest”.
Our src/index.js file should contain the following:
import React from "react";
import ReactDOM from "react-dom";
import App from "./app";

ReactDOM.render(
  <React.StrictMode>
    <App />
  </React.StrictMode>,
  document.getElementById("root")
);
We’ll rename our src/App.js to src/app.js. Alter it to contain the following:
import React from "react";

function App() {
  return <div>Hello world!</div>;
}

export default App;
Now, we can restart our development server using the following command from our root directory:
npm start
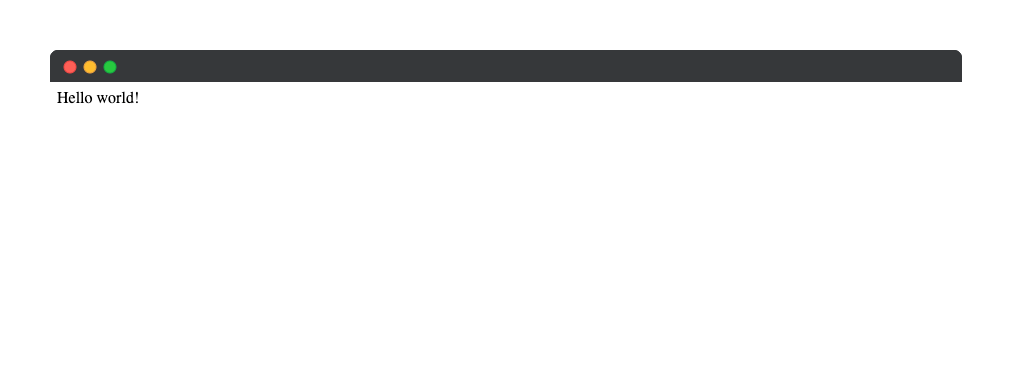
Our development server should be up and running on http://localhost:3000/ and it should look like the following:
Creating a New Firebase Project
In this section, we’ll be installing and integrating Firebase with our application.
If you don’t have a Firebase account, you can create one free account now by visiting their website. After you’re done creating a new account, log in to your account and go to the console page and click on Create a project.
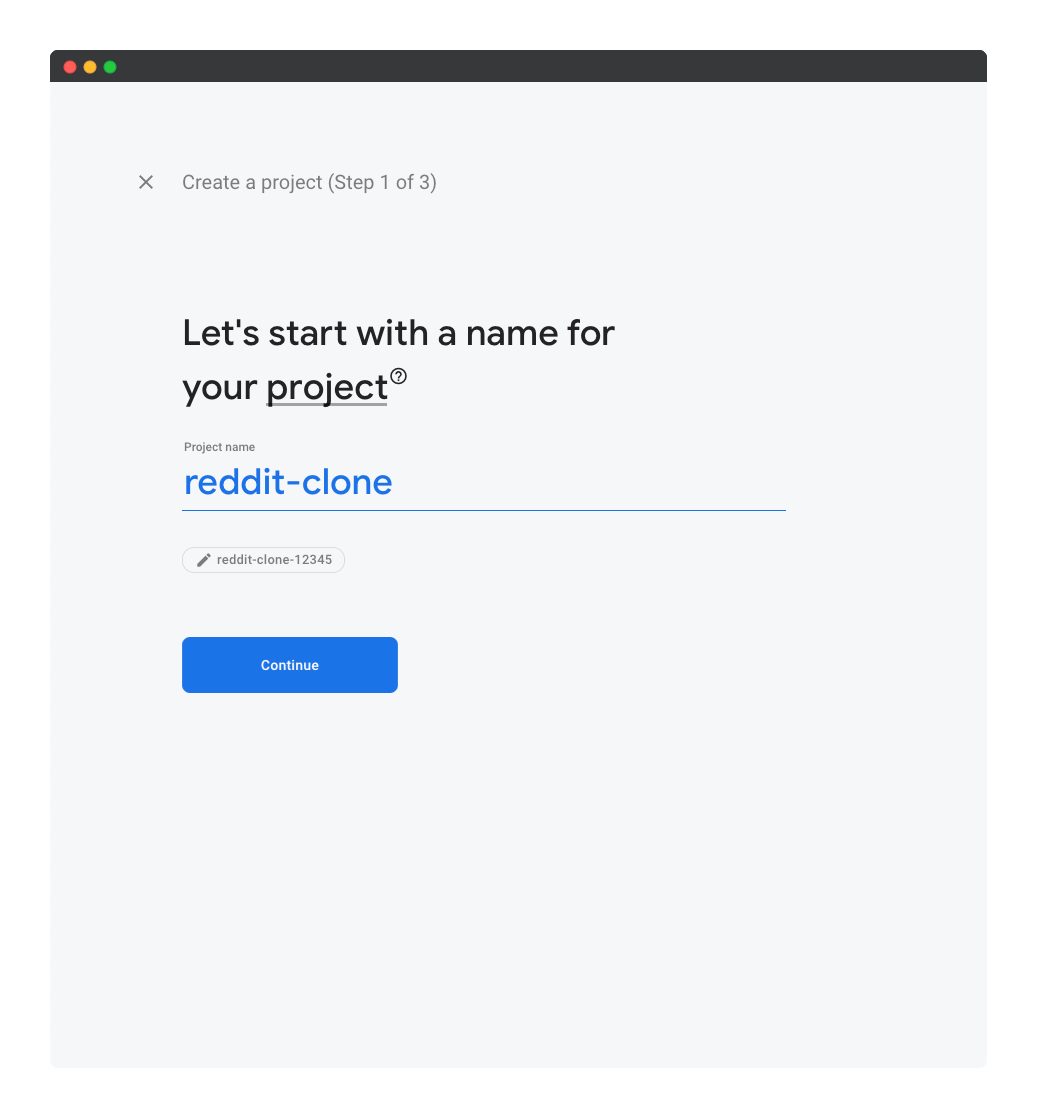
Enter the name of your project (I’ll call mine reddit-clone), accept the terms and conditions, and click on the Continue button.
In the next step, you should choose whether to enable Google Analytics for the project, then click on the Continue button.
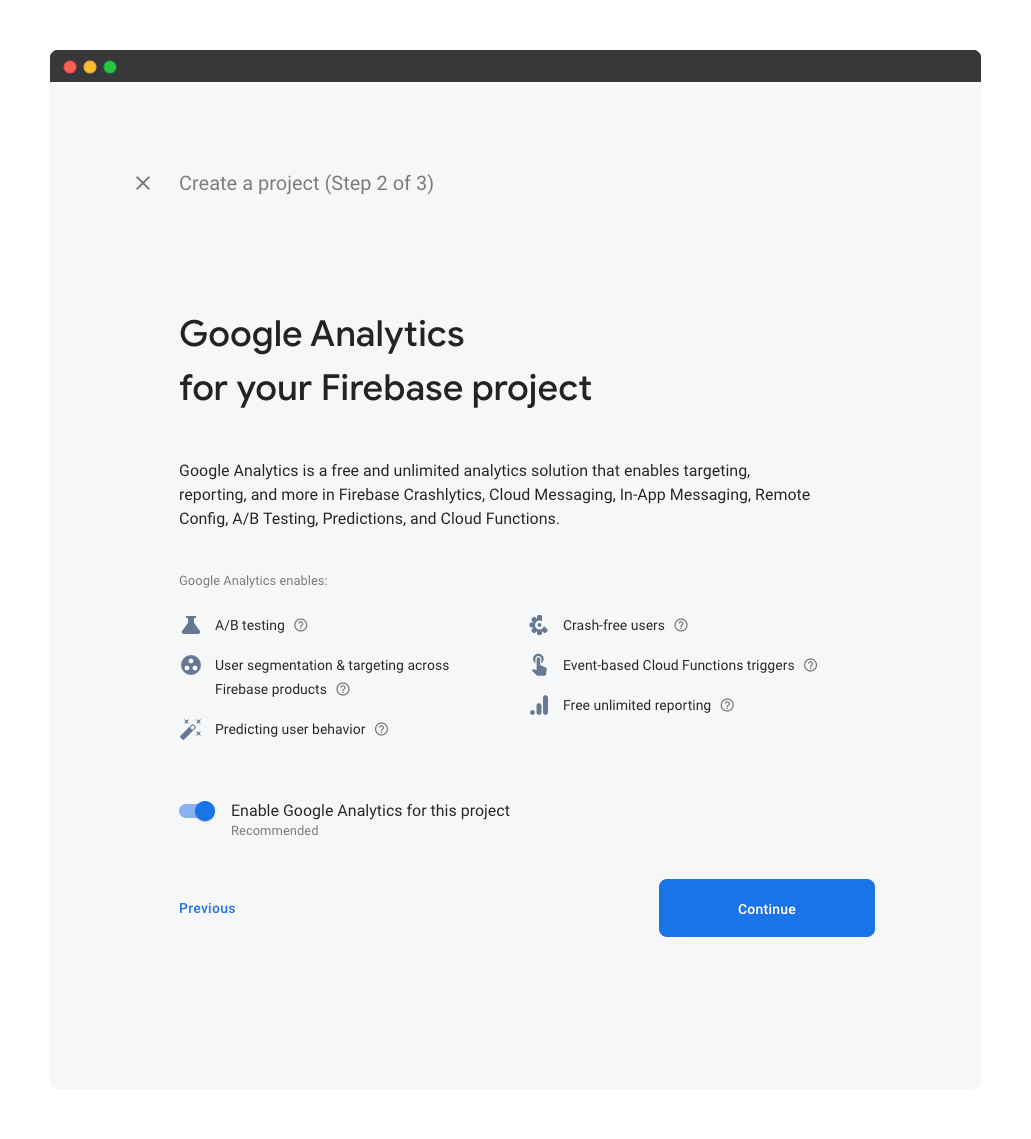
In step three, we should select a Google Analytics account and then click on the Create project button:
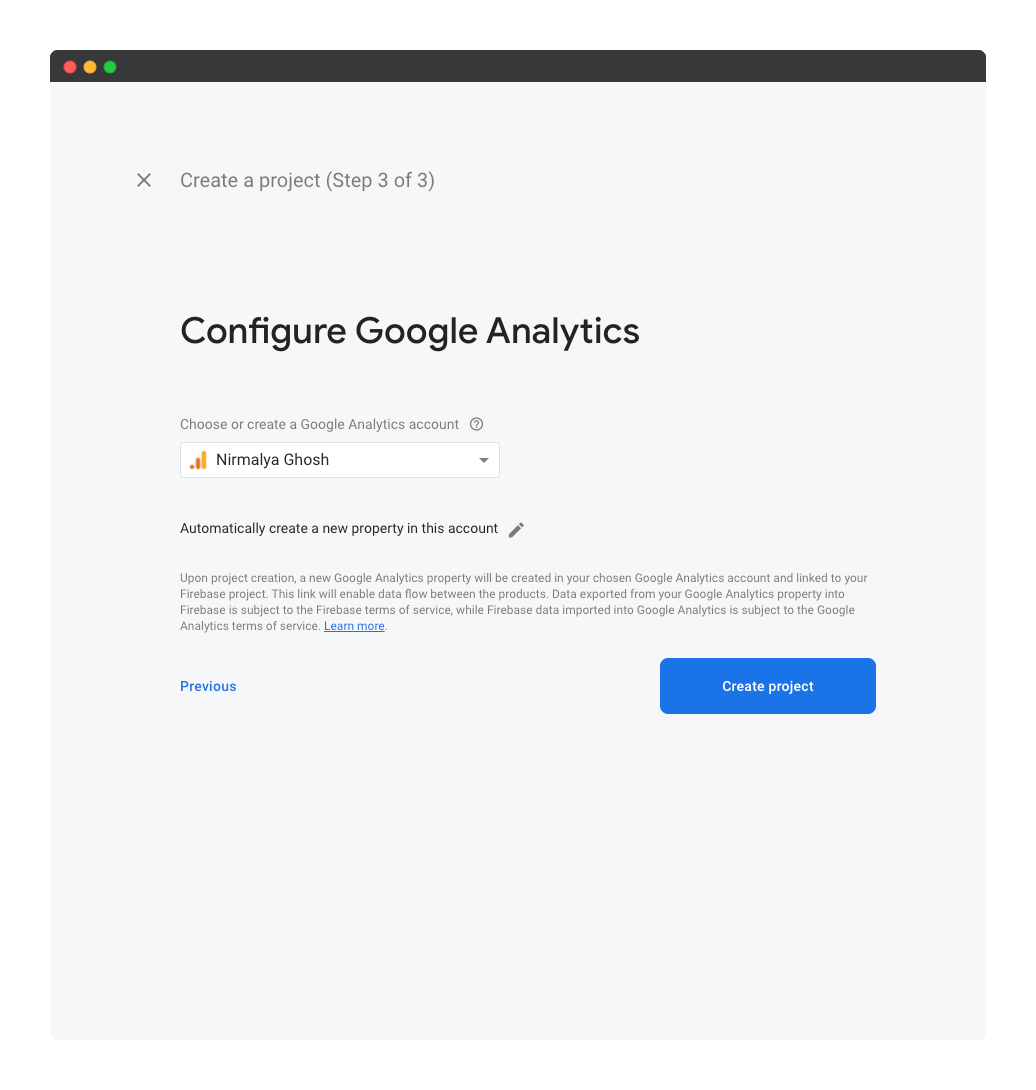
After a short while, you’ll see a notice that your new project is ready. Click Continue to exit the wizard.
Creating a New App in the Firebase Project
In this section, we’ll be creating a new Firebase app from the Firebase console. We can create a Web app by selecting the web option.

Next, we’ll need to enter the name of the project and click on the Register app button, leaving the Also set up Firebase Hosting checkbox unchecked.
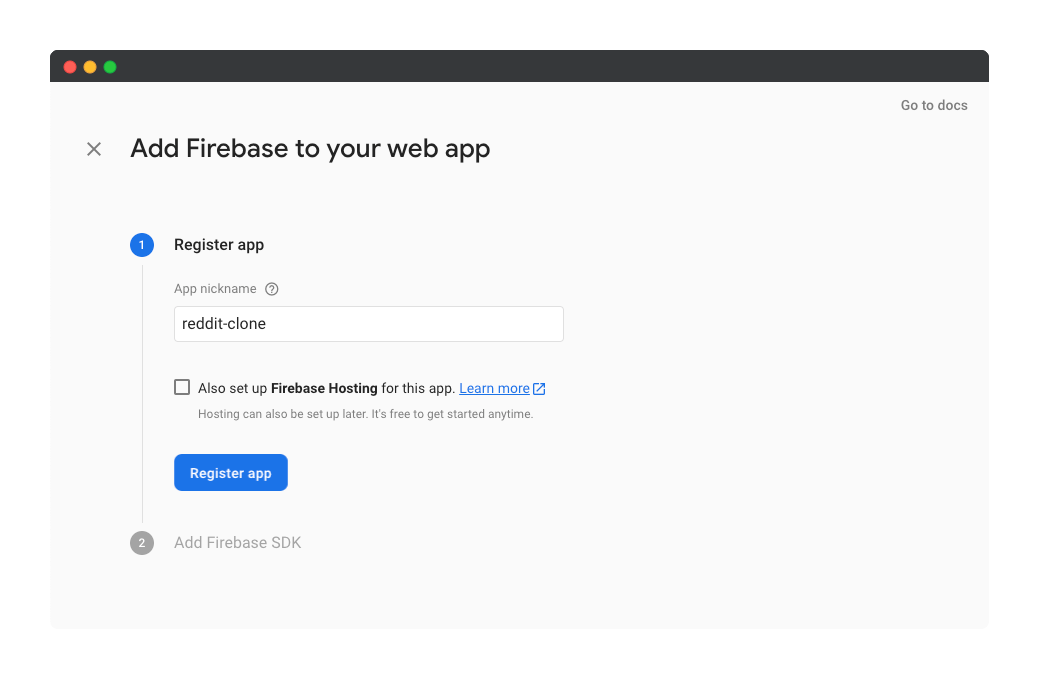
Now you’ll see all the credentials for our new Firebase web app.
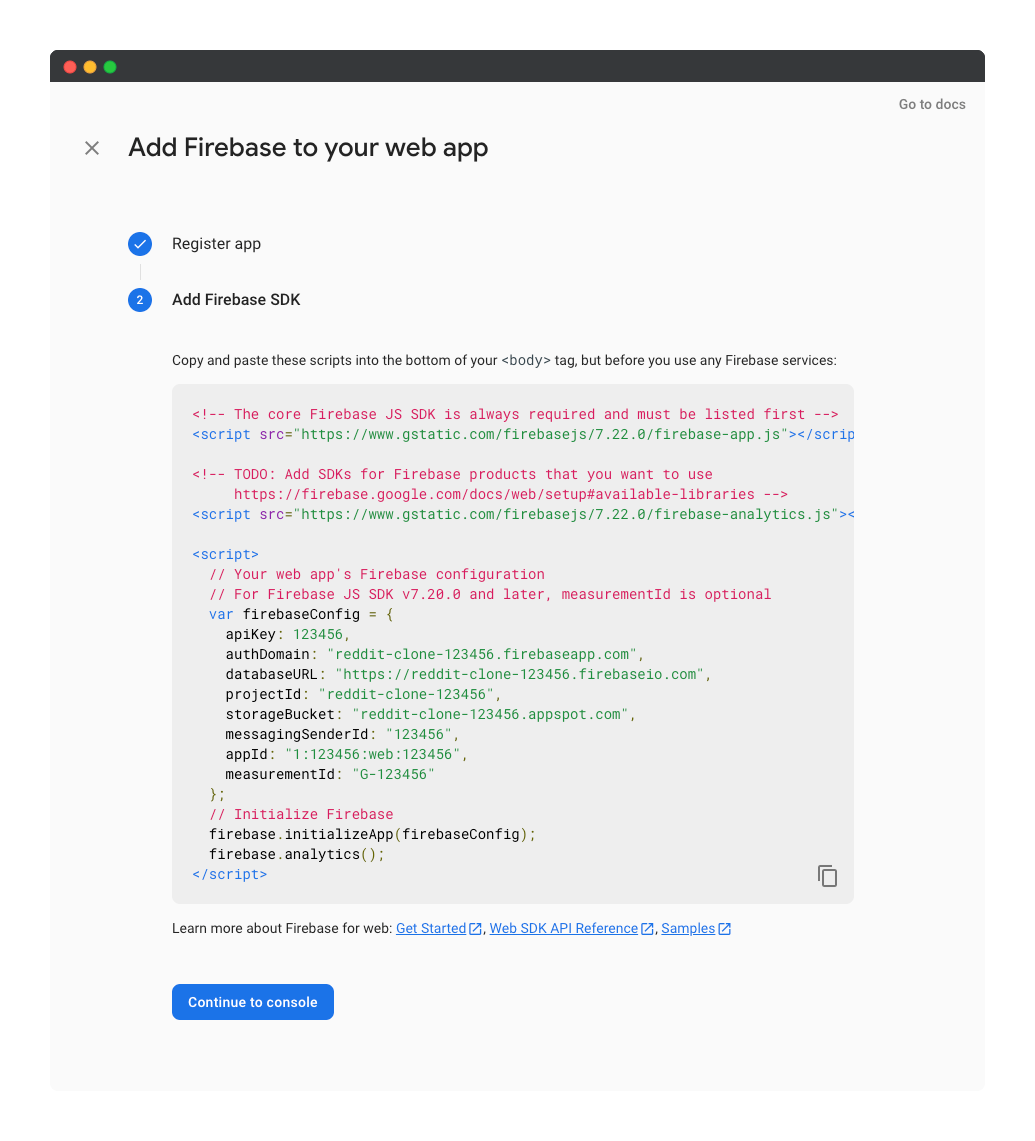
Make a note of these credentials and click Continue to console.
We can now add our app’s credentials to an environment file:
// .env

REACT_APP_FIREBASE_API_KEY="123456"
REACT_APP_FIREBASE_AUTH_DOMAIN="reddit-clone-123456.firebaseapp.com"
REACT_APP_FIREBASE_PROJECT_ID="reddit-clone-123456"
REACT_APP_FIREBASE_STORAGE_BUCKET="reddit-clone-123456.appspot.com"
REACT_APP_FIREBASE_MESSAGING_SENDER_ID="123456"
REACT_APP_FIREBASE_APP_ID="1:123456:web:123456"
REACT_APP_FIREBASE_MEASUREMENT_ID="G-123456"
Note: it’s always a good idea to store all credentials in an environment file and add that file to .gitignore so that the credentials are never leaked into the source code.
Next, we can create a new file src/lib/firebase.js where we’ll store all our Firebase credentials:
import firebase from "firebase";

const firebaseConfig = {
  apiKey: process.env.REACT_APP_FIREBASE_API_KEY,
  authDomain: process.env.REACT_APP_FIREBASE_AUTH_DOMAIN,
  projectId: process.env.REACT_APP_FIREBASE_PROJECT_ID,
  storageBucket: process.env.REACT_APP_FIREBASE_STORAGE_BUCKET,
  messagingSenderId: process.env.REACT_APP_FIREBASE_MESSAGING_SENDER_ID,
  appId: process.env.REACT_APP_FIREBASE_APP_ID,
  measurementId: process.env.REACT_APP_FIREBASE_MEASUREMENT_ID,
};

const initFirebase = firebase.initializeApp(firebaseConfig);
const db = initFirebase.firestore();

export default db;
Finally, we’ll need to install the firebase package so that we can interact with our database:
npm install firebase
Adding a New Firebase Cloud Firestore
Now we need to add a new Firebase Cloud Firestore — a scalable NoSQL cloud database. This can be done by selecting the Cloud Firestore link and clicking on the Create database button.
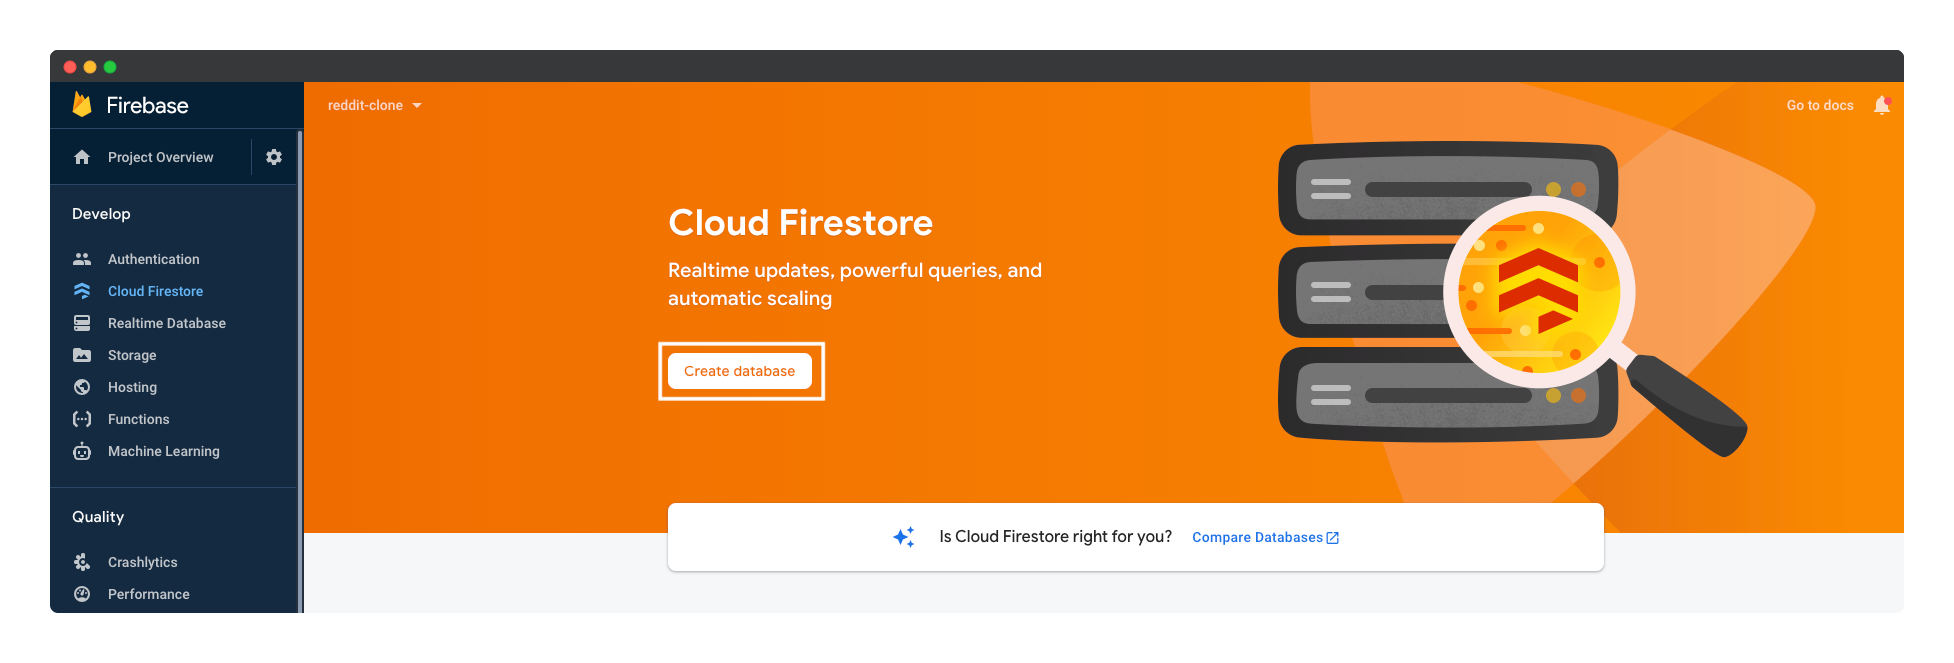
Next, we’ll select the option to start the Firestore in production mode.
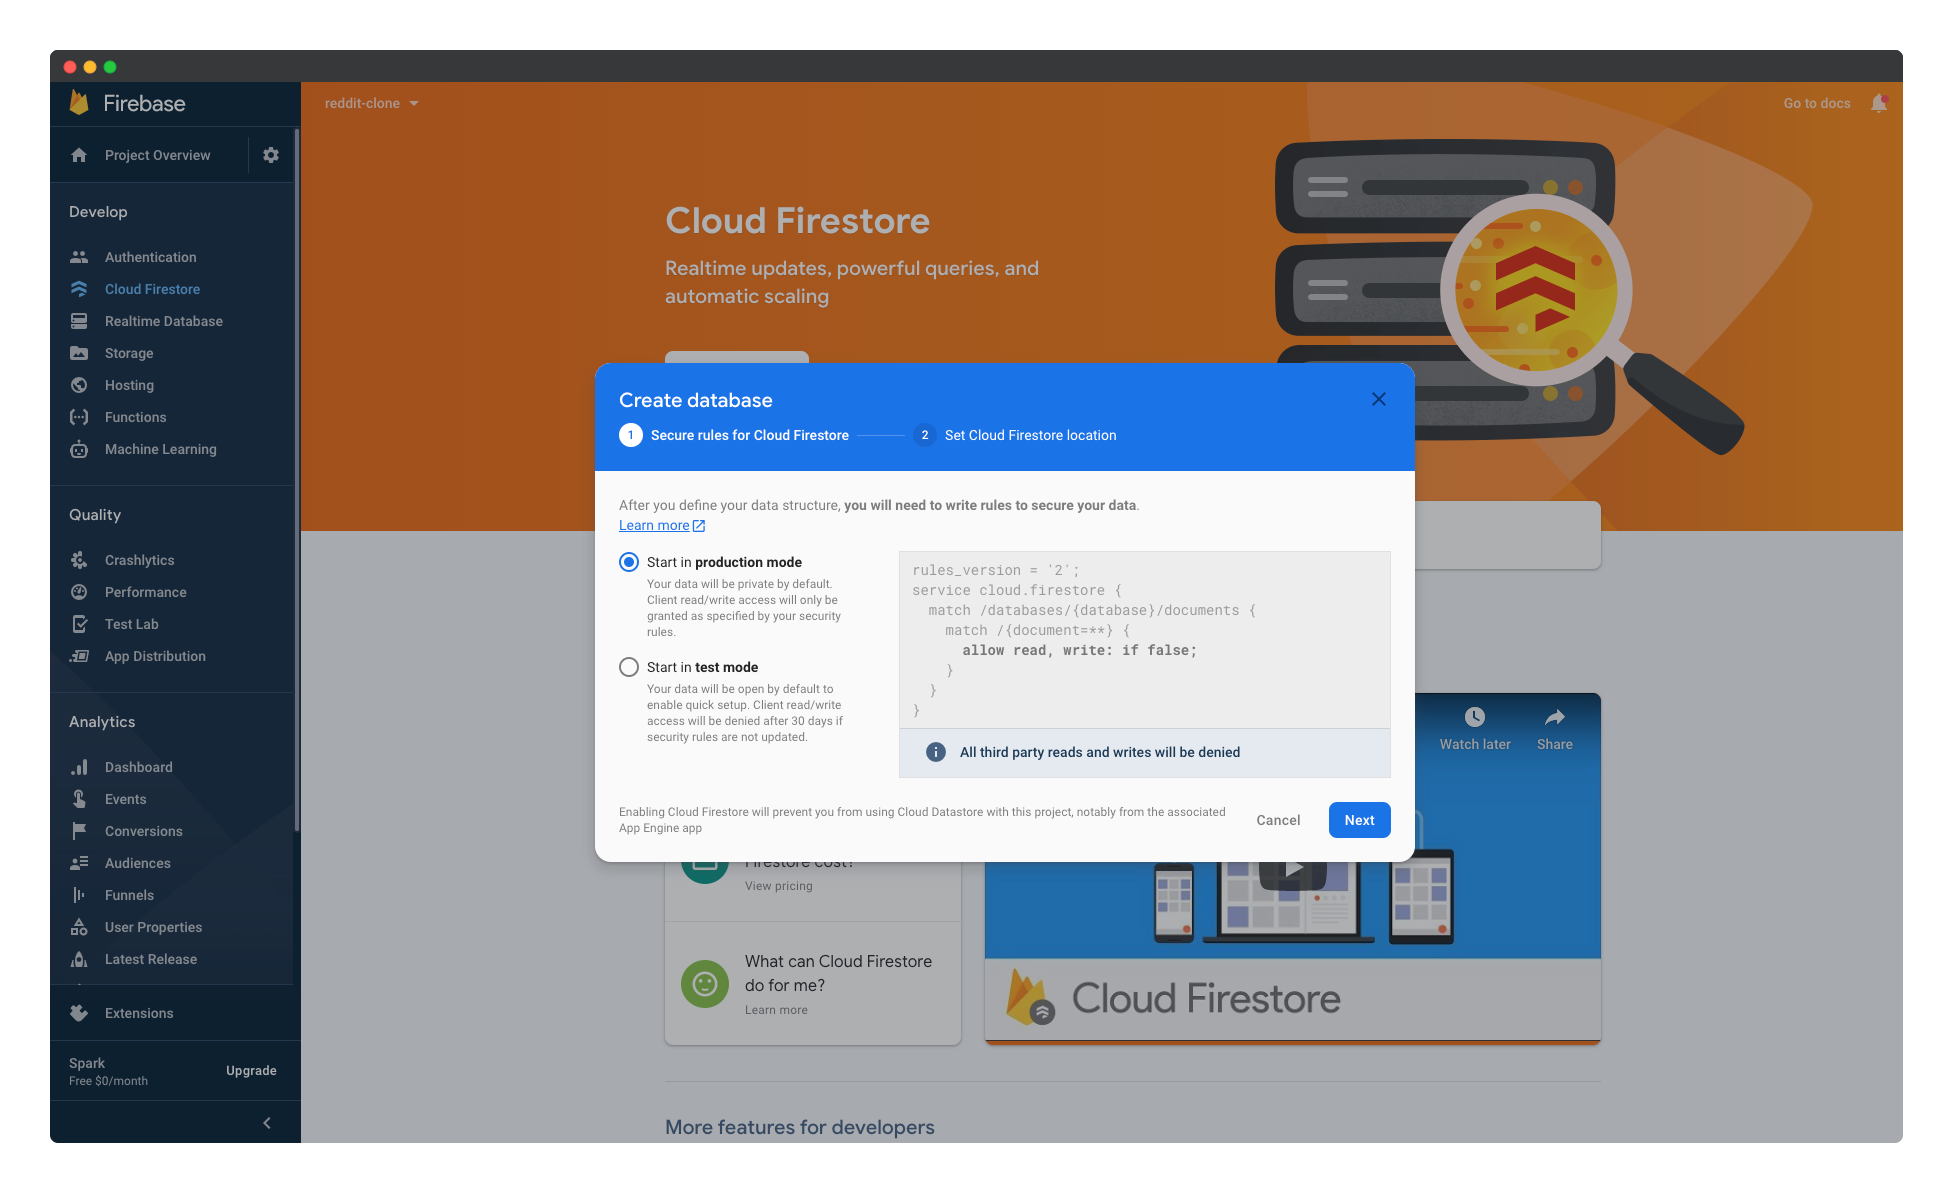
Click Next. On the next screen we’ll need to select the location of our Cloud Firestore and click on the Enable button.
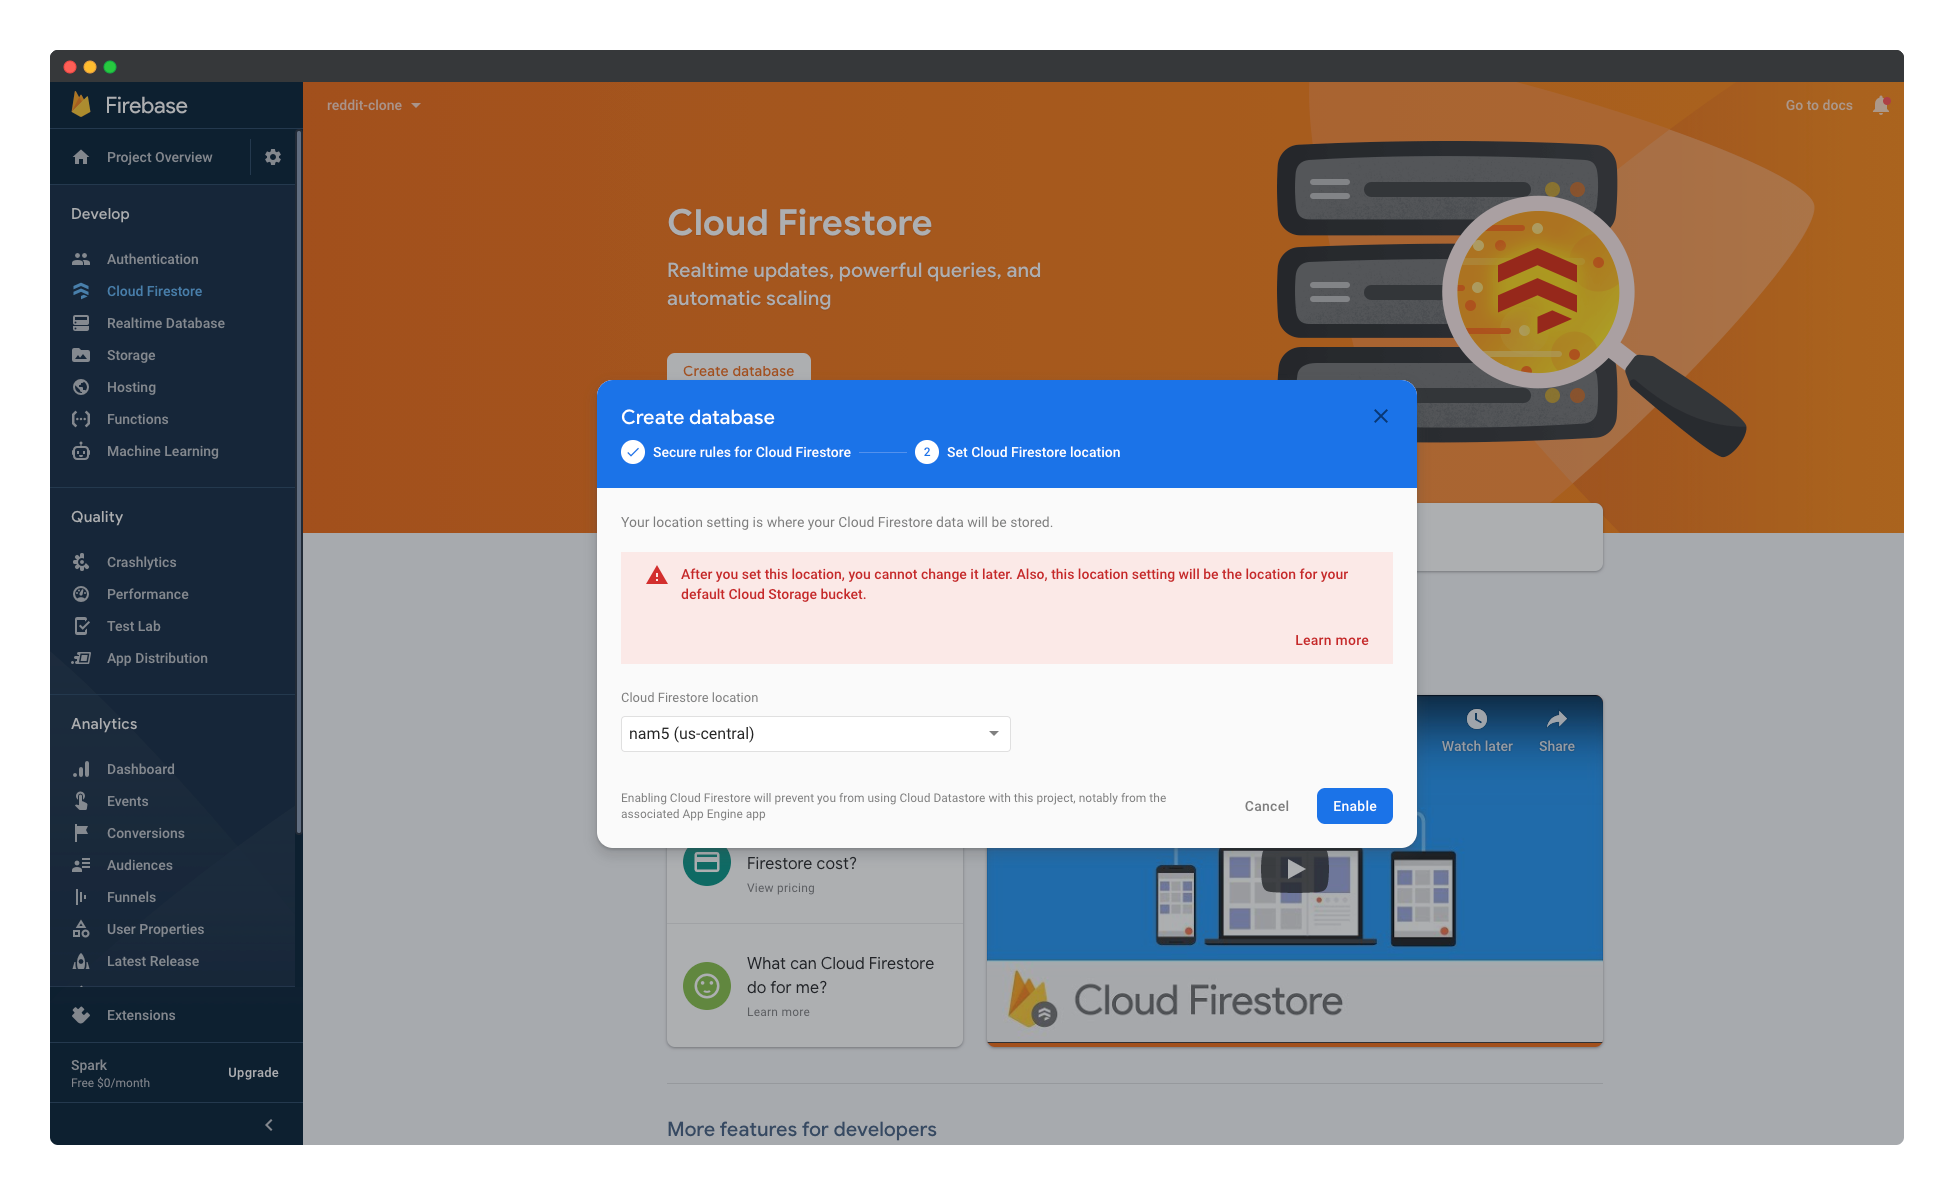
You’ll see a “Provisioning Cloud Firestore” message, followed by Setting up security rules, and after a short wait you’ll be redirected to the dashboard for your new project.
Adding a New Collection to the Firebase Cloud Firestore
Next, we’ll need to add a new collection to the Firebase Cloud Firestore that we just created. We can do that by clicking on the Start collection button.
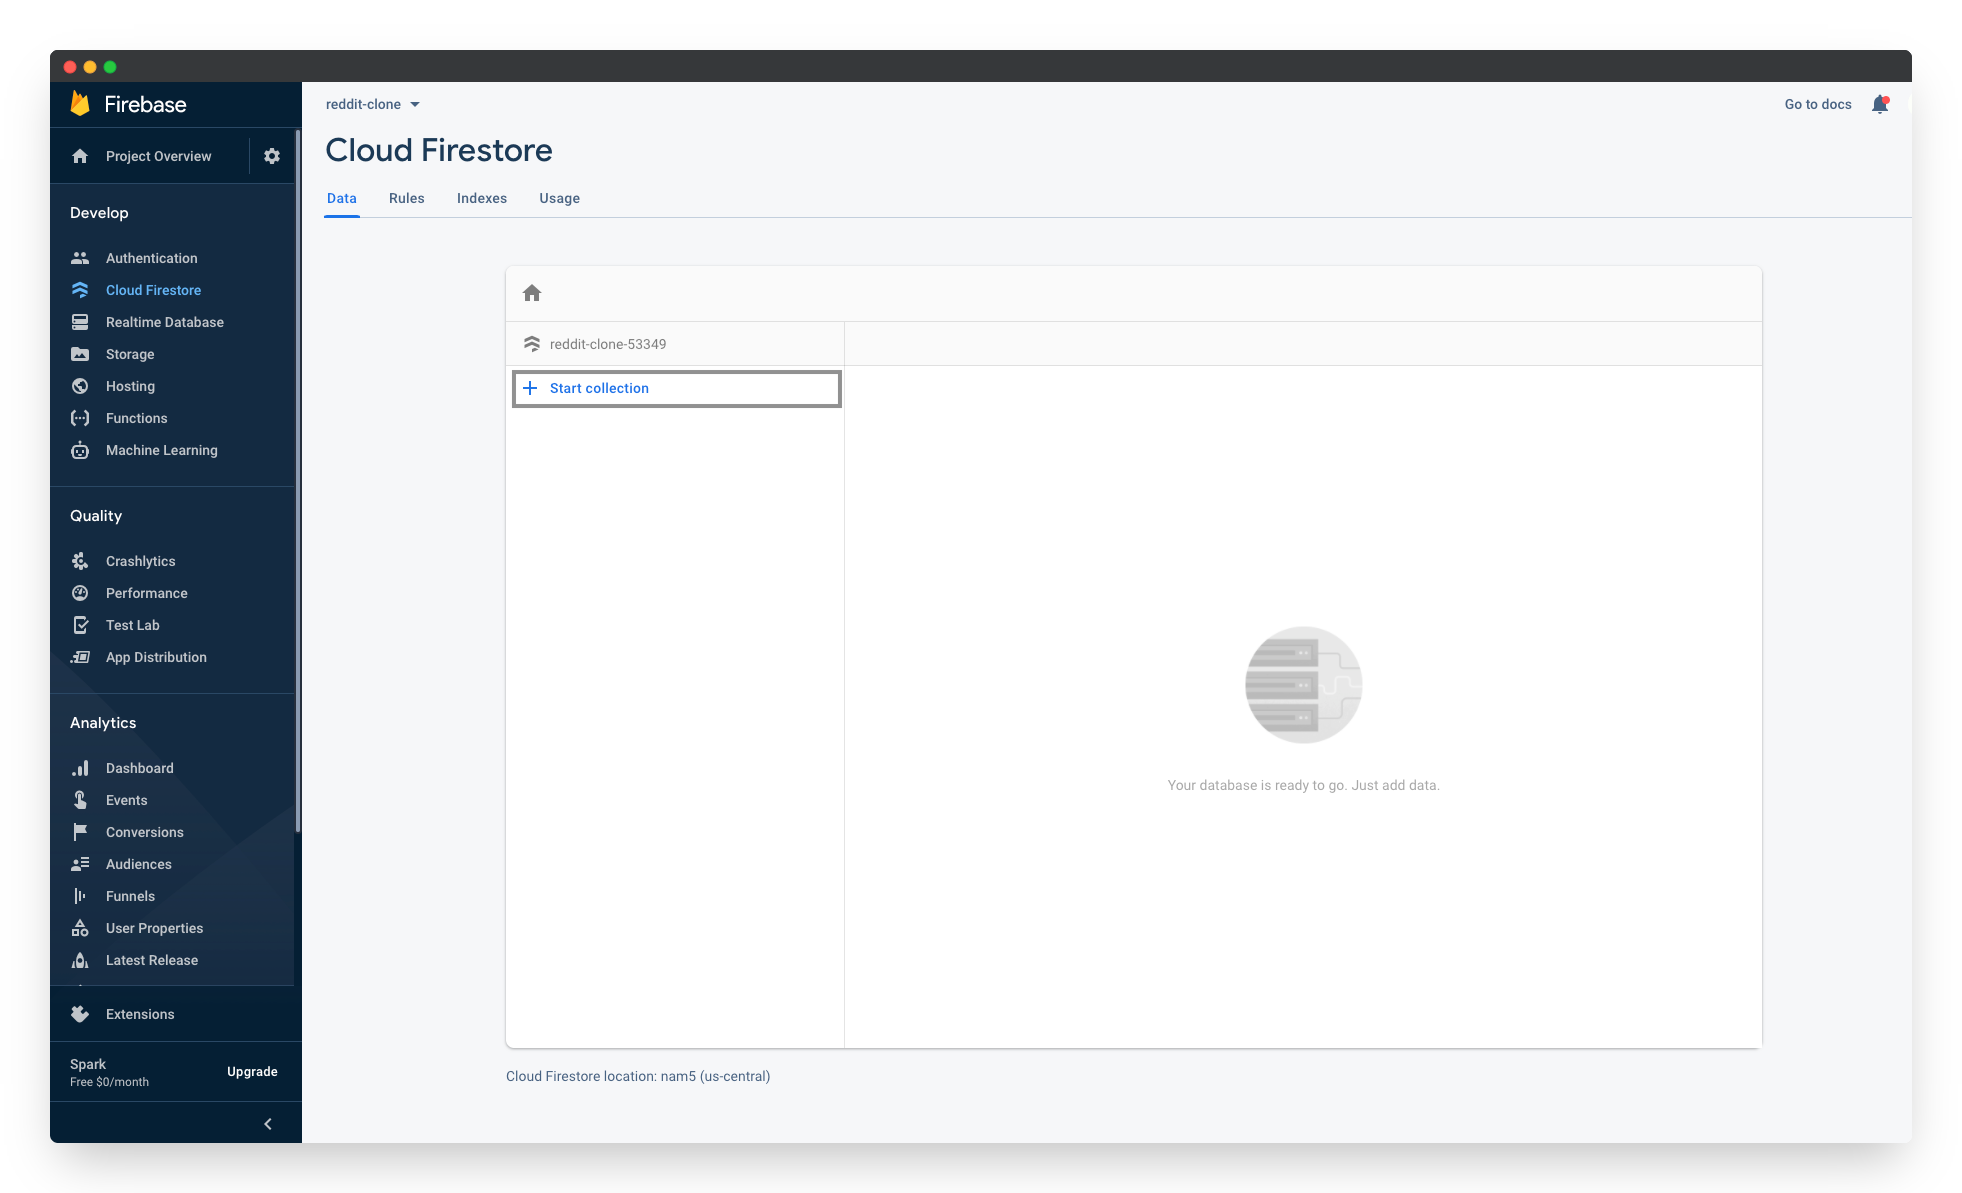
We’ll need to add a name to our Collection ID. We can call it posts, as we’ll be adding and voting on posts.
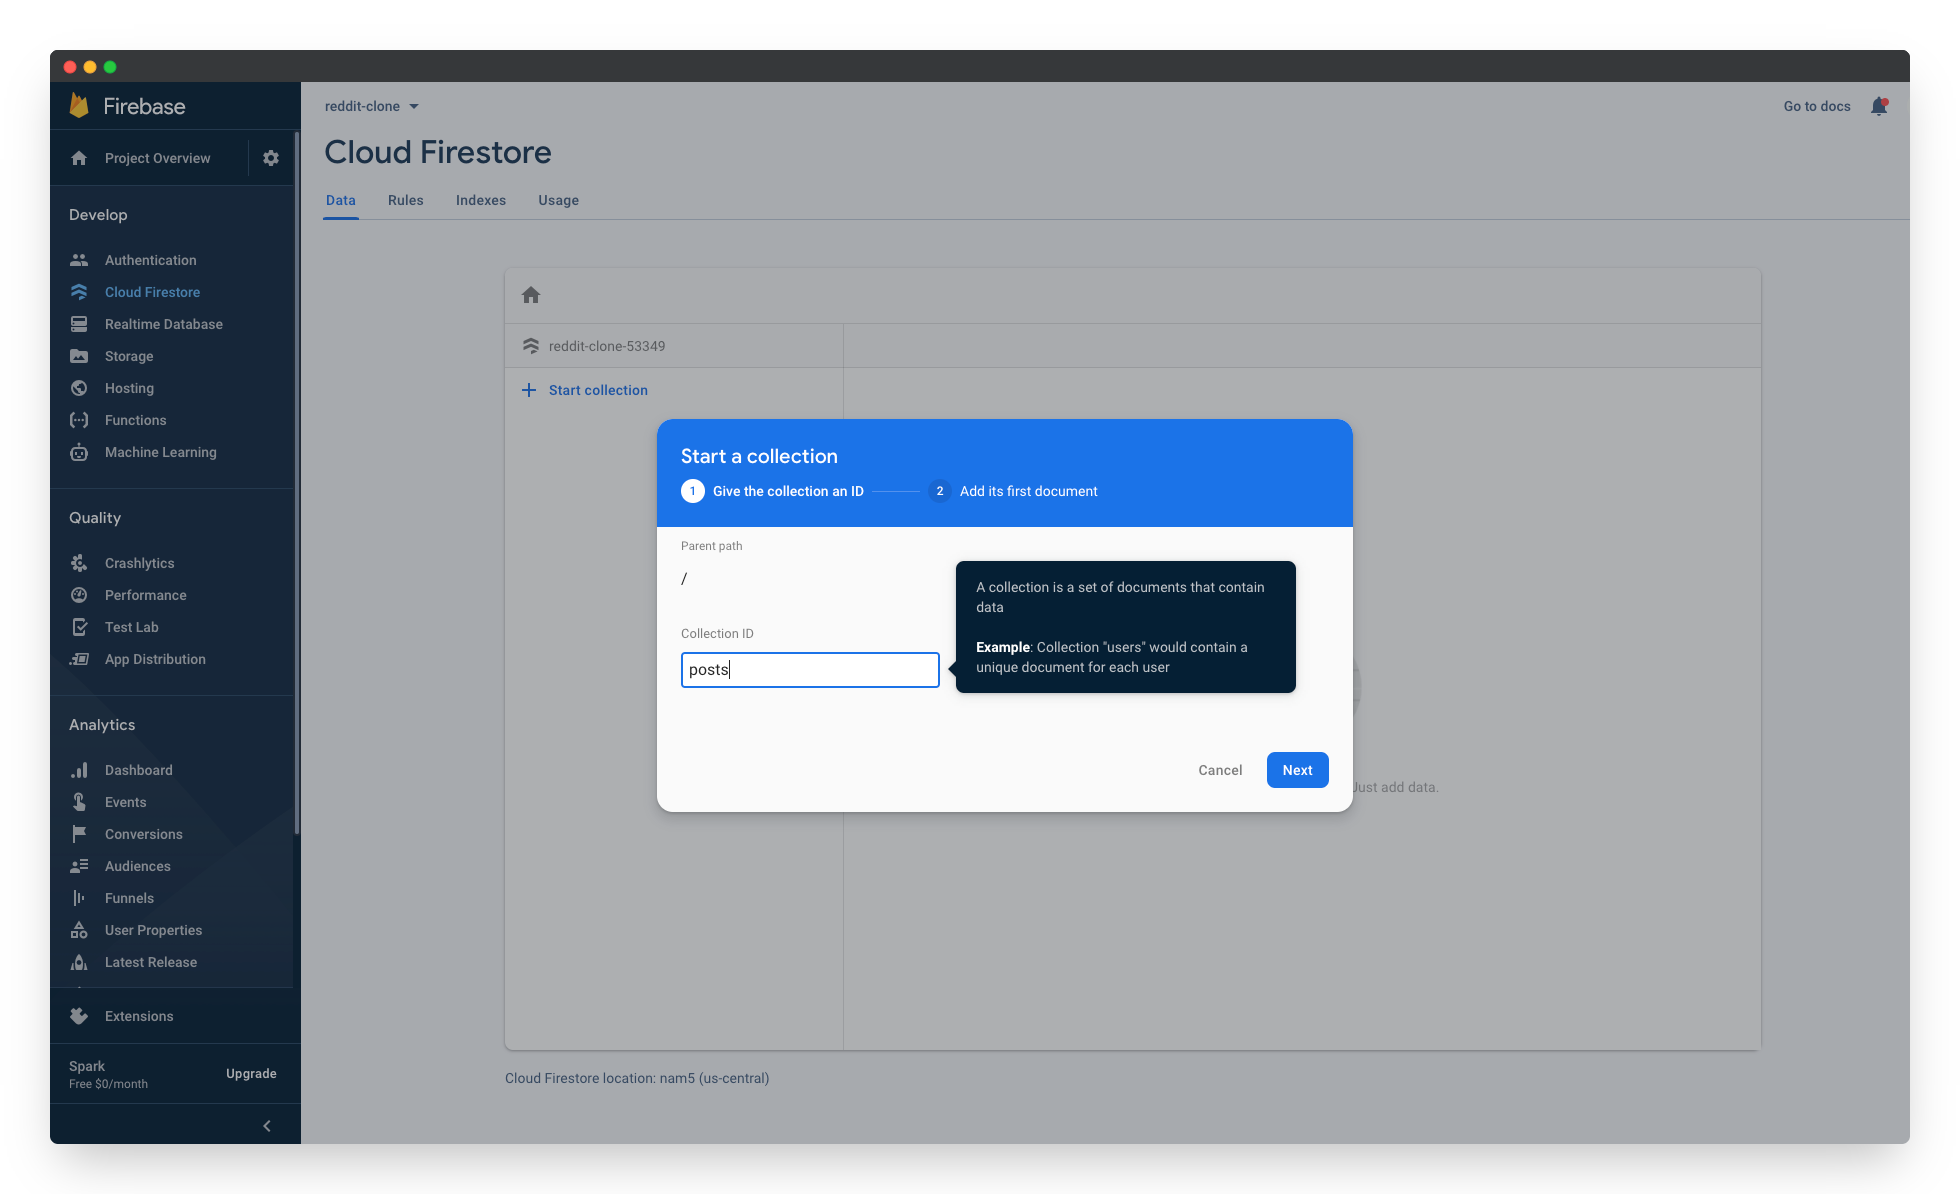
Click Next. It’s now time to add a document to our collection. Each document requires an ID, so click the Auto-ID link in the first field. This should generate a unique ID.
Next, we’ll need to add the following fields:
| Field | Type | Value | Screenshot |
|---|---|---|---|
| createdAt | timestamp | Current time | 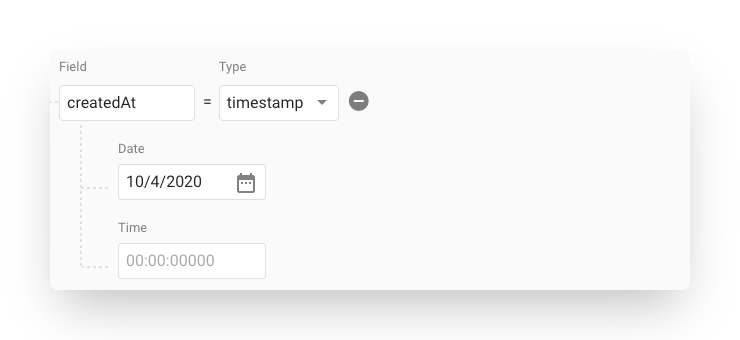 |
| updatedAt | timestamp | Current time | 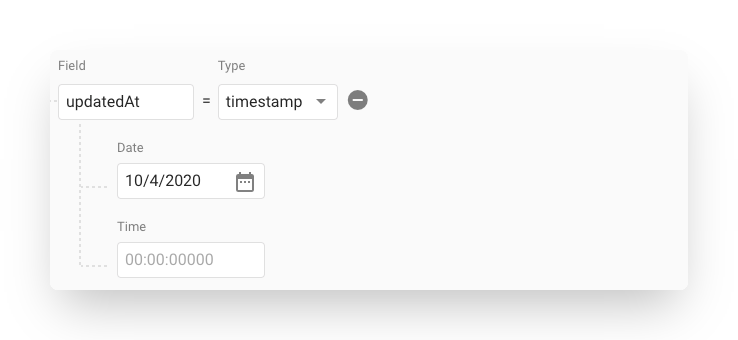 |
| title | string | This is the first post from Firebase |  |
| upVotesCount | number | 0 |  |
| downVotesCount | number | 0 |  |
This is what our the collection will finally look like:
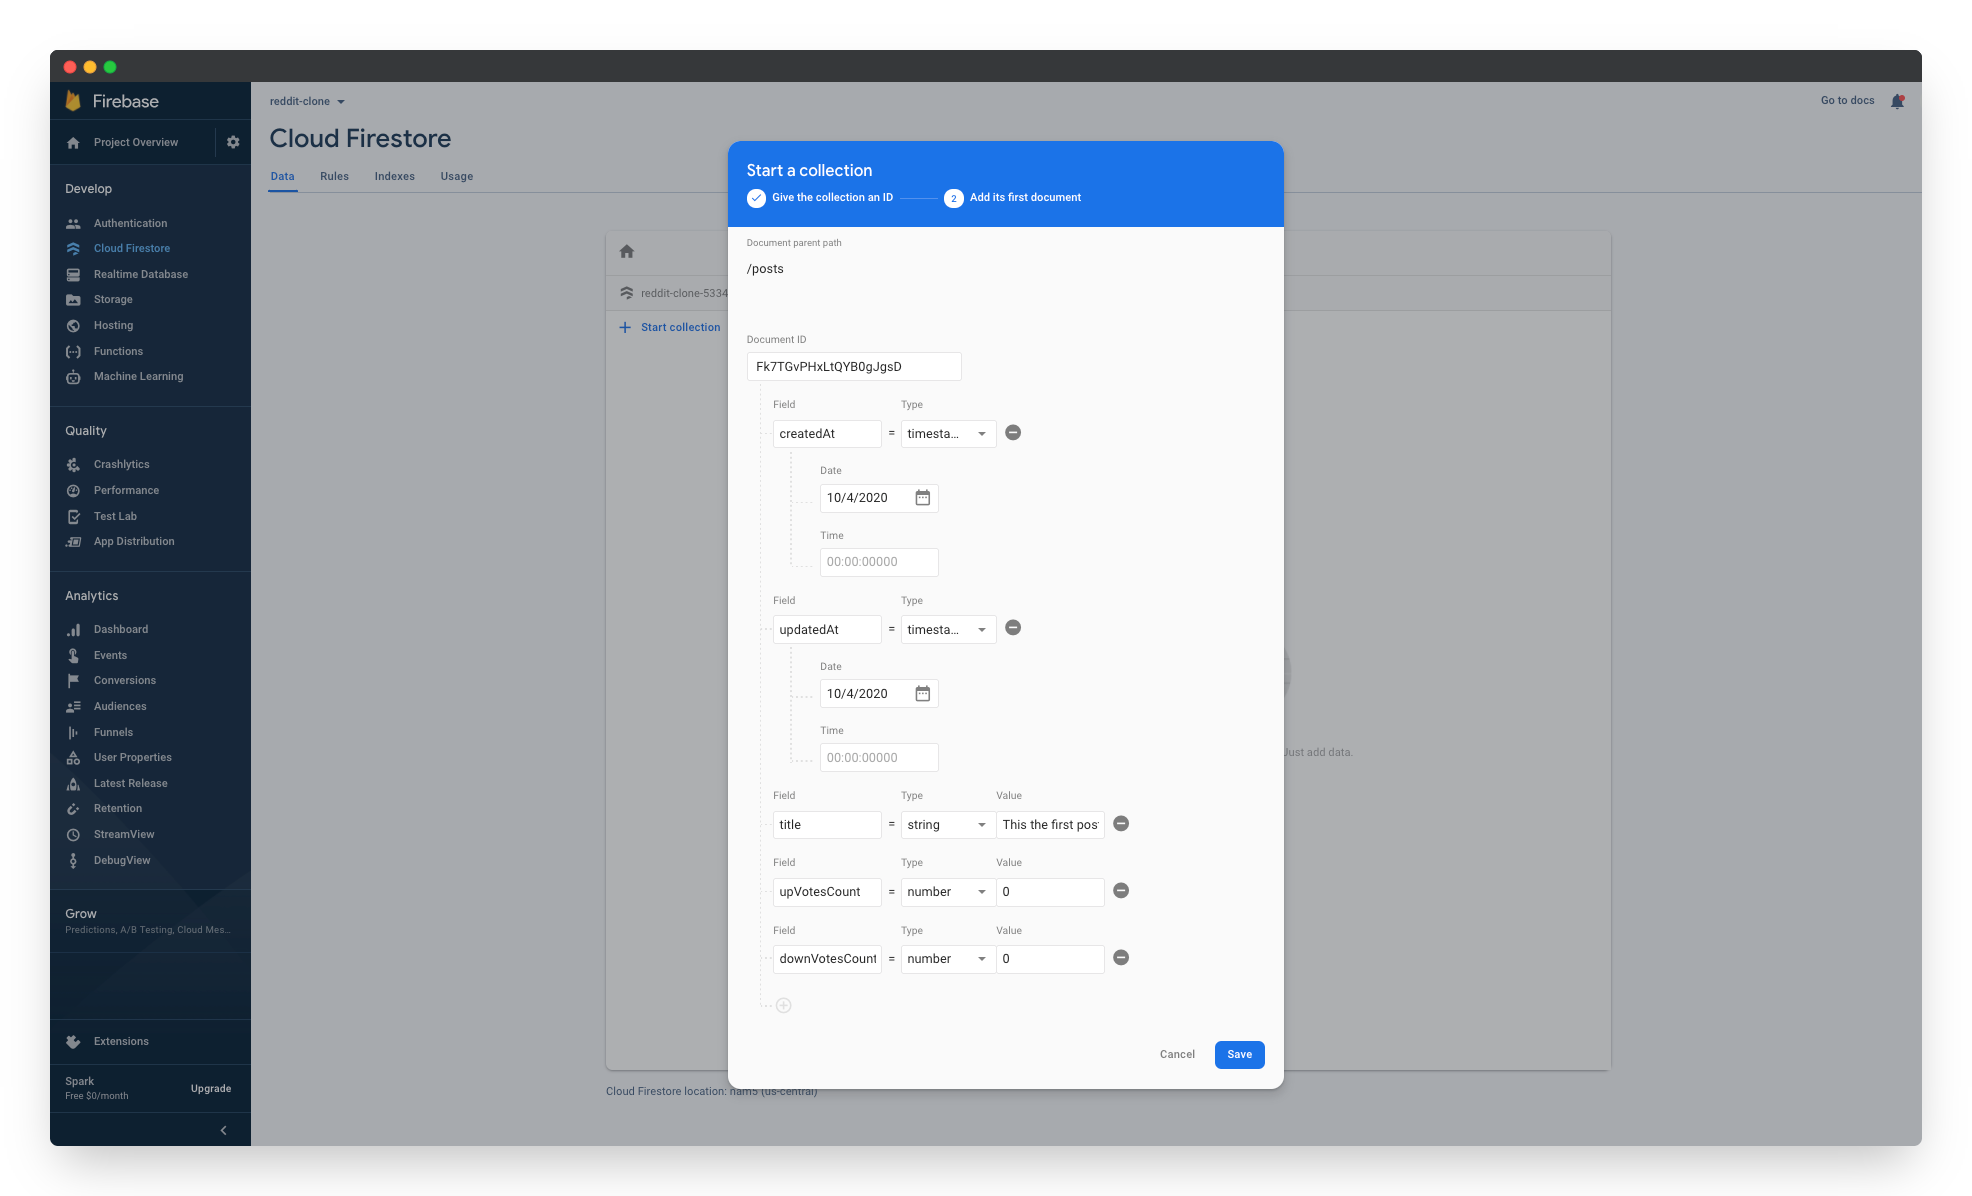
Click on the Save button. The collection will be created and you’ll be redirected to the project’s dashboard.
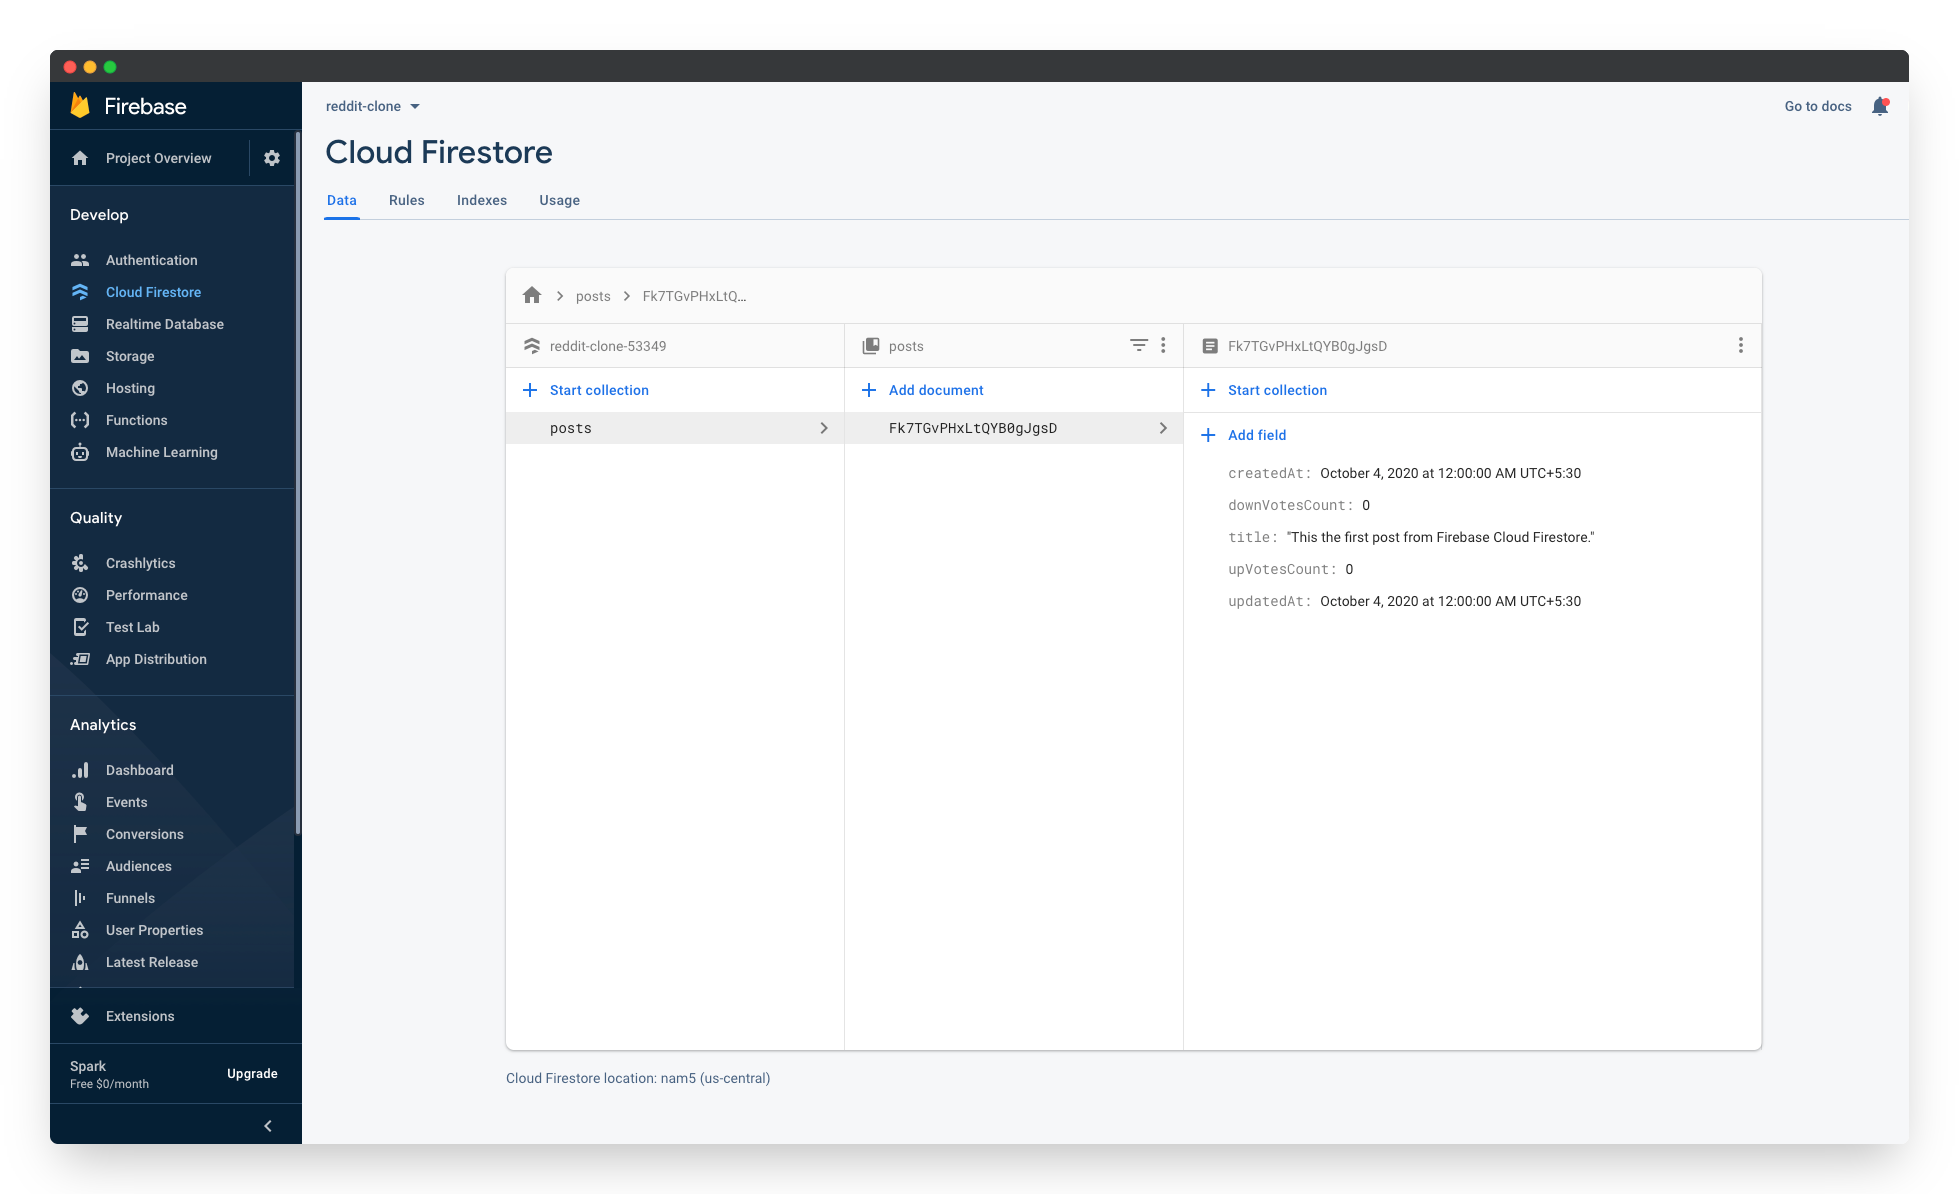
Updating the Rules of the Firebase Cloud Firestore
If we visit the Rules tab, we’ll see the following rules:
rules_version = '2';
service cloud.firestore {
  match /databases/{database}/documents {
    match /{document=**} {
      allow read, write: if false;
    }
  }
}
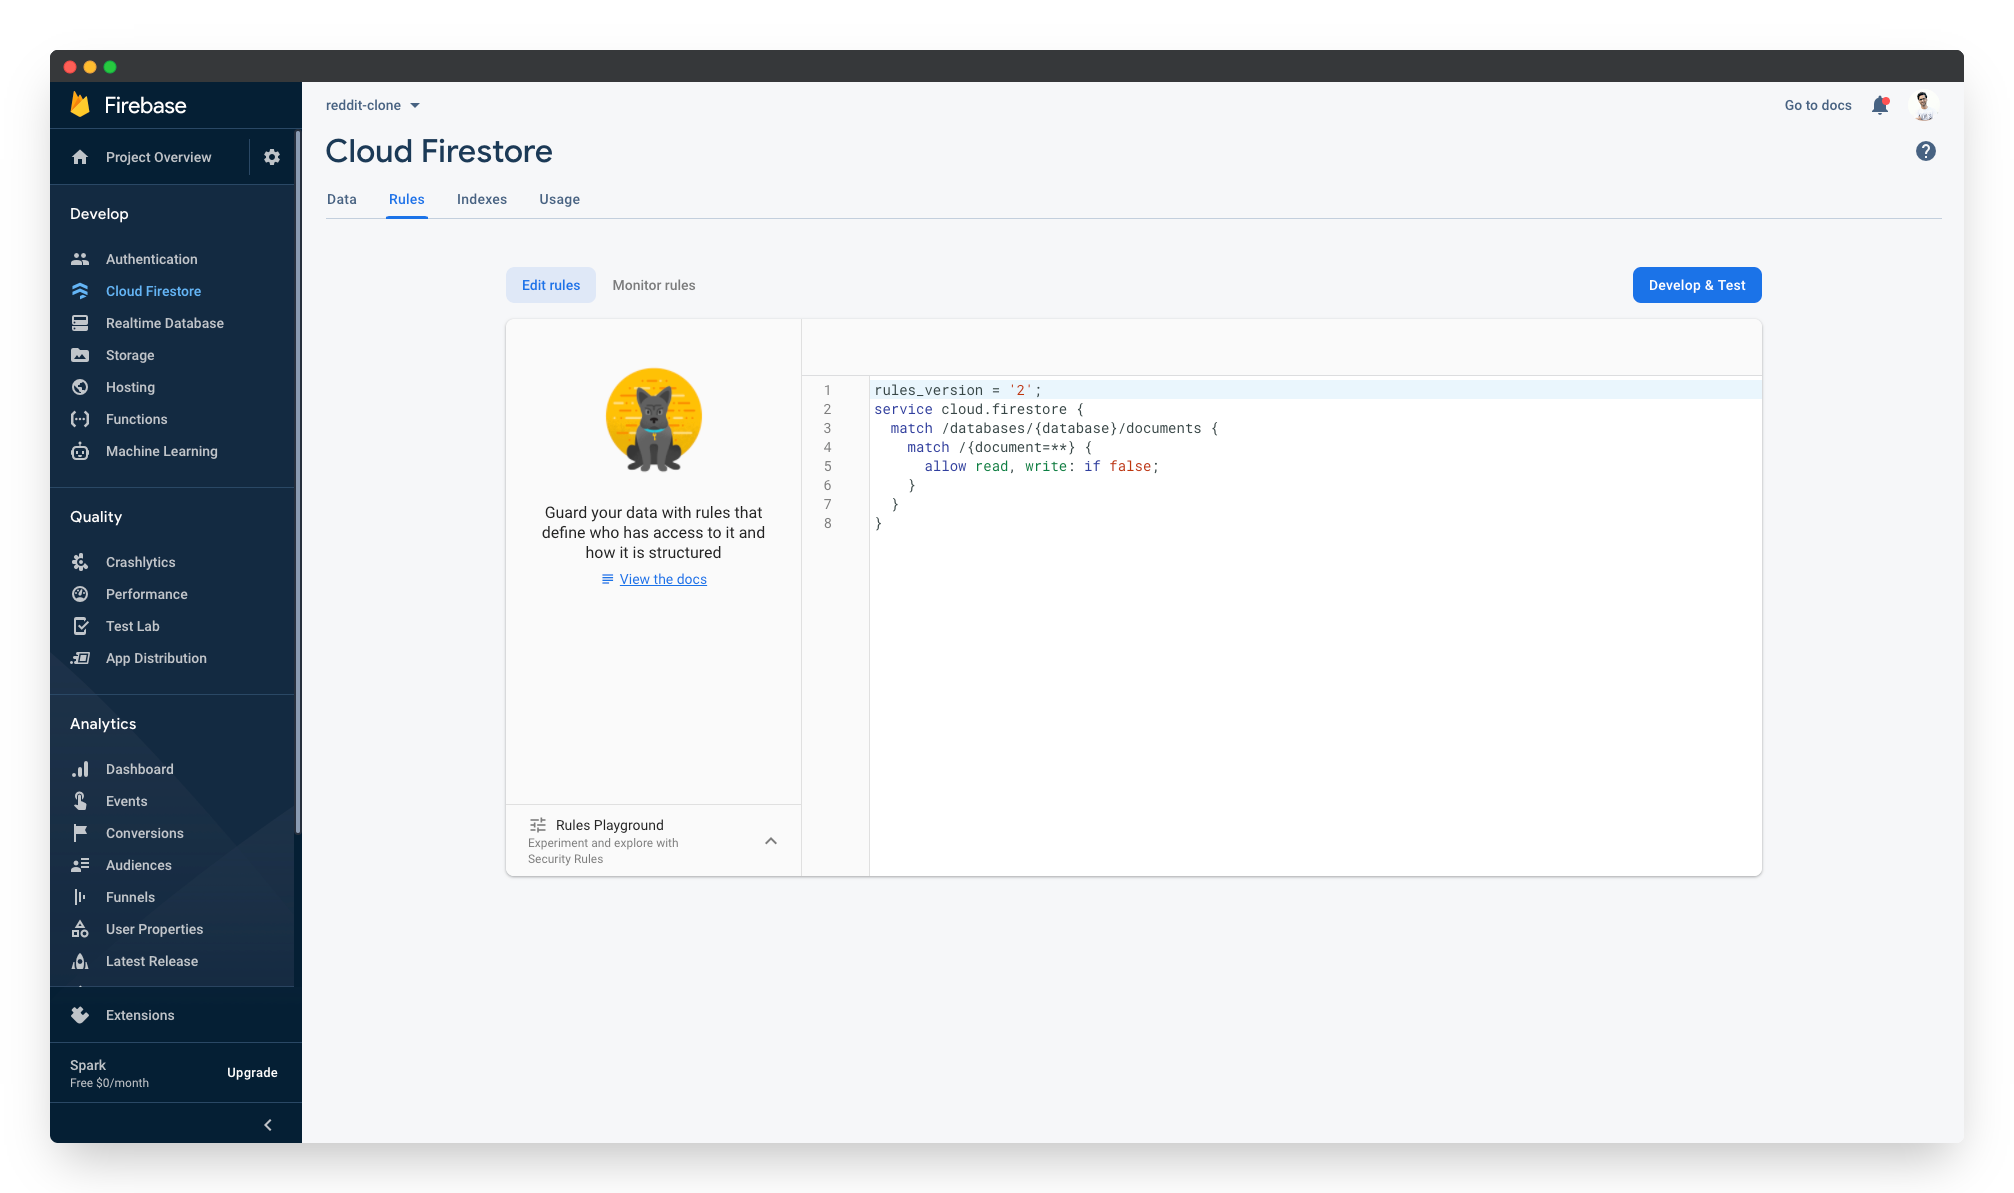
We need to modify this to allow the write operation as well:
rules_version = '2';
service cloud.firestore {
  match /databases/{database}/documents {
    match /{document=**} {
      allow read, write: if true;
    }
  }
}
Finally, click on the Publish button to save our modified rules:
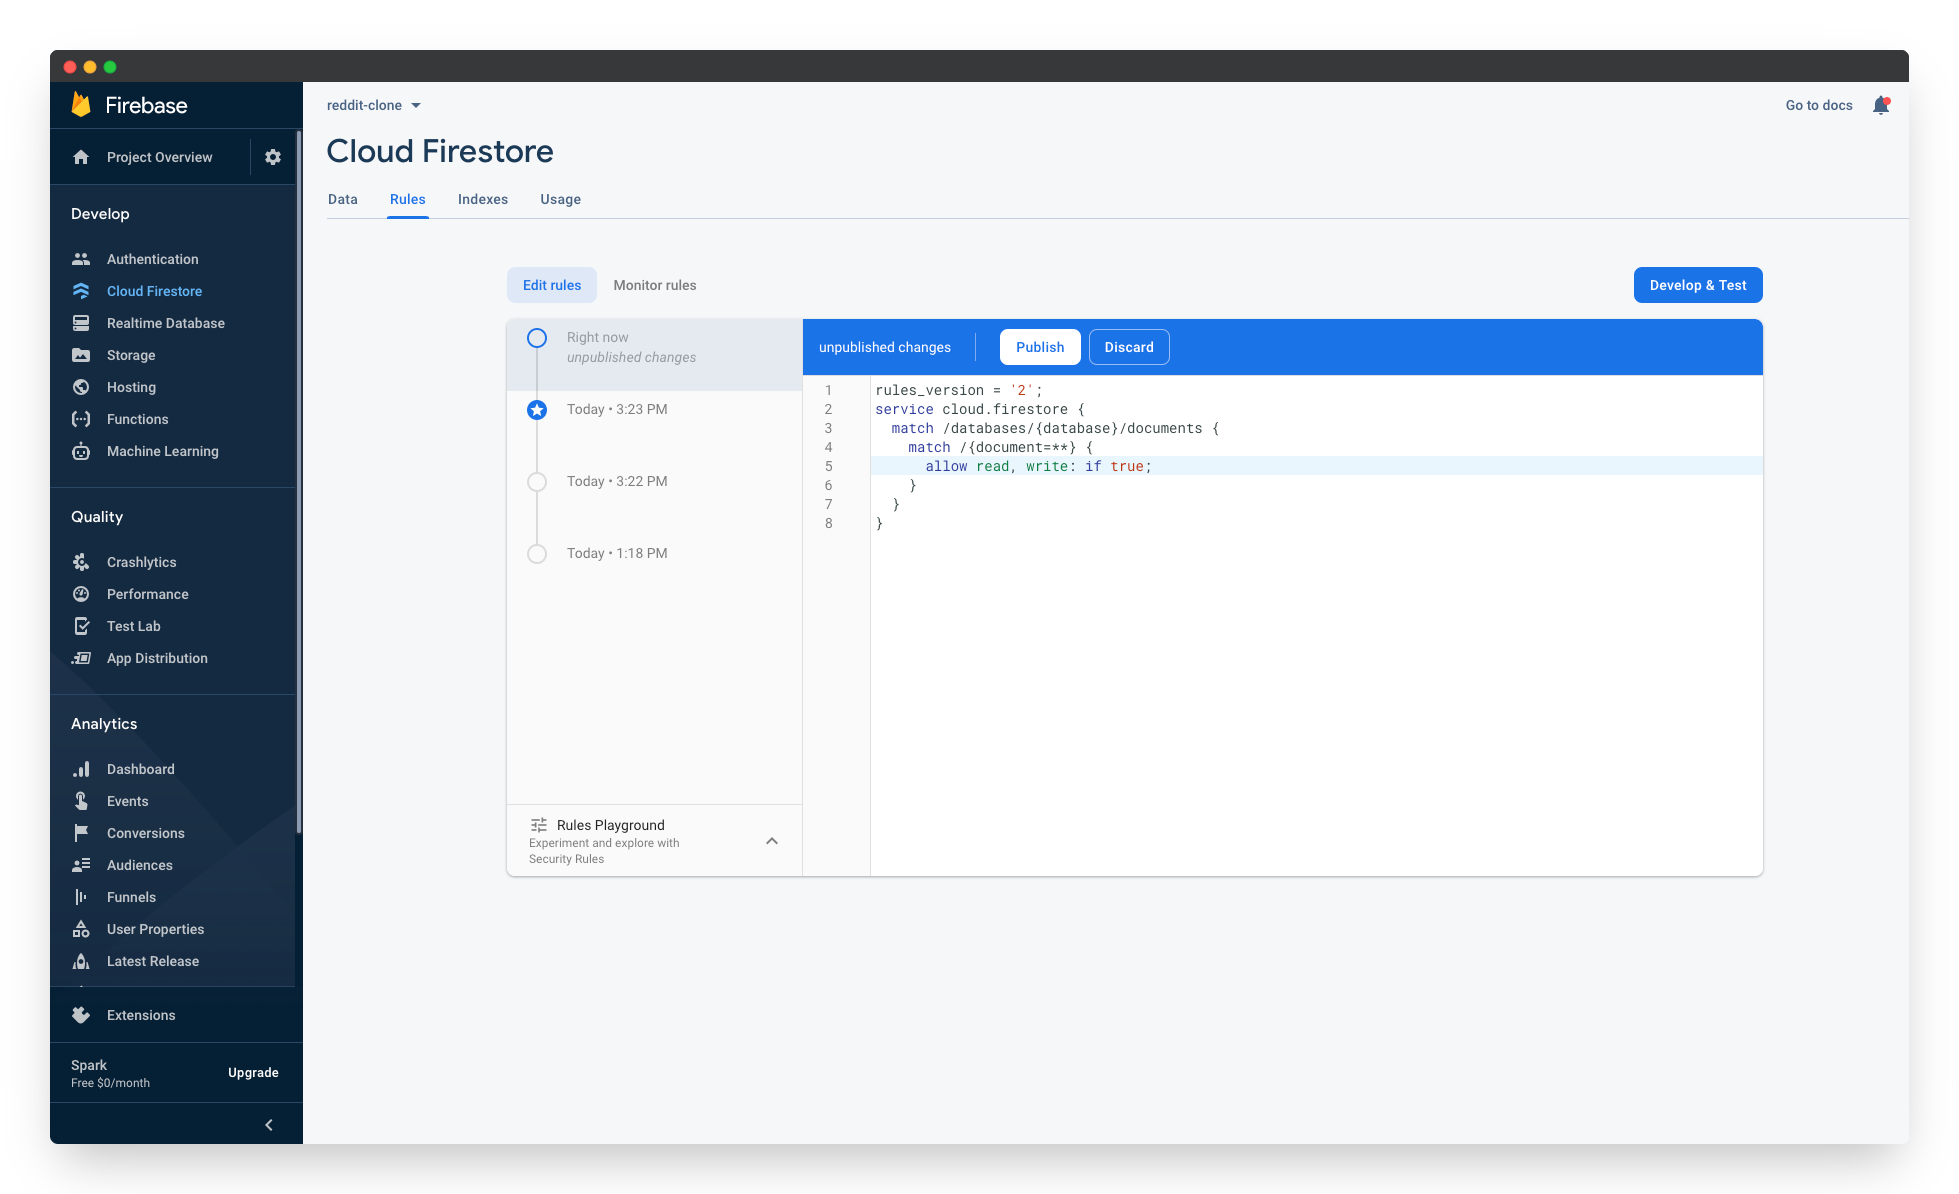
Note: more information regarding security rules can be found here.
Integrating Firebase with Create React App
In this section, we’ll work on our React application to add the following:
- Adding Chakra UI package
- Option to view all posts
- Option to add a new post
- Option to disable vote button once a user has voted on a post
Adding the Chakra UI Package
We’ll be adding the Chakra UI package to help us build our application’s UI. It’s a simple, modular and accessible React component library. You can check out their Getting Started guide, if you’d like to find out more.
We can install Chakra UI using the following command:
npm install @chakra-ui/core@next
For Chakra UI to work correctly, we’ll need to set up the ChakraProvider at the root of the application. Modify src/index.js like so:
import { ChakraProvider } from "@chakra-ui/core";
import React from "react";
import ReactDOM from "react-dom";
import App from "./app";

ReactDOM.render(
  <React.StrictMode>
    <ChakraProvider>
      <App />
    </ChakraProvider>
  </React.StrictMode>,
  document.getElementById("root")
);
Adding the Option to View All Posts
In this section, we’ll develop a list to show all our posts from Firebase. We’ll need to modify our src/app.js file with the following:
import { Container, Flex, Spinner, VStack } from "@chakra-ui/core";
import React, { useEffect, useState } from "react";
import Post from "./components/post";
import db from "./lib/firebase";

const App = () => {
  const [posts, setPosts] = useState([]);

  useEffect(() => {
    // Hook to handle the initial fetching of posts

    db.collection("posts")
      .orderBy("createdAt", "desc")
      .get()
      .then((querySnapshot) => {
        const data = querySnapshot.docs.map((doc) => ({
          id: doc.id,
          ...doc.data(),
        }));

        setPosts(data);
      });
  }, []);

  return (
    <>
      <Container maxW="md" centerContent p={8}>
        <VStack spacing={8} w="100%">
          {posts.map((post) => (
            <Post post={post} key={post.id} />
          ))}
        </VStack>
      </Container>
    </>
  );
};

export default App;
Here, we’re doing the following:
- The useEffect hook is responsible for fetching the initial set of posts from Firebase. Hopefully the query syntax is relatively straightforward. You can read more about performing queries in Cloud Firestore here.
- Once the posts have been fetched from Firebase, we’re storing all the posts in the
postsstate. - We’re rendering a list of posts by using the
Postcomponent. - The
Postcomponent is responsible for handling the rendering of a single post.
Next, we’ll need to create a new file src/components/post.js with the following content:
import { Box, HStack, Text } from "@chakra-ui/core";
import React from "react";

const Post = ({ post }) => {
  return (
    <HStack key={post.id} w="100%" alignItems="flex-start">
      <Box bg="gray.100" p={4} rounded="md" w="100%">
        <Text>{post.title}</Text>
      </Box>
    </HStack>
  );
};

export default Post;
There’s not much going on here. The component receives the post via props and displays its title in a Chakra UI Text element.
Restart the dev server using Ctrl + C, then visit http://localhost:3000/. We should be able to view the post that we entered manually in the Firestore.

Adding the Option to Add a New Post
In this section, we’ll develop a modal through which we’ll be able to add a new post. To do that, we’ll need to add the following code to our src/app.js file:
...
import Navbar from "./components/navbar";
...

const App = () => {
  ...

  return (
    <>
      <Navbar />
      <Container maxW="md" centerContent p={8}>
        ...
      </Container>
    </>
  );
};
We’ll also need to add a new file src/components/navbar.js with the following content:
import { Box, Container, Flex } from "@chakra-ui/core";
import React from "react";
import AddNewPost from "./add-new-post";

const Navbar = () => {
  return (
    <Box position="sticky" top={0} p={4} bg="gray.100" zIndex={1}>
      <Container maxW="md" centerContent>
        <Flex justifyContent="flex-end" w="100%" position="sticky" top={0}>
          <AddNewPost />
        </Flex>
      </Container>
    </Box>
  );
};

export default Navbar;
We’ll also need to add a new file src/components/add-new-post.js with the following content:
import {
  Button,
  FormControl,
  FormLabel,
  Textarea,
  Modal,
  ModalBody,
  ModalCloseButton,
  ModalContent,
  ModalFooter,
  ModalHeader,
  ModalOverlay,
  HStack,
  useDisclosure,
} from "@chakra-ui/core";
import React, { useState, useEffect } from "react";
import db from "../lib/firebase";

const AddNewPost = () => {
  const { isOpen, onOpen, onClose } = useDisclosure();
  const [title, setTitle] = useState("");
  const [isSaving, setSaving] = useState(false);

  const handleSubmit = async () => {
    const date = new Date();

    await db.collection("posts").add({
      title,
      upVotesCount: 0,
      downVotesCount: 0,
      createdAt: date.toUTCString(),
      updatedAt: date.toUTCString(),
    });

    onClose();
    setTitle("");
  };

  return (
    <>
      <Button onClick={onOpen} colorScheme="blue">
        Add new post
      </Button>

      <Modal onClose={onClose} isOpen={isOpen} isCentered>
        <ModalOverlay>
          <ModalContent>
            <ModalHeader>Add new post</ModalHeader>
            <ModalCloseButton />
            <ModalBody>
              <FormControl id="post-title">
                <FormLabel>Post title</FormLabel>
                <Textarea
                  type="post-title"
                  value={title}
                  onChange={(e) => setTitle(e.target.value)}
                />
              </FormControl>
            </ModalBody>
            <ModalFooter>
              <HStack spacing={4}>
                <Button onClick={onClose}>Close</Button>
                <Button
                  onClick={handleSubmit}
                  colorScheme="blue"
                  disabled={!title.trim()}
                  isLoading={isSaving}
                >
                  Save
                </Button>
              </HStack>
            </ModalFooter>
          </ModalContent>
        </ModalOverlay>
      </Modal>
    </>
  );
};

export default AddNewPost;
The AddNewPost component will be responsible for opening a modal to add a new post. We make use of Chakra’s useDisclosure hook, a custom hook to help handle common open, close, or toggle scenarios.
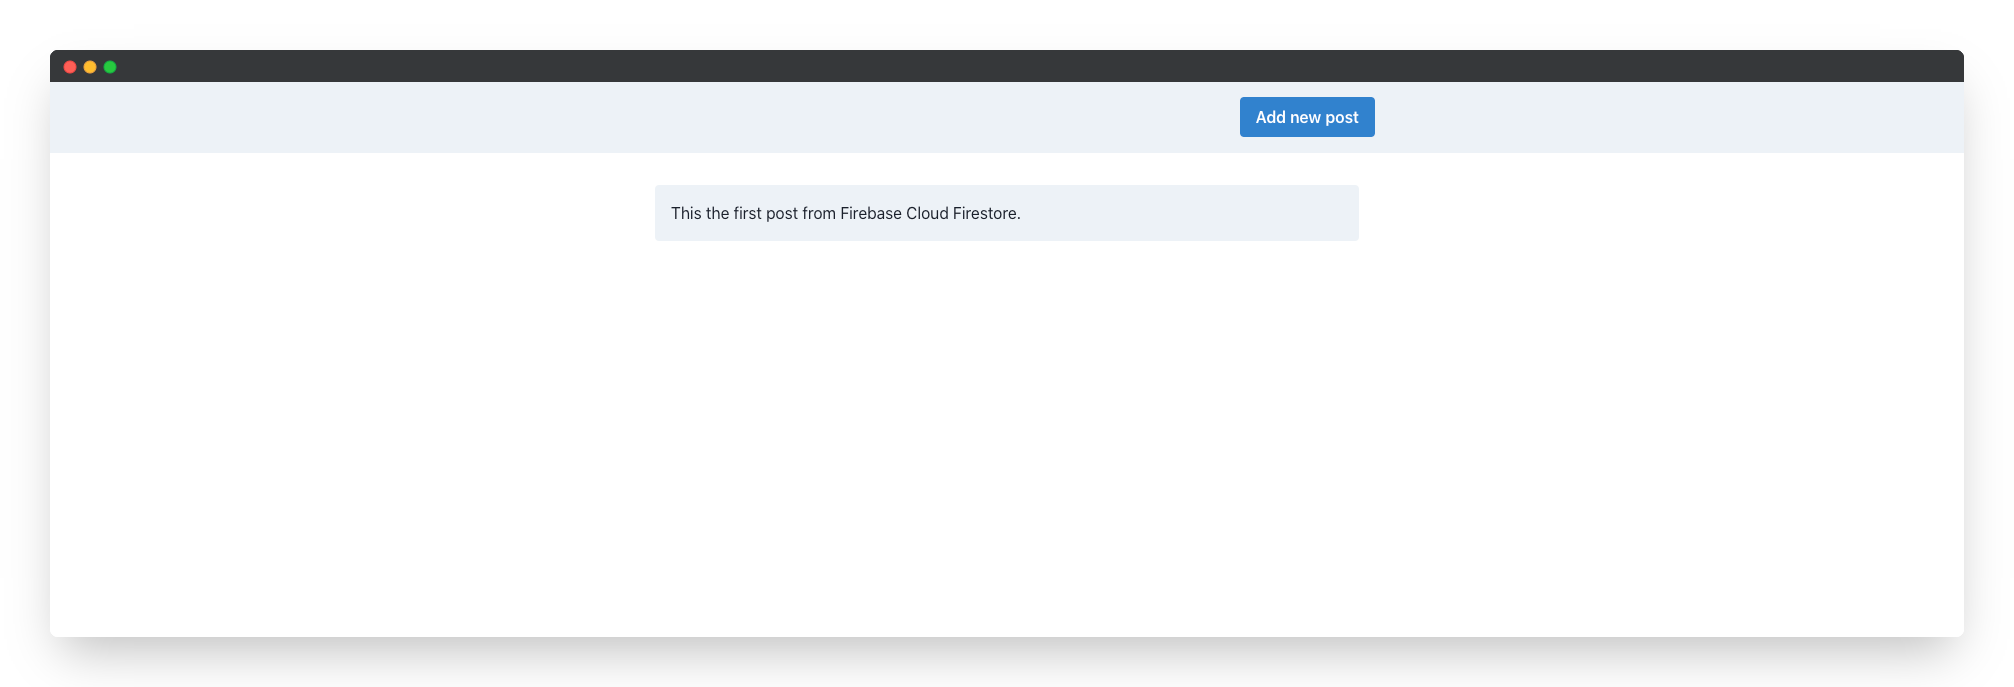
Now, if we visit http://localhost:3000/, we should be able to view the following:
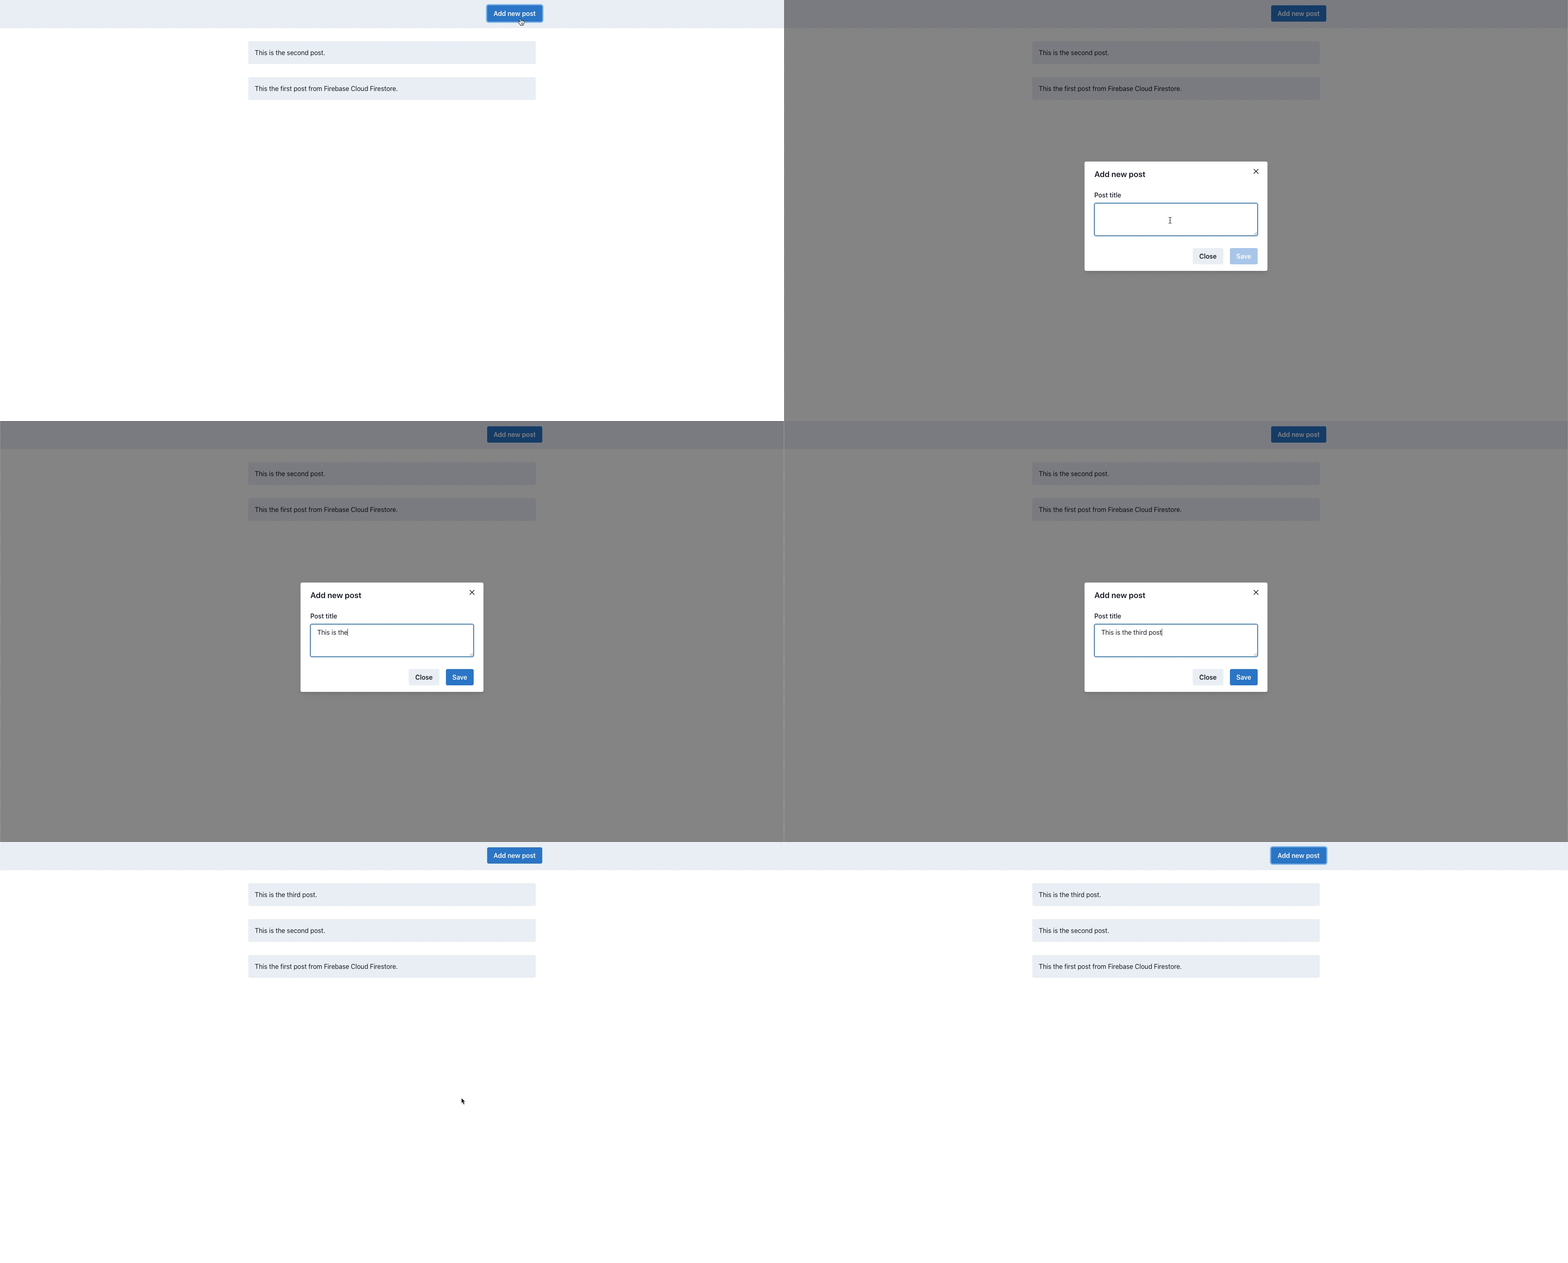
If we click on the Add new post button, a modal will appear through which we can add a new post:
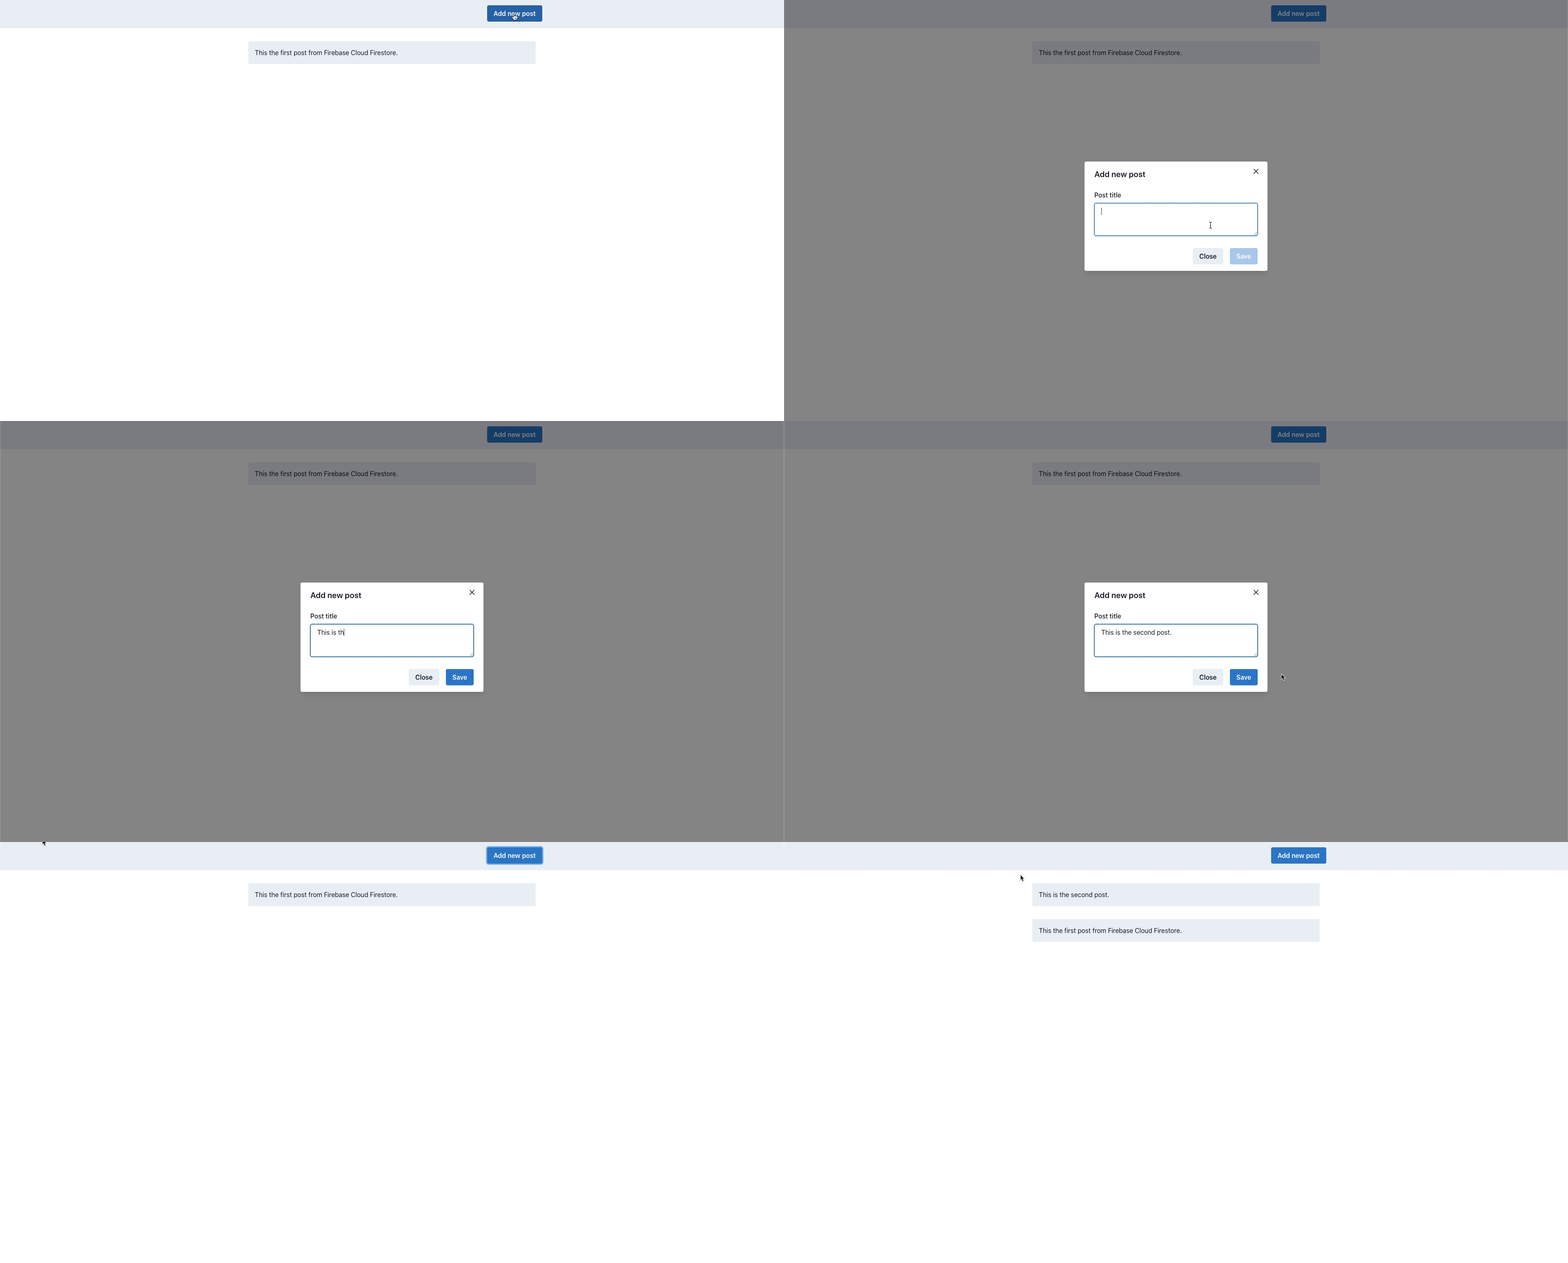
However, we’ll need to refresh the page to view the new post. We can fix that by adding a new useEffect hook to our src/app.js file:
// src/app.js

  useEffect(() => {
    // Hook to handle the real-time updating of posts whenever there is a
    // change in the datastore (https://firebase.google.com/docs/firestore/query-data/listen#view_changes_between_snapshots)

    db.collection("posts")
      .orderBy("createdAt", "desc")
      .onSnapshot((querySnapshot) => {
        const _posts = [];

        querySnapshot.forEach((doc) => {
          _posts.push({
            id: doc.id,
            ...doc.data(),
          });
        });

        setPosts(_posts);
      });
  }, []);
Now, if we add a new post, it’ll be visible in real time.
Adding the Option to Vote on a Post
In this section, we’ll develop the buttons through which a user can vote on each post. To do that, we’ll need to add the following code to our src/components/post.js file:
...
import VoteButtons from "./vote-buttons";

const Post = ({ post }) => {
  return (
    <HStack key={post.id} w="100%" alignItems="flex-start">
      <VoteButtons post={post} />
      ...
    </HStack>
  );
};

export default Post;
Next, we’ll need to add a new file src/components/vote-buttons.js with the following:
// src/components/vote-buttons.js

import { IconButton, Text, VStack } from "@chakra-ui/core";
import React, { useState } from "react";
import { FiArrowDown, FiArrowUp } from "react-icons/fi";
import db from "../lib/firebase";

const VoteButtons = ({ post }) => {
  const handleClick = async (type) => {
    // Do calculation to save the vote.
    let upVotesCount = post.upVotesCount;
    let downVotesCount = post.downVotesCount;

    const date = new Date();

    if (type === "upvote") {
      upVotesCount = upVotesCount + 1;
    } else {
      downVotesCount = downVotesCount + 1;
    }

    await db.collection("posts").doc(post.id).set({
      title: post.title,
      upVotesCount,
      downVotesCount,
      createdAt: post.createdAt,
      updatedAt: date.toUTCString(),
    });
  };

  return (
    <>
      <VStack>
        <IconButton
          size="lg"
          colorScheme="purple"
          aria-label="Upvote"
          icon={<FiArrowUp />}
          onClick={() => handleClick("upvote")}
        />
        <Text bg="gray.100" rounded="md" w="100%" p={1}>
          {post.upVotesCount}
        </Text>
      </VStack>
      <VStack>
        <IconButton
          size="lg"
          colorScheme="yellow"
          aria-label="Downvote"
          icon={<FiArrowDown />}
          onClick={() => handleClick("downvote")}
        />
        <Text bg="gray.100" rounded="md" w="100%" p={1}>
          {post.downVotesCount}
        </Text>
      </VStack>
    </>
  );
};

export default VoteButtons;
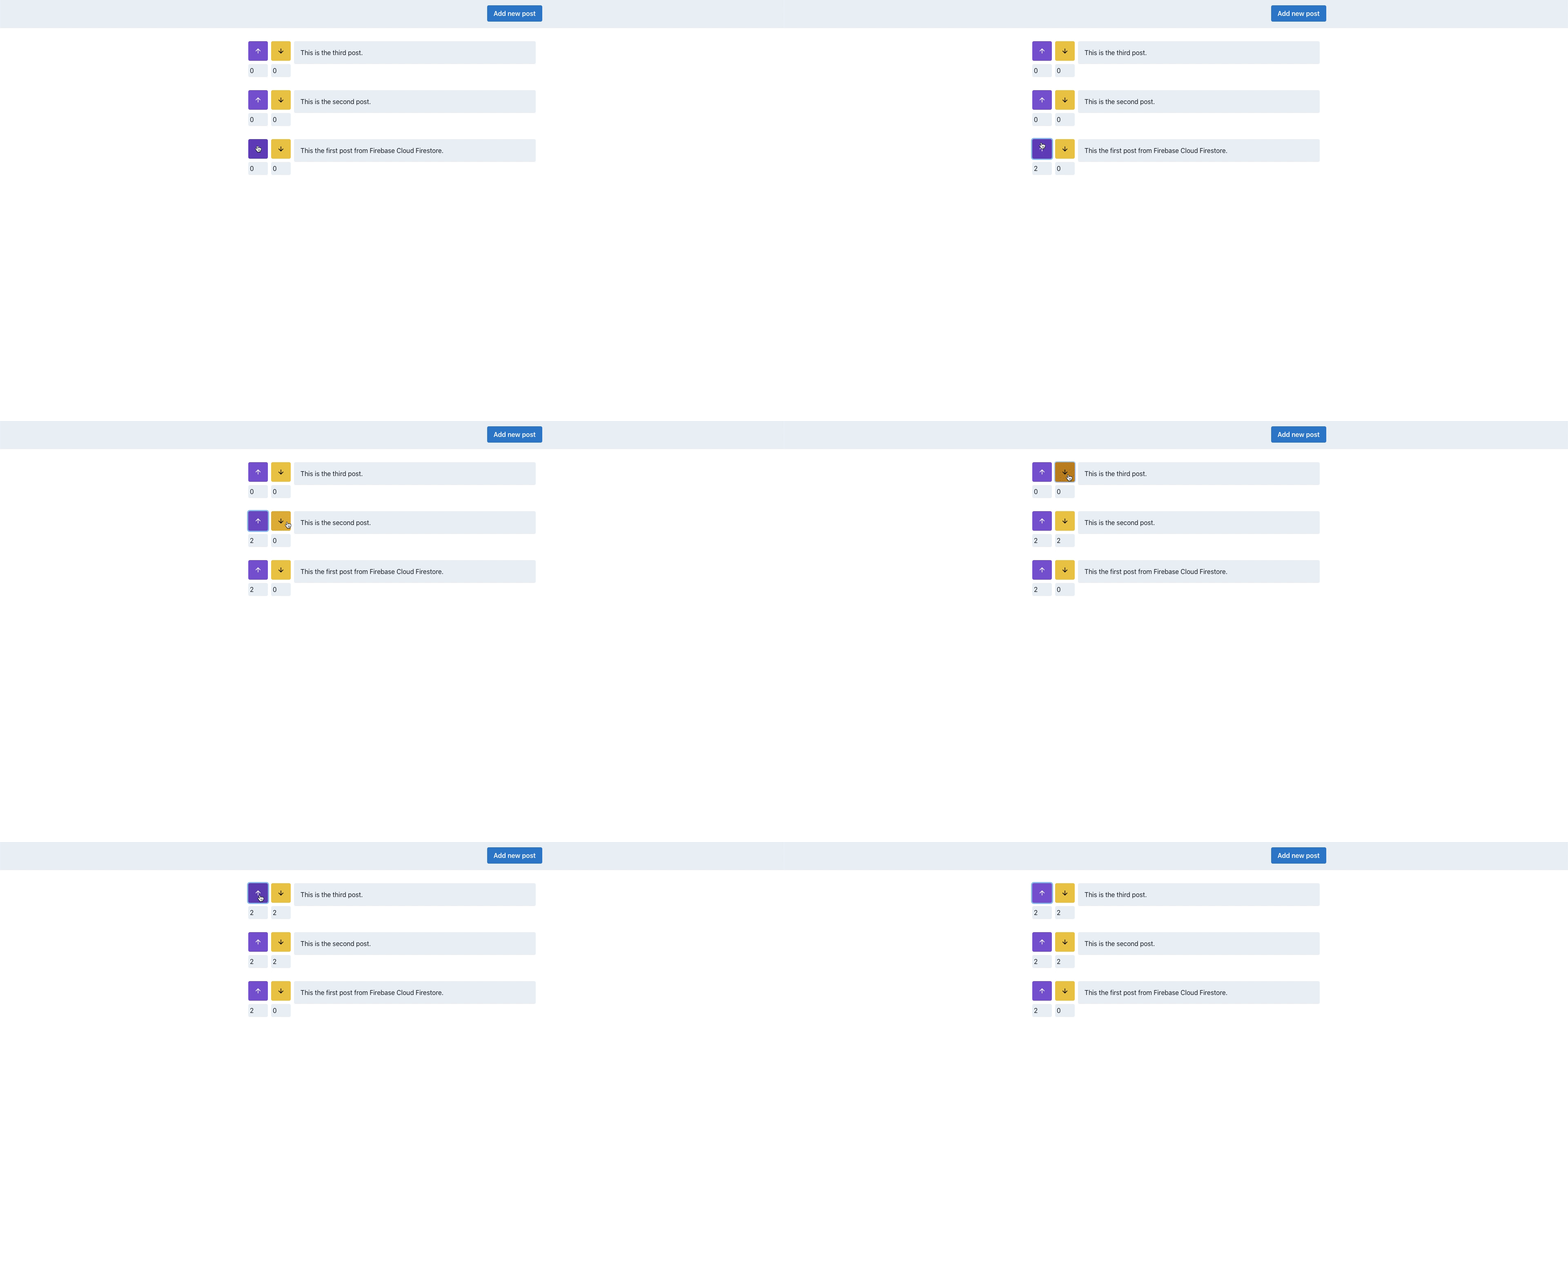
The VoteButtons component is responsible for rendering an upvote and downvote button. When a user clicks on either of these two buttons, the handleClick function is called. The handleClick function is responsible for saving the vote to the database.
Since, we’re using the icons from React Icons, we’ll need to add the package. We can do that by running the following command from our root directory:
npm install react-icons
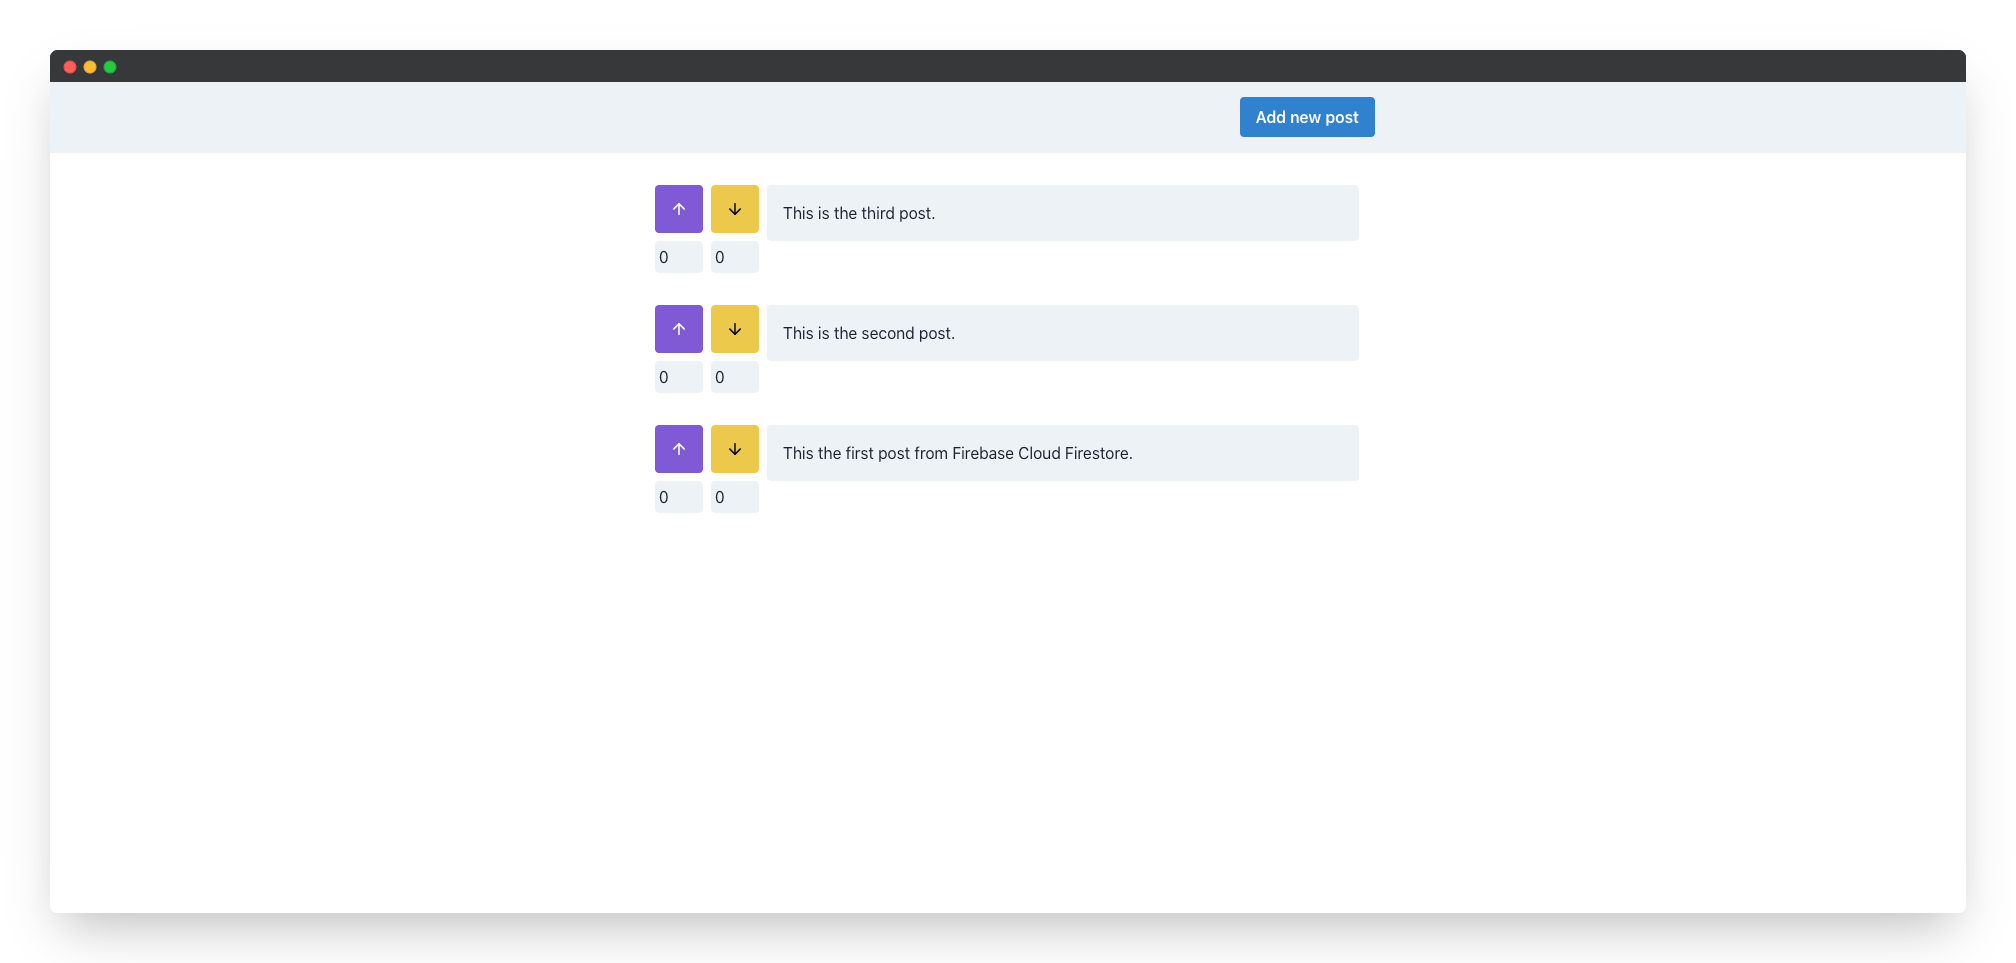
Now, if we visit http://localhost:3000/, we should be able to view the following:
We should be able to vote on any of the posts:
Adding the Option to Disable Vote Button Once User Has Voted on a Post
In the previous section, we added the option to vote on a post. However, we can see that a user can vote on a single post multiple times. We can fix that by disabling the voting button once a user has already voted on a post.
To do that, we’ll need to add the following code to our src/component/vote-buttons.js file:
import React, { useEffect, useState } from "react";

...
const VoteButtons = ({ post }) => {
  const [isVoting, setVoting] = useState(false);
  const [votedPosts, setVotedPosts] = useState([]);

  useEffect(() => {
    // Fetch the previously voted items from localStorage. See https://stackoverflow.com/a/52607524/1928724 on why we need "JSON.parse" and update the item on localStorage. Return "true" if the user has already voted the post.
    const votesFromLocalStorage = localStorage.getItem("votes") || [];
    let previousVotes = [];

    try {
      // Parse the value of the item from localStorage. If the value of the
      // items isn't an array, then JS will throw an error.
      previousVotes = JSON.parse(votesFromLocalStorage);
    } catch (error) {
      console.error(error);
    }

    setVotedPosts(previousVotes);
  }, []);

  const handleDisablingOfVoting = (postId) => {
    // This function is responsible for disabling the voting button after a
    // user has voted. Fetch the previously voted items from localStorage. See
    // https://stackoverflow.com/a/52607524/1928724 on why we need "JSON.parse"
    // and update the item on localStorage.
    const previousVotes = votedPosts;
    previousVotes.push(postId);

    setVotedPosts(previousVotes);

    // Update the voted items from localStorage. See https://stackoverflow.com/a/52607524/1928724 on why we need "JSON.stringify" and update the item on localStorage.
    localStorage.setItem("votes", JSON.stringify(votedPosts));
  };

  const handleClick = async (type) => {
    setVoting(true);
    ...
    // Disable the voting button once the voting is successful.
    handleDisablingOfVoting(post.id);

    setVoting(true);
  };

  const checkIfPostIsAlreadyVoted = () => {
    if (votedPosts.indexOf(post.id) > -1) {
      return true;
    } else {
      return false;
    }
  };

  return (
    <>
      <VStack>
        <IconButton
          ...
          isLoading={isVoting}
          isDisabled={checkIfPostIsAlreadyVoted()}
        />
        ...
      </VStack>
      <VStack>
        <IconButton
          ...
          isLoading={isVoting}
          isDisabled={checkIfPostIsAlreadyVoted()}
        />
        ...
      </VStack>
    </>
  );
};

export default VoteButtons;
In the above changes, we’re doing the following:
- We’re keeping track of the
idthe posts that have been voted in our localStorage. - After a post has been voted upon, we’re adding the
idof that post to ourlocalStorage. - We’re disabling the vote buttons after a user votes on the post. When the app renders any voted on posts will be disabled by default.
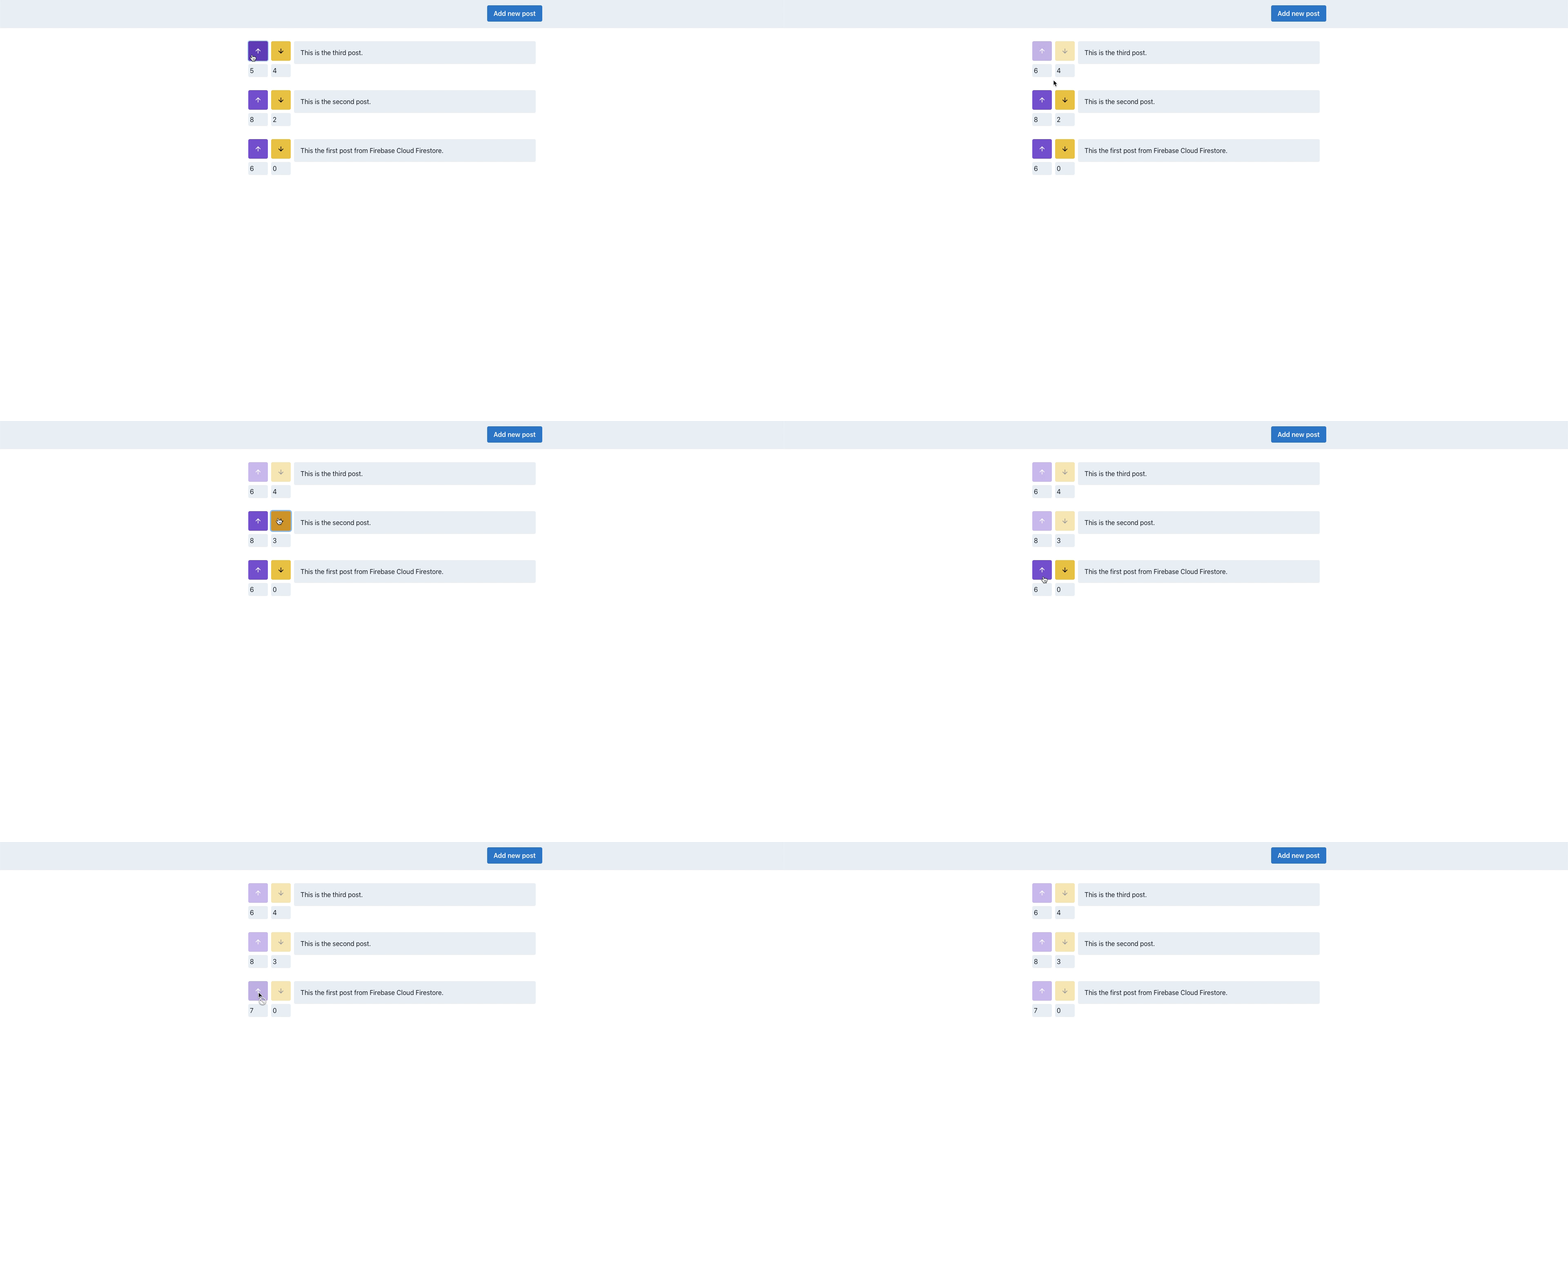
Please note that normally you would store this kind of information in a database. Unfortunately, this is outside of the scope of our app, as that would mean we would need to implement a whole user management and authentication system.
Pushing Our Code Changes to GitHub
We’re now done with adding all the features to our application. In this section, we’ll commit our code and push it to GitHub.
Creating a GitHub Account
As we’re going to be storing our code on GitHub, we’ll need a GitHub account. Please note that this will be required when we come to deploy the application on Vercel.
Committing Our Code Using Git
You’ll need Git installed on your PC for this next step. If you’re unfamiliar with Git, or you’d like a refresher, check out Jump Start Git, 2nd Edition over on SitePoint Premium.
From our root directory, we can run the following commands to stage all our files:
git add --all
Note: more information on git add is available here.
Next, we can commit our files using the following command:
git commit -m "Adds all the necessary code"
Note: more information on git commit is available here.
Creating a New GitHub Repository
We can create a new GitHub repository by visiting https://github.com/new.
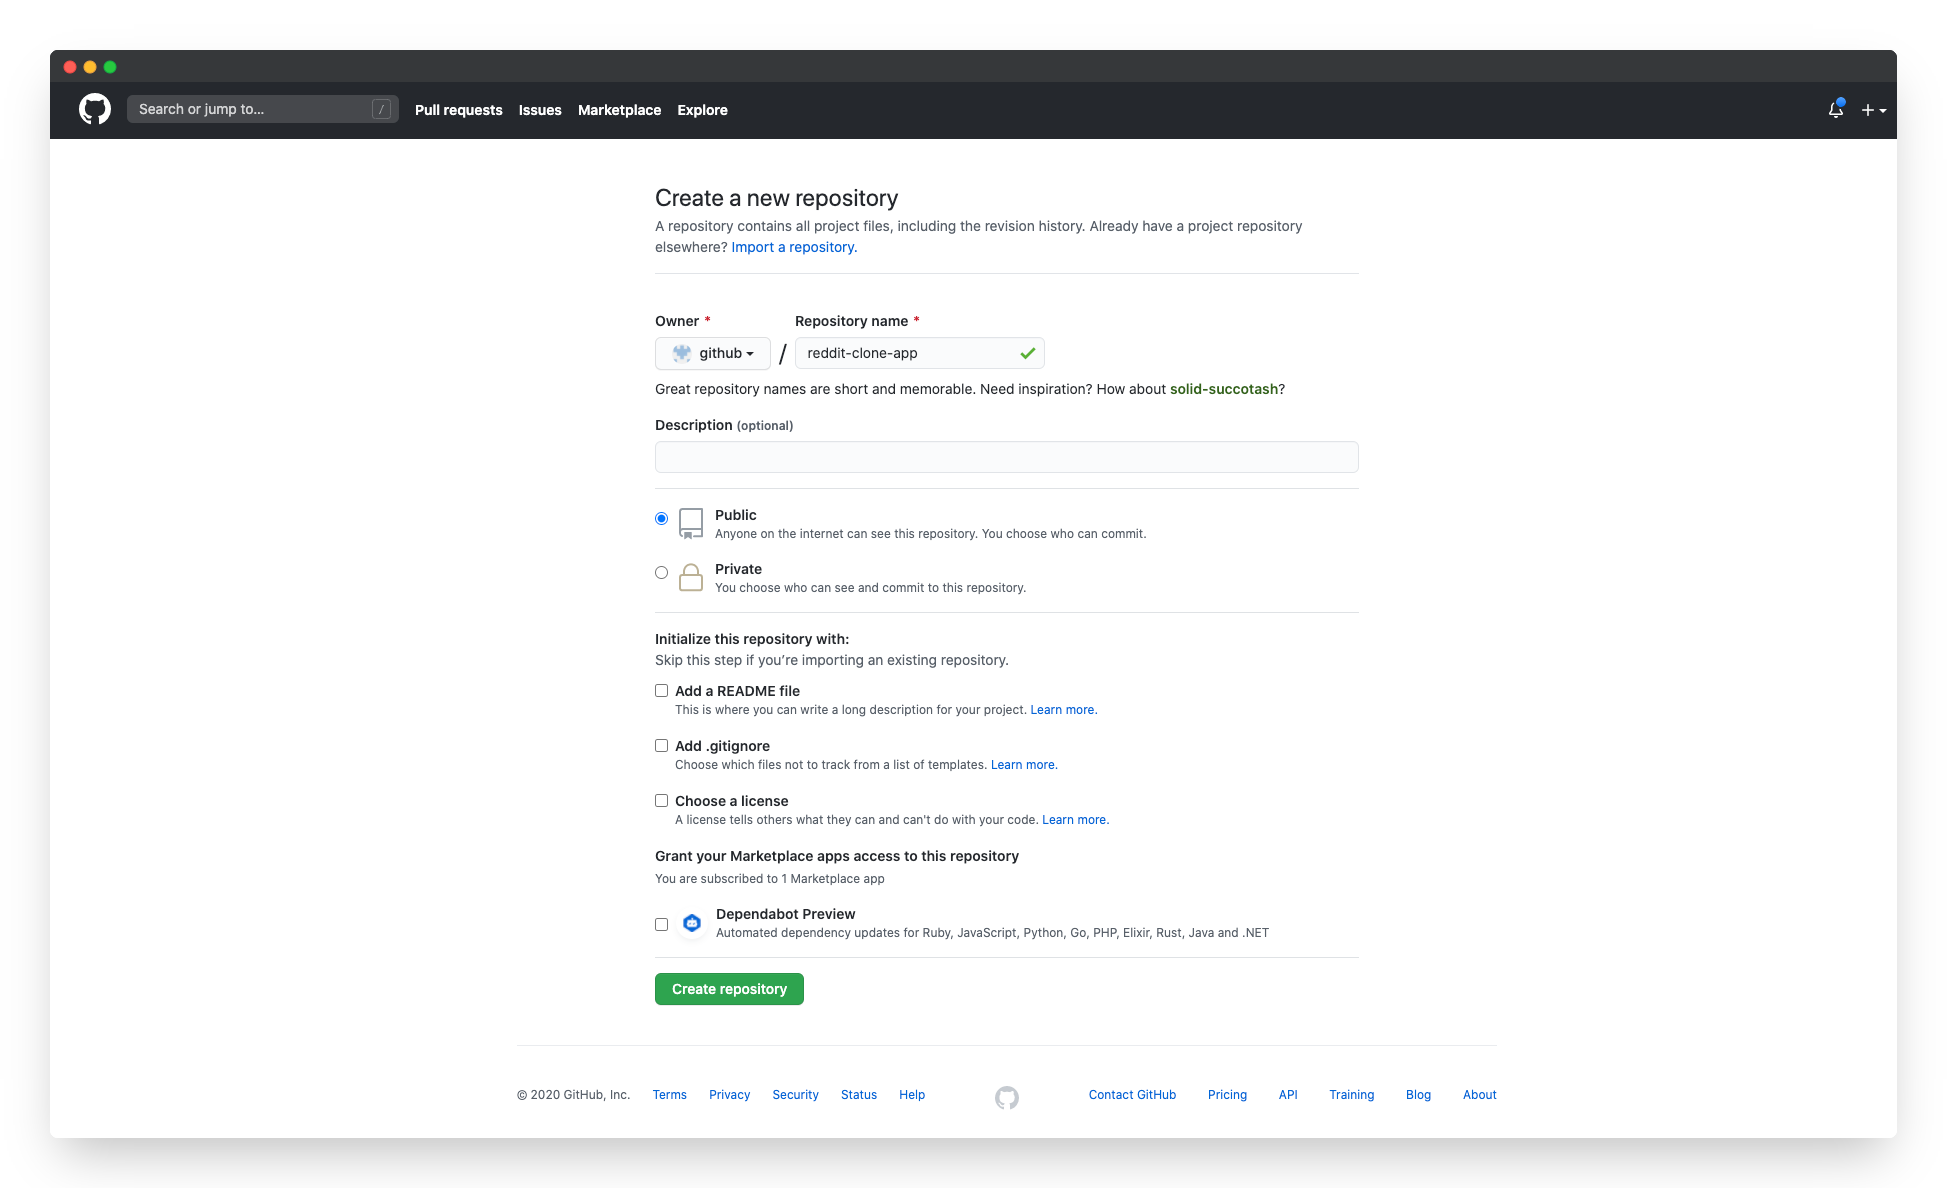
Once we add a name to our repository, we can click on the Create repository button to create a new repository.
Pushing the Code to Our GitHub Repository
We can push the code to our GitHub repository using the following command:
git remote add origin https://github.com/ghoshnirmalya/reddit-clone-app.git
git branch -M main
git push -u origin main
Note: you’ll need to replace “https://github.com/sitepoint-editors/reddit-clone.git” with the link of your GitHub repository.
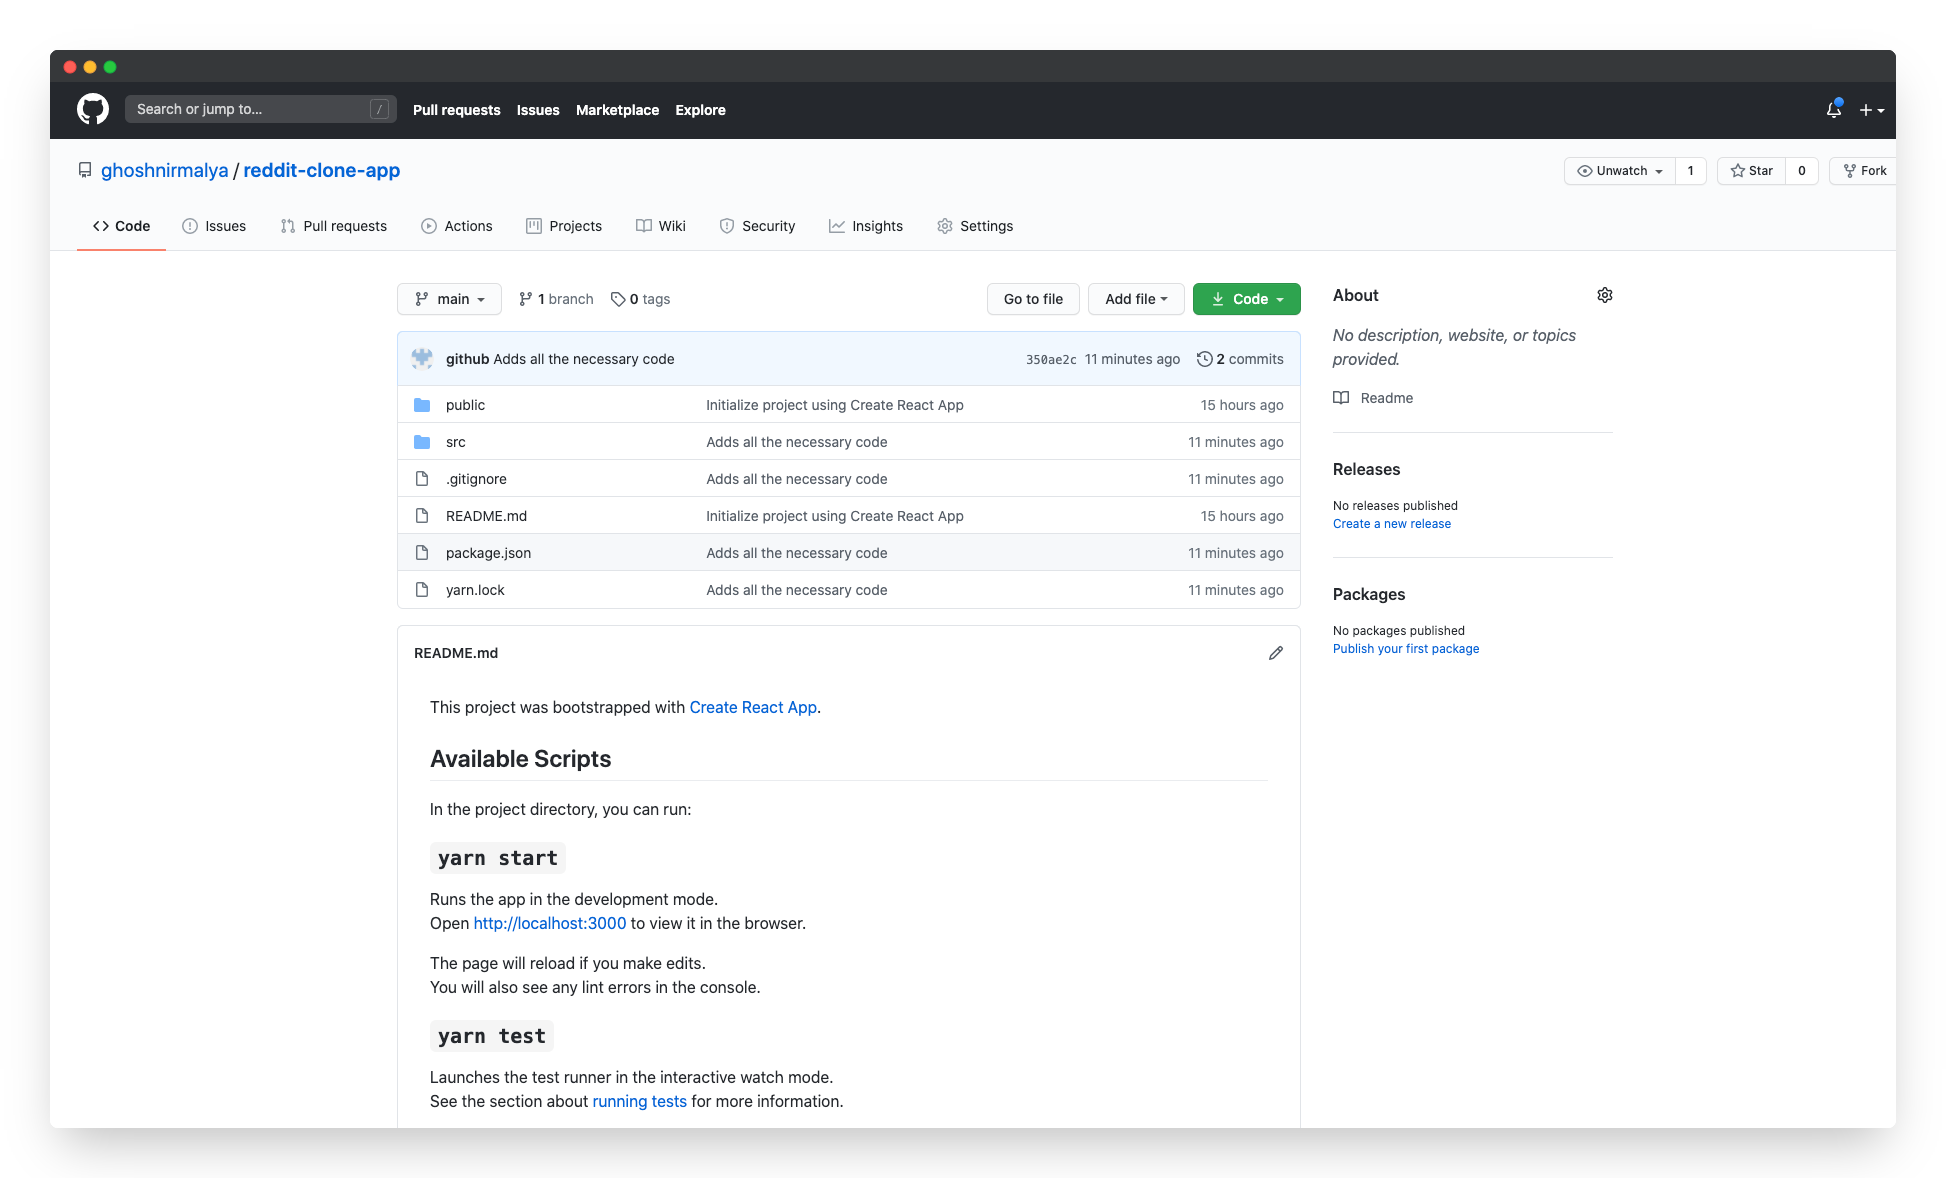
And that’s it. Our application is now under version control and pushed up to GitHub!
Deploying the Application to Vercel
In this final section, we’ll deploy our code to Vercel.
Creating a Vercel Account
First, head over to Vercel and create an account. You can sign in with GitHub, GitLab and BitBucket.
Importing a Git Repository to Vercel
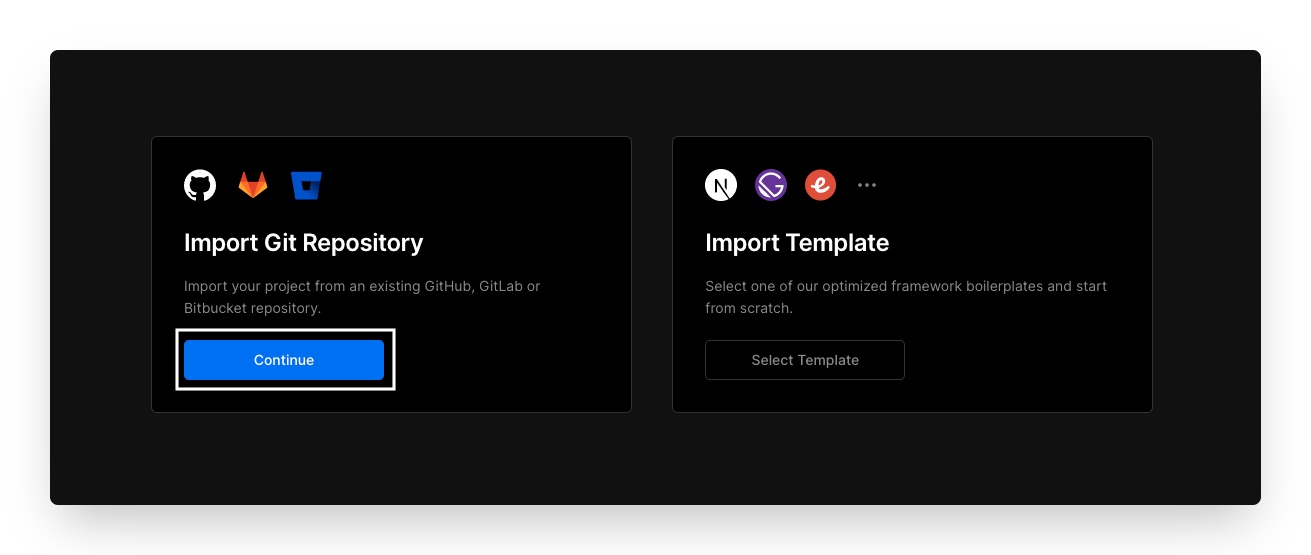
We can import our GitHub repository from GitHub by clicking on the Continue button in the Import Git Repository section.
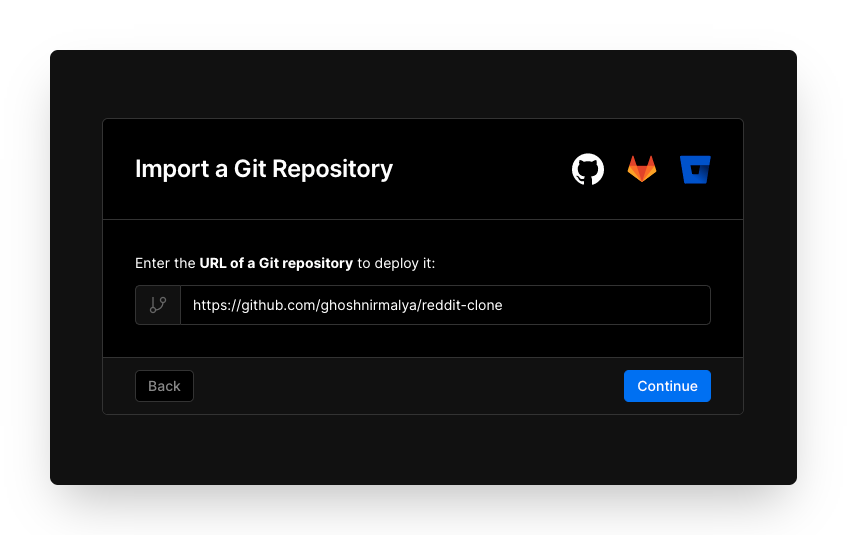
Next, we’ll need to enter the link to our GitHub project and click on the Continue button to deploy our application.
So that our React app can communicate with our back end, we’ll need to enter all the environment variables from our .env file.
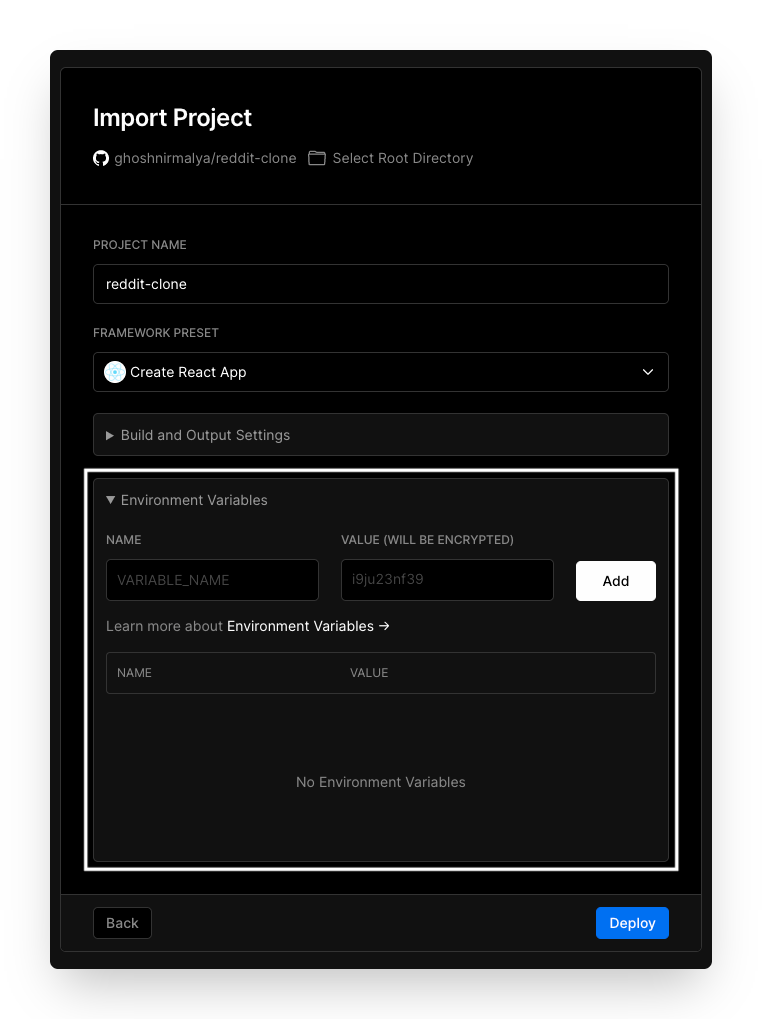
It should contain the environment variables.
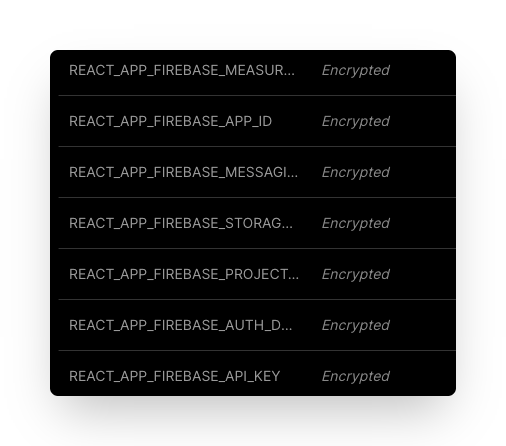
Next, we can click on the Deploy button, which will deploy the application.
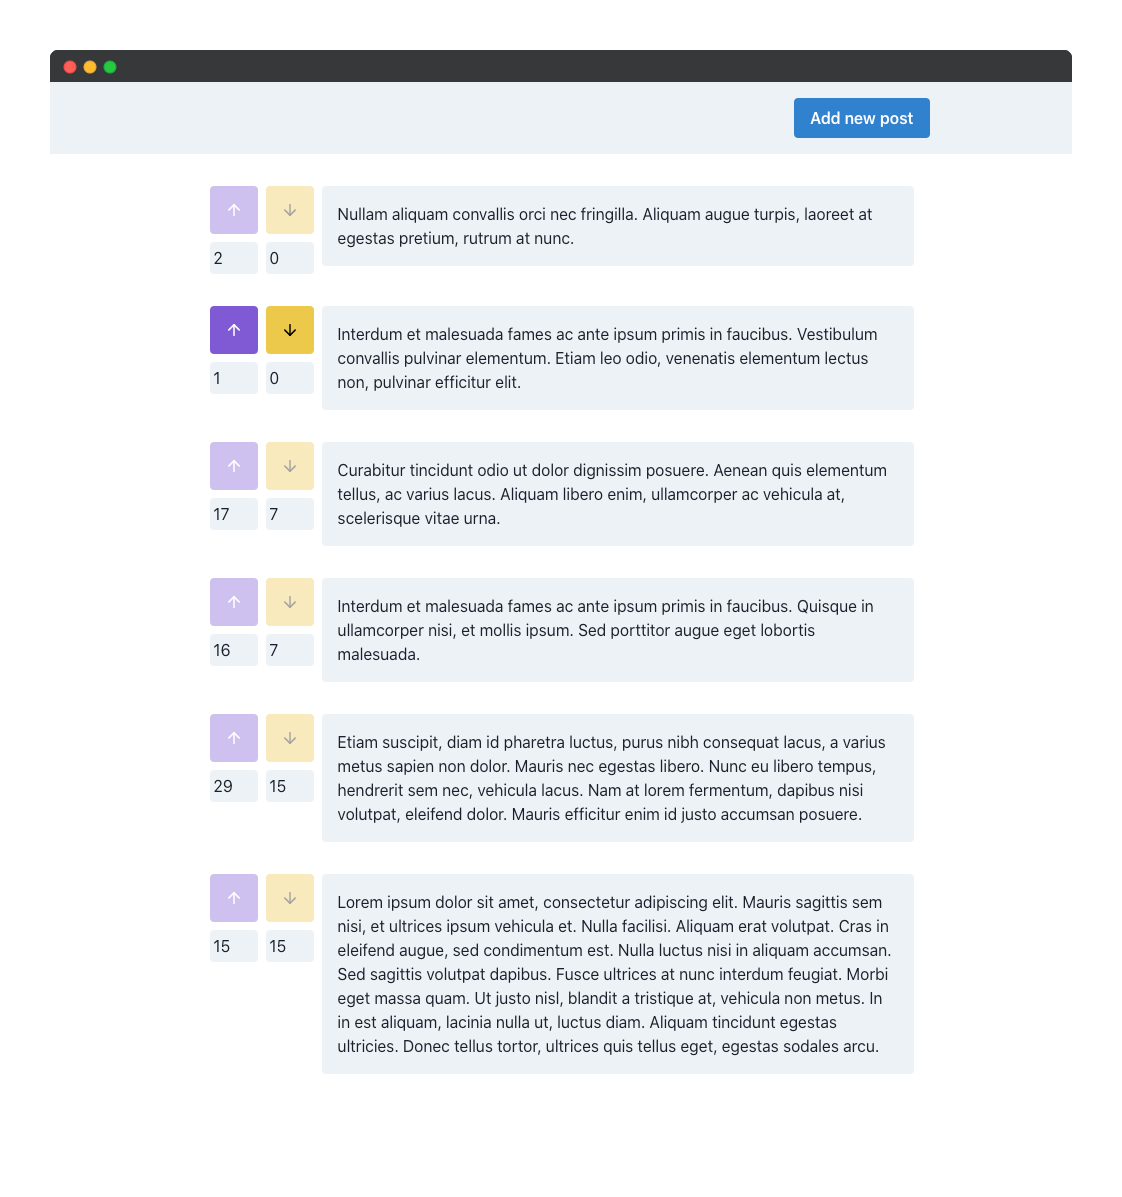
If we now visit the deployment link, we should be able to view our deployed application:
Conclusion
The live demo of our application is deployed on Vercel and the code is available on GitHub.
We didn’t add any authentication, in order to reduce the complexity and the length of the tutorial, but obviously any real-world application would require it.
Firebase is really useful for places where you don’t want to create and maintain a separate back-end application, or where you want real-time data without investing too much time developing your APIs.
I hope this tutorial helps you in your future projects. Please feel free to reach out with any feedback.
