Break an Image Into Puzzle Pieces in Photoshop

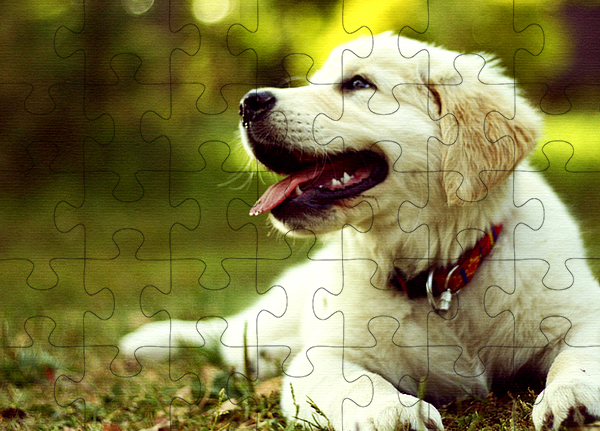
Puzzles are symbolic for many things: an assembly of abstract parts into a cohesive whole, the solving of complex problems, and the combination of perfectly-fitting components. These contexts and connotations can be in high demand for designers, so having puzzles as a visual technique can be invaluable. In this tutorial, we’ll turn a photograph into a fun jigsaw puzzle. We’ll make everything from scratch, which will allow a greater control on your final outcome.
Along the way, you will learn the use of pen tool, few layer styling techniques and use of filter. I’ll also demonstrate how you can create your very own jigsaw puzzle pattern by following few easy steps. So, let’s get started!
Resources:
Final result:

Step 1
Open the photograph in Photoshop.

Step 2
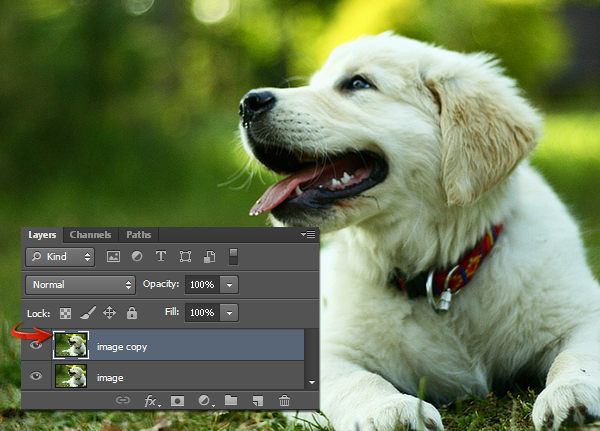
Duplicate the image layer by going to “Layer” > “Duplicate Layer.” We’ll apply the jigsaw puzzle effect on this duplicated image and keep the original image below it as a backup.
Step 3
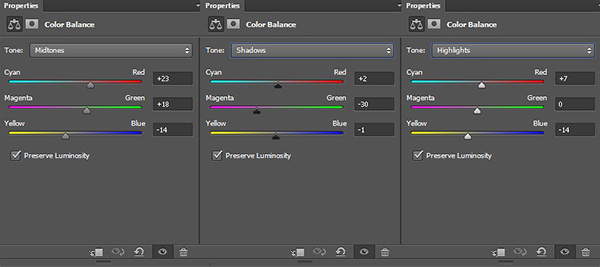
We’ll do some color adjustments on the image before proceeding any further. Click on the icon to “Create new fill or adjustment layer” at the bottom of the layers panel and select the “Color balance” option. Apply the following settings for midtones, shadows, and highlights. Once you are done, merge the duplicated image and color balance layers. To do so, select both layers and press Ctrl + “E”.

Step 4
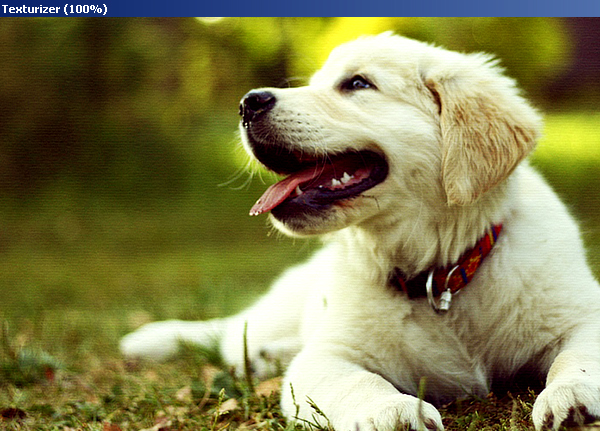
Next, we’ll give the image some texture. Click on the image layer to select it, go to “Filter” > “Filter Gallery” > “Texture” > “Texturizer”, and apply the following settings. Label this layer as “Textured”.

Step 5
Now I’ll show you how to make the jigsaw puzzle template. Create a new layer by going to “Layer” > “New Layer.” Select the pen tool (Tool mode: Shape), set fill to “none” and the stroke to 0.5pt in pure black color in the top properties bar. Draw the stroke shown below.

Step 6
Rasterize the stroke layer by going to “Layer”> “Rasterize”> “Shape”. Duplicate the stroke layer and flip it horizontally by going to “Edit” > “Transform Path” > “Flip horizontal”. Join both the stroke layers over each other with the help of Move tool (“V”). Now, select both the stroke layers and merge them by pressing Ctrl+ “E”.
Step 7
Duplicate the merged layer twice and position these copies below the original layer to make a continuous stroke like the one shown below. Merge these three layers into a continuous stroke.

Step 8
Duplicate the stroke layer, flip it horizontally and position it as shown below.

Merge these two stroke layers, duplicate, and drag it towards the right side. Repeat the same technique until you cover the entire canvas. Once you are done, merge all the stroke layers and label the merged layer as “Vertical strokes”.

Step 9
Duplicate the “Vertical strokes” layer and flip it 90⁰ by going to “Edit” > “Transform” > “Rotate 90⁰”. Position it as shown below to complete the puzzle template. In this way, by making a simple segment, you can make a complete puzzle.
Step 10
I’ve made a jigsaw puzzle blank template using the same technique shown above. You can skip steps 5-9 if you want to use the template instead. Download the PNG file from the tutorial resources, go to “File” > “Place”, and choose the jigsaw puzzle blank template PNG file. This will place the puzzle inside the document you are working on. You can adjust the size of puzzle according to your image using the free transform tool (Ctrl+ “T”).

Step 11
Next, press Ctrl + <click on the puzzle template layer> to select it. After that, go to “Select” >“Inverse”. Now, click on the textured layer while the selection is still active and press Ctrl + “C” to copy it. Press Ctrl + “V” to paste the selection onto a new layer. Label this layer as “Photo Puzzle”. Hide rest of the layers except this one.

Step 12
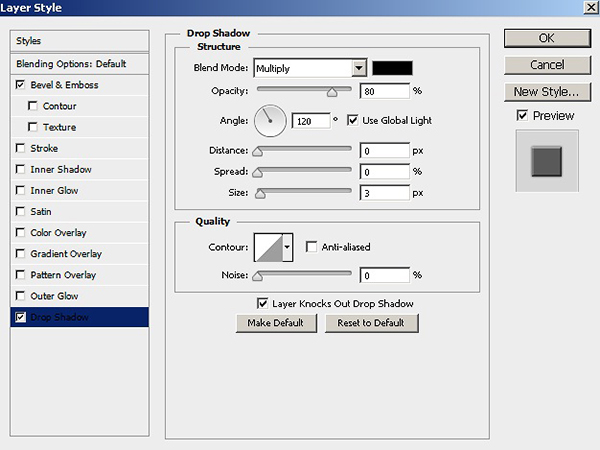
Double-click on the “Photo Puzzle” layer and apply the following settings for “Bevel and Emboss” and “Drop shadow”.


Step 13
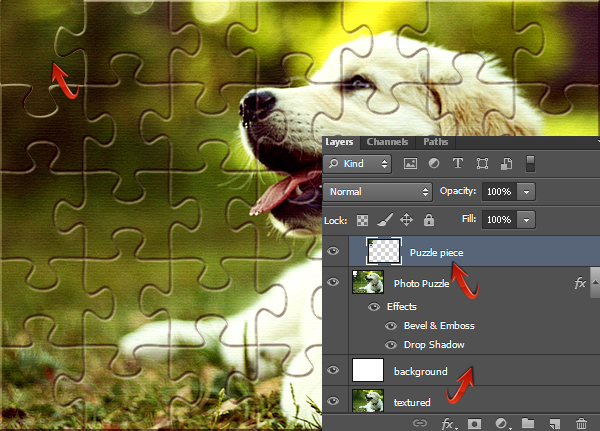
Our puzzle is looking fairly authentic so far. However, we can enhance it further. Select the pen tool (Tool mode: Shape), set the fill to any color you want, and stroke to “none”. Draw the shape of the puzzle piece that you want to move.

Step 14
Press Ctrl + <click on the puzzle piece layer> to select it. Now click on the “Photo Puzzle” layer and go to “Edit” > “Clear”. Create a new layer below the “Photo Puzzle” layer and fill it with pure white color using the paint bucket tool.

Step 15
Once again, make a selection around the puzzle piece layer. Now make the textured layer visible, press Ctrl + “C” to copy the selection on it and press Ctrl + “V” to paste it onto a new layer. Place this cut puzzle piece above the “Photo Puzzle” layer.
Step 16
Right-click on the “Photo Puzzle” layer, select the option of “copy layer style” and then right-click on the puzzle piece layer and choose “paste layer style” to apply the same effects on it. Double-click and modify the drop shadow settings on the puzzle piece.

Rotate this piece a bit using the free transform tool (Ctrl + “T”) and arrange it as you like.

Step 17
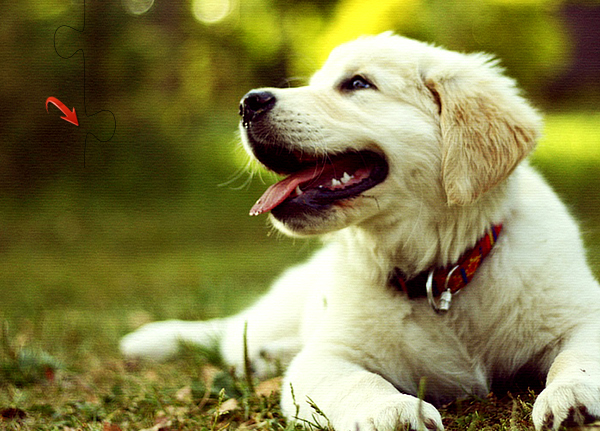
Play along with the puzzle using the same techniques and create your own outcome. Here is my final result.

That’s it guys. I hope you learned something interesting. Do share your thoughts!