Build a Photo-sharing App with Django

Django is the most-used Python framework for web development. Its built-in features and robust structure make it an excellent option when building web applications. But there are so many resources out there that it’s sometimes overwhelming to apply that knowledge to real-world projects. In this tutorial, we’re going to build a full-stack web application, using Django on the back end and Django Templates stylized with Bootstrap on the front end.
Requirements
To get the most out of this tutorial, you’d ideally have a grasp of the following:
- the basics of Python
- object-oriented programming in Python
- the basics of the Django web framework
If you don’t have previous experience with Django, don’t be afraid of continuing with this tutorial. This will be a step-by-step process, and each step will be explained.
Before starting, I want to introduce you to your new best ally, the Django documentation. We’ll be referencing it throughout the article, so make sure to get acquainted with it.
A Django Photo-sharing App
All the source code of this tutorial is available on this GitHub repo.
The complexity of a project depends on all the features we want to include. The more features we want to offer to users, the more time we’ll need to spend building and integrating everything into a unique project.
Taking that into account, we’re going to see a quick distinction between what we’re going to build and what we’re not.
What we’re going to build
In this tutorial, we’ll build a full-stack (back-end and front-end development) photo-sharing app. Our app will include the following features:
- CRUD (Create, Read, Update, Delete) database functionality
- a user management system, so that users will be able to create an account, upload photos, see other people’s photos and edit or delete their own photos
- a simple web interface made with Bootstrap
Note: although this app seems quite similar to a social network, it isn’t one. An app like Instagram or Twitter has a lot of complexity that can’t be covered in a single article.
Tech stack
Let’s define the technologies we’re going to use. We’ll cover the installation process of each one when we need to use it.
On the back end, Django will be the core framework of the app. It allows us to define the URLs, define the logic, manage user authentication, and control all the database operations through the Django ORM (object-relational mapper).
Also, we’ll be using a couple of third-party packages to accelerate the development of some features.
Django-taggit provides us the ability to set up a simple tag system in few steps. Pillow is a Python package that provides Django image manipulation capabilities. Finally, Django-crispy-forms gives us a simple way to display Bootstrap forms.
On the front end, we’re going to use the Django template language, which consists of HTML files that display data dynamically.
We’ll also be using Bootstrap 5 (the latest version at the time of writing) for the design of the site.
Note: you can always check the dependencies used in this project in the requirements.txt file.
Create a Django project
Let’s start with Django!
First of all, make sure you have Python 3 installed. Most Linux and macOS systems have already Python installed, but if you use Windows you can check the Python 3 installation guide.
Note: we’ll be using Unix commands (macOS & Linux) along the tutorial. If you can’t execute them for any reason you can use a graphical file manager.
In some linux distributions, the python command refers to Python 2. In others, python doesn’t exist at all.
Let’s see what Python command you need to use to follow along. Open your terminal (on Unix) or command line window (on Windows) and type python --version:
python --version

# My result
Python 3.9.5
If you’ve got a Python version above 3.6, you’re ready to go. If you don’t have the right version of Python, you might get a message like one of these:
Command 'python' not found
Python 2.7.18
The Python command you need to run to follow along with this tutorial will be python3:
python3 --version

Python 3.9.5
Virtual environments
A virtual environment is an isolated Python environment, which includes all the files you need to run a Python program.
Virtual environments are a crucial part of any Python (and Django) project, because they let us manage and share dependencies (external packages the project depends on) with other people.
To create a virtual environment natively, we’ll use the built-in module venv, available from Python 3.6 or greater.
The following command will create a virtual environment with the name .venv (you can choose another name if you prefer):
python -m venv .venv
If you’re using Ubuntu Linux, or any other Debian-based distribution, it’s possible you’ll get the following message:
The virtual environment was not created successfully because pip is not available ...
To solve this, you can run the following command:
sudo apt-get install python3-venv
If the command above doesn’t work, you can use virtualenv, which is another library to work with virtual environments:
virtualenv .venv
After running this command, a folder named .venv (or the name you’ve chosen) will appear.
All of the packages we install will be placed inside that directory.
To activate a virtual environment, you’ll need to run a specific command depending on your OS. You can refer to the table below (extracted from the Python docs).
| Platform | Shell | Command to activate virtual environment |
|---|---|---|
| POSIX | bash/zsh | $ source .venv/bin/activate |
| fish | $ source .venv/bin/activate.fish | |
| csh/tcsh | $ source .venv/bin/activate.csh | |
| PowerShell Core | $ .venv/bin/Activate.ps1 | |
| Windows | cmd.exe | C:> .venv\Scripts\activate.bat |
| PowerShell | PS C:> .venv\Scripts\Activate.ps1 |
Since I’m using a bash shell on a POSIX operative system, I’ll use this:
source .venv/bin/activate
Note how a .venv caption is added to my shell once I’ve activated the virtualenv.

Installing Django
Django is an external package, so we’ll need to install it with pip:
pip install django

# Use pip3 if the command above doesn't work

pip3 install django
Note: we can always take a look at the packages installed in our venv with pip freeze.
Next, let’s start a Django project with the name config with the command-line utility django-admin.
django-admin startproject config
Here, config is the name of the project, and it’s used as a naming convention to keep all your projects with the same structure. For instance, Django cookiecutter uses this convention name to start a project.
That being said, you can create the project with any other name.
After running these commands, you should have the regular file structure of a Django project. You can check it with the command-line utility tree, or with any file manager.
Note: if you can’t run tree you’ll need to install it.
$ tree config/
└── config
    ├── config
    │   ├── asgi.py
    │   ├── __init__.py
    │   ├── settings.py
    │   ├── urls.py
    │   └── wsgi.py
    └── manage.py
Now let’s enter the project folder with cd, and run the server to check everything is correctly set up:
cd config/

python manage.py runserver
You’ll see a warning message pointing out that there are unapplied migrations. This is a totally normal message, and we’ll learn how to run migrations in the “Creating the Photo Model” section.
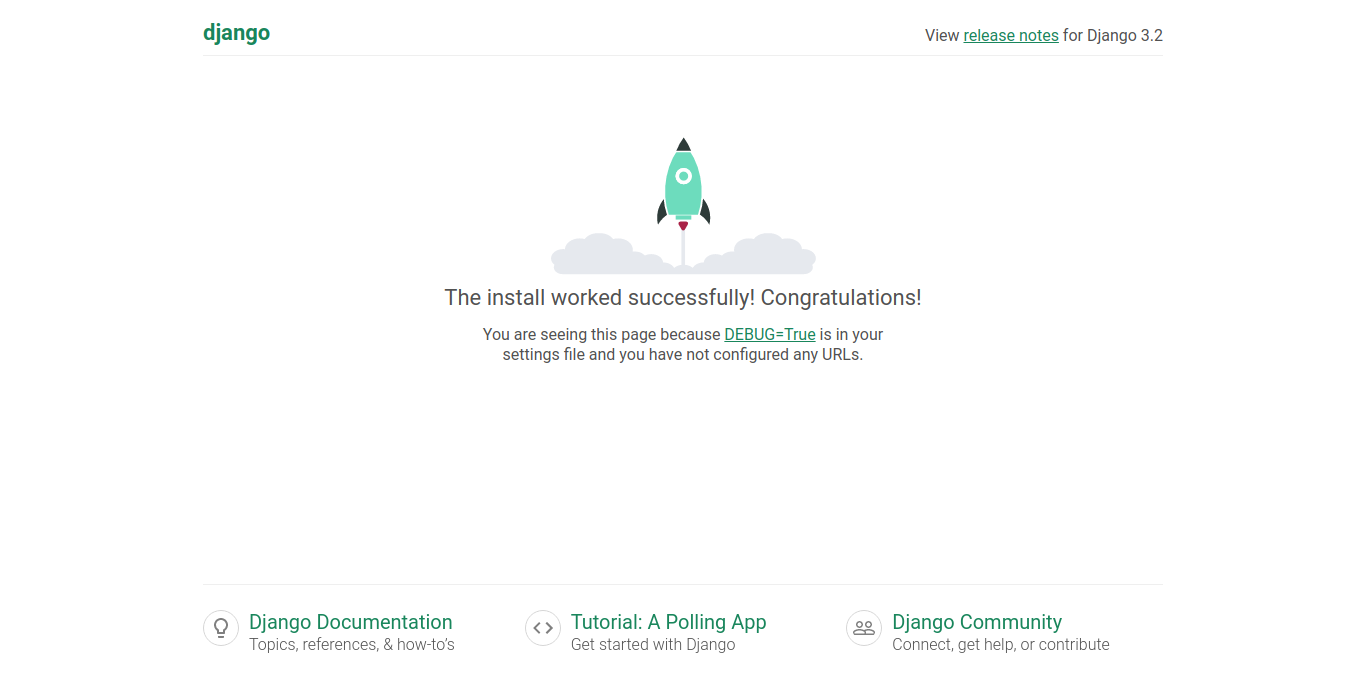
Now, visit localhost:8000 in your browser. You should see the iconic Django congratulations page.
Starting the Photo-sharing App
The manage.py file has the exact same capabilities as django-admin, so we’ll use it many times during this tutorial.
Its location is in the root folder of the project, and each time we want to run a command with it, we need to enter the project directory.
Remember to always list the files of the directory you’re in with ls, to check if we’re in the correct spot:
$ ls
Another-files.. manage.py
With these tips in mind, it’s time to start the main app of the project. To do this we open a new shell (so the local server is still running), and use the manage.py with the command startapp.
Note: each time we open a new shell session, we’ll need to activate the virtual environment again.
source .venv/bin/activate
cd config
python manage.py startapp photoapp
In this case, the name of the app is photoapp. Once again, you can create it with whatever name you want.
Every time we create an app we must install it. We can do this in the config/settings.py file by adding photoapp to the INSTALLED_APPS variable:
# config/settings.py

INSTALLED_APPS = [
    'django.contrib.admin',
    ...

    # Custom apps
    'photoapp',
]
Next, we’ll enter the app directory and create an empty urls.py file. We can do this by running touch, or by creating it with a graphical file manager:
cd photoapp/

touch urls.py
Lastly, let’s include all the URL patterns of the photo-sharing app in the overall project. To accomplish this, we’ll use the django.urls.include function:
# config/urls.py

from django.urls import path, include # Import this function

urlpatterns = [
    path('admin/', admin.site.urls),
    # Main app
    path('', include('photoapp.urls')),
]
The code above will include all the URL patterns of the photoapp/urls.py to the project.
If you take a look at the shell in which the server is running, you’ll see an error:
raise ImproperlyConfigured(msg.format(name=self.urlconf_name)) ....
That’s because we haven’t created the urlpatterns list inside the photopp/urls.py file.
To solve this, create an empty list named urlpatterns. We’re going to populate that variable later with Django paths:
# photoapp/urls.py

# Empty patterns
urlpatterns = [

]
Note: the advantage of using this approach is that we can make the photoapp reusable, by including all the code needed inside of it.
Creating the Photo Model
In this section, we’re going to build the database schema of our application. For this purpose, we’ll use the Django ORM.
The Django ORM allows the creation and management of database tables without the need to use SQL manually.
When we write a model, it represents a database table, and each attribute inside it represents a column.
Since we’ll use the Django built-in authentication system, we can start focusing on the app’s core functionality. That way, we avoid building a custom user management system.
Before starting, we’re going to install some third-party packages, django-taggit and Pillow. We can do so with the following command:
pip install django-taggit Pillow
django-taggit is a Django application, so we need to install it as we did with the photoapp:
# config/settings.py
INSTALLED_APPS = [
    ...

    # 3rd party apps
    'taggit',

    # Custom apps
    'photoapp',
]

# Django taggit

TAGGIT_CASE_INSENSITIVE = True
The TAGGIT_CASE_INSENSITIVE variable configures the tags to be case insensitive. That means PYTHON and python will be the same.
Let’s define the Photo model, which will be the main model of the app. Open the photoapp/models.py file and use the following code:
# photoapp/models.py
from django.db import models

from django.contrib.auth import get_user_model

from taggit.managers import TaggableManager

class Photo(models.Model):

    title = models.CharField(max_length=45)

    description = models.CharField(max_length=250)

    created = models.DateTimeField(auto_now_add=True)

    image = models.ImageField(upload_to='photos/')

    submitter = models.ForeignKey(get_user_model(), on_delete=models.CASCADE)

    tags = TaggableManager()

    def __str__(self):
        return self.title
In the above code block, we’ve defined the Photo model. Let’s see what each field does.
-
The
titlefield is a CharField and it’s limited to 45 characters. -
descriptionis another CharField but with a limit of 250 characters. -
createdis a DateTimeField and, as the name suggests, it stores the date and hour when the photo is created. -
imageis an ImageField. It uploads the images tomedia/photosand stores the URL at which the file is located. Later we’ll see how to set up media files. -
submitteris a ForeignKey, which means it’s a relationship with a user and the photo uploaded. That way we can filter which user uploaded a photo. -
Lastly,
tagsis a TaggableManager and allows us to classify topics by tags.
On the other hand, the __str__ method indicates how each object will be displayed in the admin area. Later, we’ll set up the admin and create our firsts objects.
To create a database based on the model we created, we firstly need to make the migrations and then run them.
Enter the project root directory and use the manage.py script with the following arguments:
python manage.py makemigrations

python manage.py migrate
The makemigrations command will create a migrations file based on the Photo model.
Note: the Migrations are Python scripts that produce changes in the database based on the models.
We can see exactly what’s happening with that migration by opening the photoapp/migrations/0001_initial.py file:
# photoapp/migrations/0001_initial.py
# imports ...
class Migration(migrations.Migration):

    initial = True

    dependencies = [
        ('taggit', '0003_taggeditem_add_unique_index'),
        migrations.swappable_dependency(settings.AUTH_USER_MODEL),
    ]

    operations = [
        migrations.CreateModel(
            name='Photo',
            fields=[
                ('id', models.BigAutoField(auto_created=True, primary_key=True, serialize=False, verbose_name='ID')),
                .....
Tip: never modify migrations file by hand. All the migrations must be auto-generated by Django.
The migrate command creates database tables by running all the migrations.
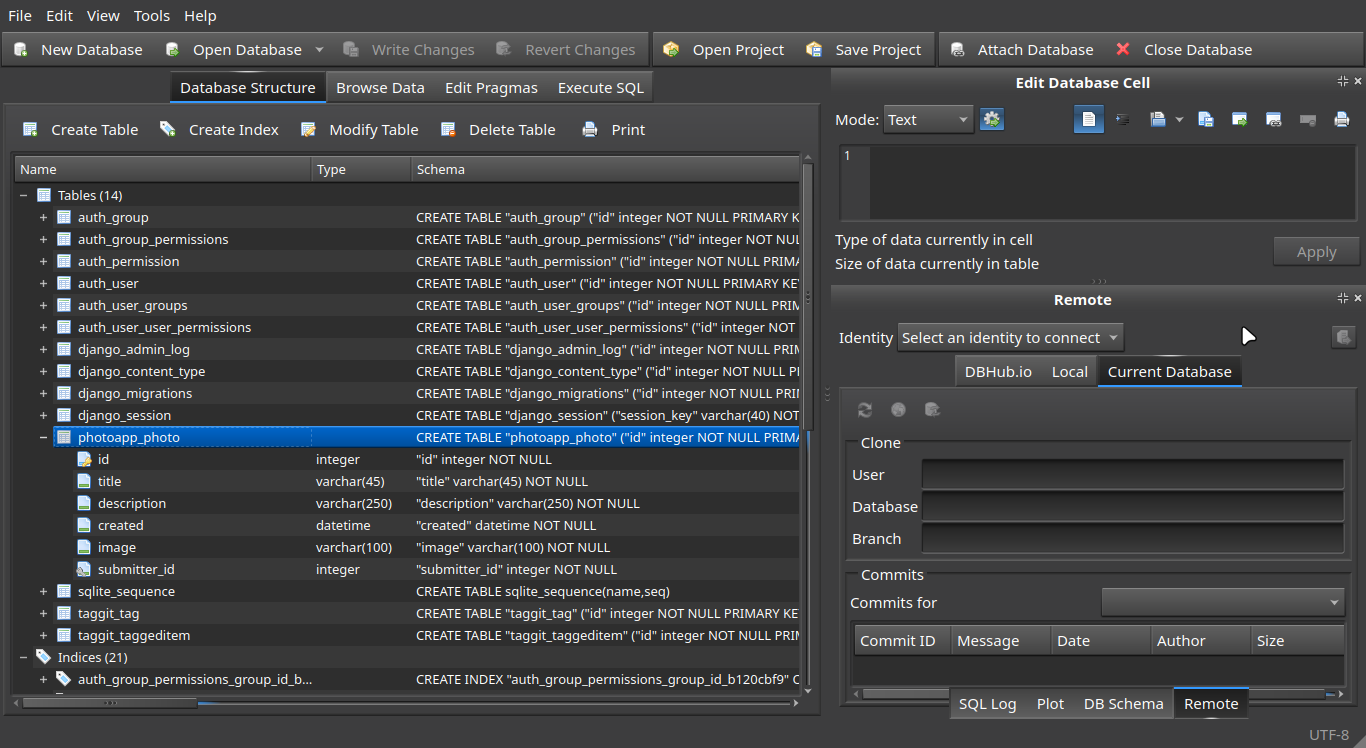
After running these two commands, you should see an SQLite database in the project root folder. If we inspect it with DB Browser, we’ll see all the fields related to the Photo model.
Managing Media Files in Development
The photo-sharing app depends heavily on media files. It’s all about sharing images, it isn’t?
Media files in Django are all the files uploaded by the user. For now, we’re going to set up media files in development, since we’ll only interact with the app through the local server.
To enable media files in development, we create the MEDIA_URL and MEDIA_ROOT variables inside the settings file. Also, we need to modify the urlpatterns of the overall project to serve media files from the local server.
First, we need to edit the config/settings.py file and append the following code at the end of the file:
# config/settings.py

# Other settings ...

MEDIA_URL = '/media/'

MEDIA_ROOT = BASE_DIR / 'media/'
MEDIA_URL is the URL that handles all the media uploaded to the MEDIA_ROOT folder. In this case, the absolute media URL would look like this: http://localhost:8000/media/.
On the other hand, MEDIA_ROOT is the path that points to the folder where all the media will be placed.
Remember that, since we’re using the pathlib library, we’re able to concatenate paths with /.
We can think of MEDIA_ROOT as the physical storage where the images will be uploaded, and MEDIA_URL as the URL that points to that storage.
If we want Django to manage media files, we’ll need to modify the project URLs:
# config/urls.py

# New imports
from django.conf import settings
from django.conf.urls.static import static

urlpatterns = [
    path('admin/', admin.site.urls),
    # Main app
    path('', include('photoapp.urls')),
] + static(settings.MEDIA_URL, document_root=settings.MEDIA_ROOT)
Taking this into account, the absolute URL of the uploaded photos will be: http://localhost:8000/media/photos/. This because we set the upload_to attribute as photos/.
Note: it can be dangerous to accept uploaded files from the user. Check out this list of security considerations.
When working with an app that’s publicly available, we must be careful with media files. We could suffer DoS attacks. Users could also upload malicious content, so the recommended approach is to always use a CDN to solve this kind of problem.
For now, you can forget about security problems, since we’re working with a development project and the ImageField only accepts a predeterminate set of extensions.
You can check those valid extensions by running the following code in the Django shell (making sure your venv is activated):
$ python manage.py shell

>>> from django.core.validators import get_available_image_extensions
>>> get_available_image_extensions()
['blp', 'bmp', 'dib', 'bufr', 'cur', 'pcx', 'dcx', 'dds', 'ps', 'eps', 'fit', 'fits', 'fli', 'flc', 'ftc', 'ftu', 'gbr', 'gif', 'grib', 'h5', 'hdf', 'png', 'apng', 'jp2', 'j2k', 'jpc', 'jpf', 'jpx', 'j2c', 'icns', 'ico', 'im', 'iim', 'tif', 'tiff', 'jfif', 'jpe', 'jpg', 'jpeg', 'mpg', 'mpeg', 'mpo', 'msp', 'palm', 'pcd', 'pdf', 'pxr', 'pbm', 'pgm', 'ppm', 'pnm', 'psd', 'bw', 'rgb', 'rgba', 'sgi', 'ras', 'tga', 'icb', 'vda', 'vst', 'webp', 'wmf', 'emf', 'xbm', 'xpm']
Testing Models with Django Admin
Django admin is a built-in interface where administrative users can make CRUD operations with the registered models of the project.
Now that we’ve created the photo model and set up the media files, it’s time to create our first Photo object through the admin page.
To do this, we have to register the Photo model into the admin page. Let’s open the photoapp/admin.py, import the Photo model, and pass it as a parameter to the admin.site.register function:
# photoapp/admin.py

from django.contrib import admin
from .models import Photo # We import the photo model

# Register your models here.
admin.site.register(Photo)
Next, it’s time to create a superuser to be able to access the admin page. We can do this with the following command:
python manage.py createsuperuser

Username: daniel
Email address:
Password:
Password (again):
Superuser created successfully
You can leave the superuser without email for now, since we’re using the default auth user.
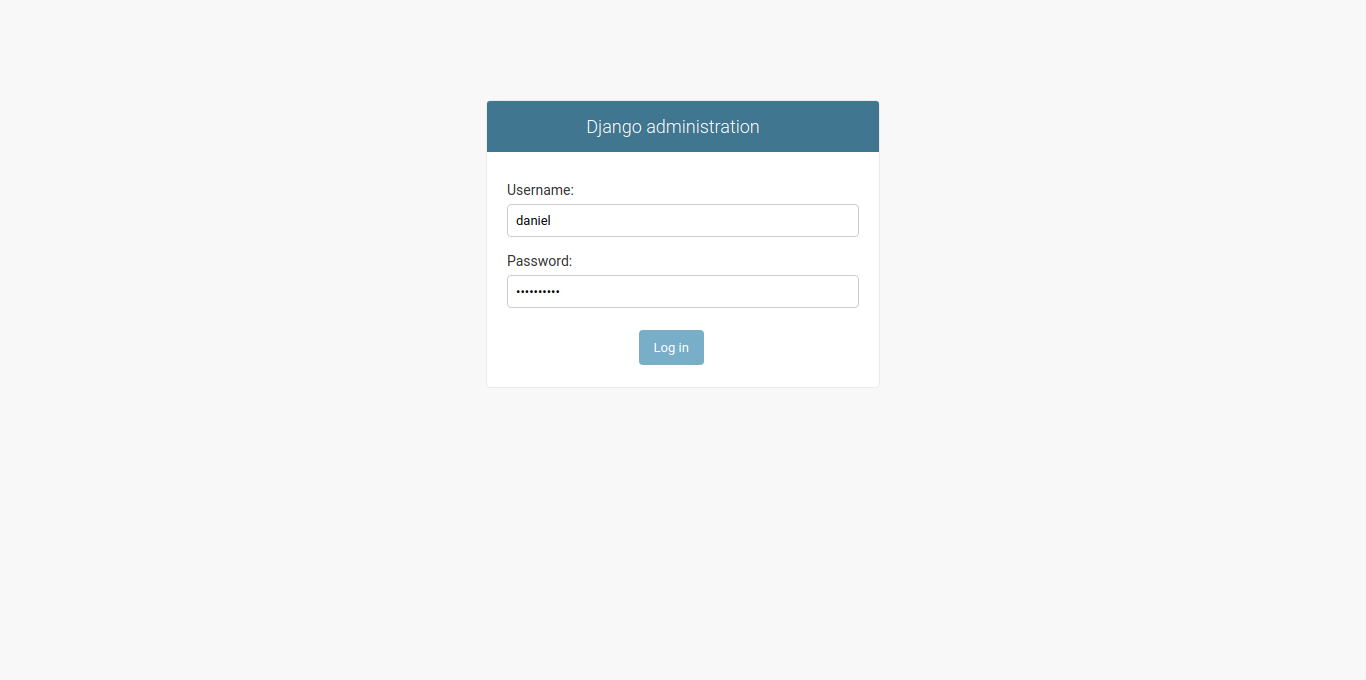
After creating the superuser, jump into the browser and navigate to http://localhost:8000/admin.
It’ll redirect you to the login page, where you’ll need to fill in your credentials (those you created the user with).
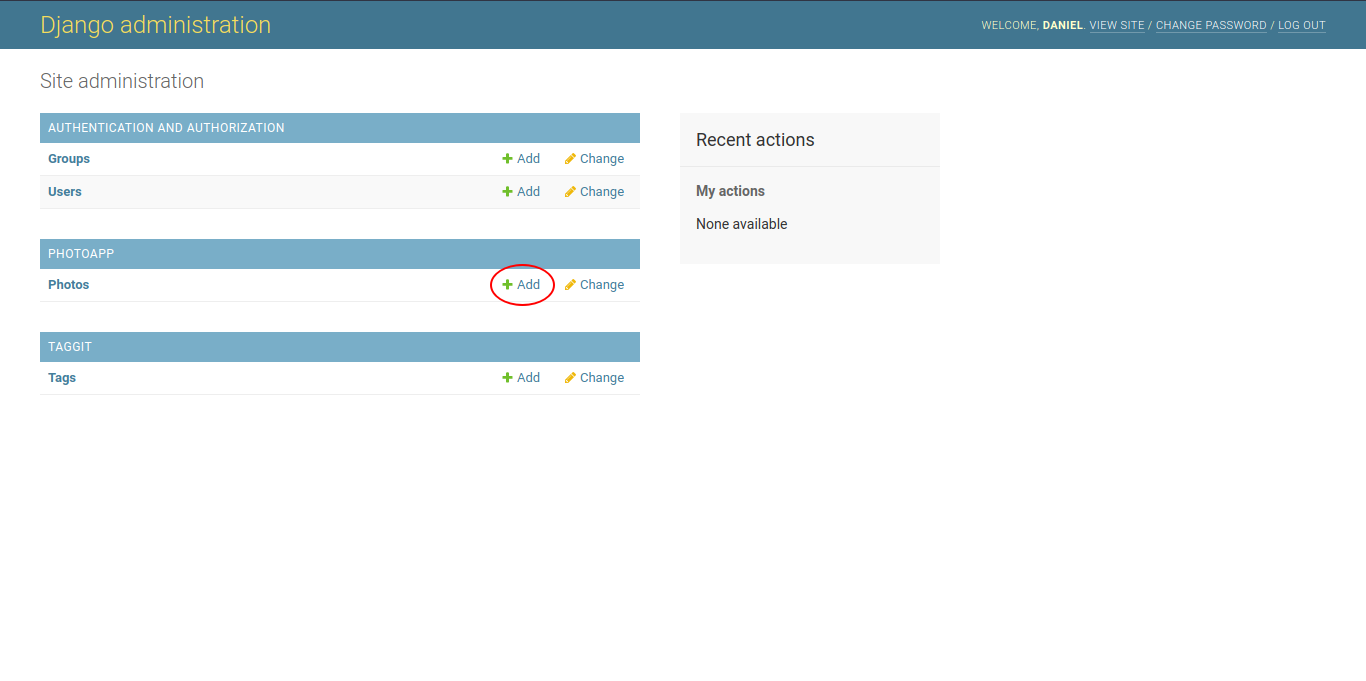
After entering our credentials, we’ll have access to a simple dashboard, where we can start to create photos. Just click the Photos section and then the Add button.
Here’s what filling the creation fields looks like.
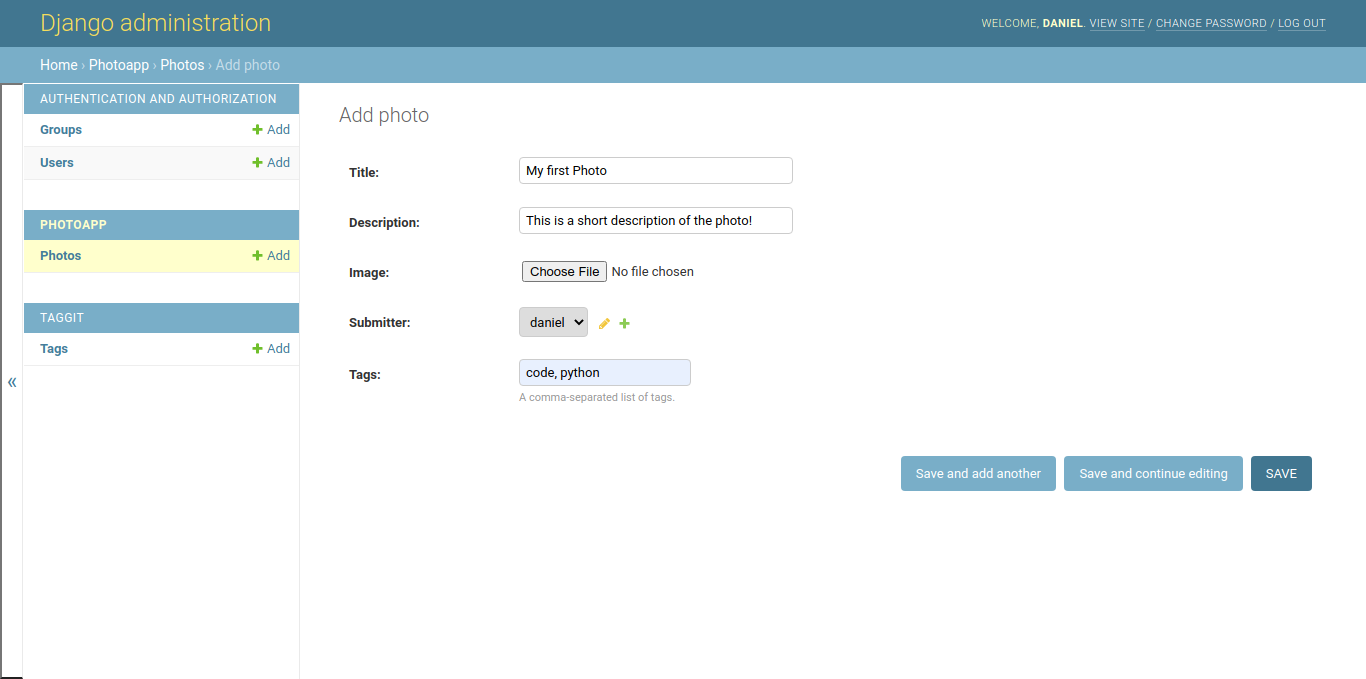
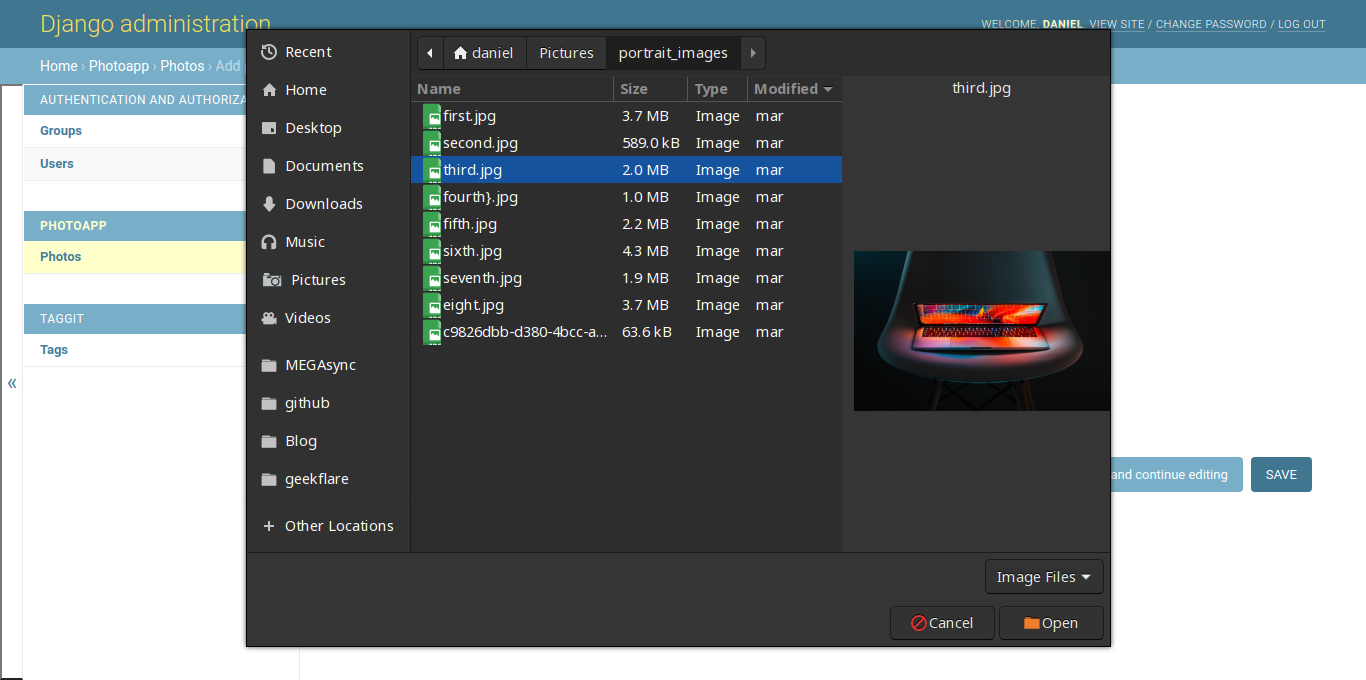
Uploading an image can be done simply with drag-and-drop.
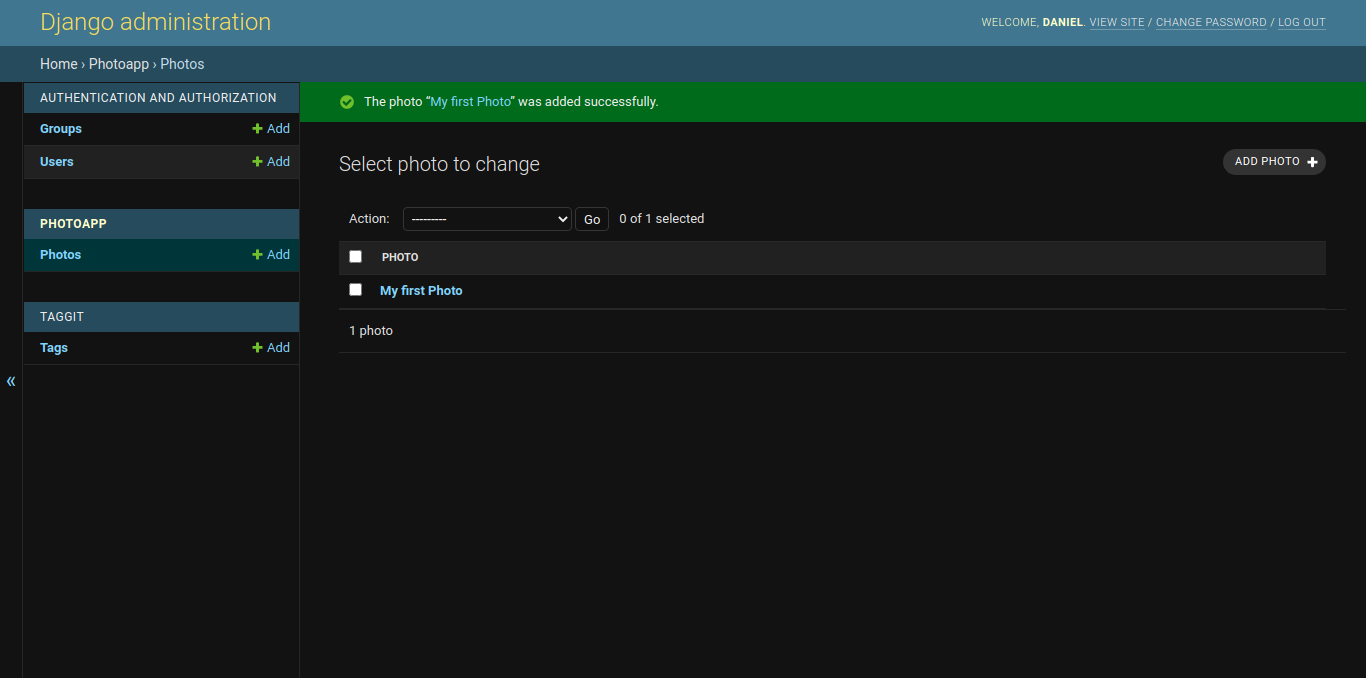
After hitting the Save button, we’ll see a dashboard with all the created photos.
Handling Web Responses with Views
We’ve defined the database schema of a working app, and even created some objects with the Django admin. But we haven’t touched the most important part of any web app — the interaction with the user!
In this section, we’re going to build the views of the photo-sharing app.
Broadly speaking, a view is a Python callable (Class or function) that takes a request and returns a response.
According to the Django documentation, we should place all of our views in a file named views.py inside each app. This file has already been created when we started the app.
We have two main ways to create views: using function-based views (FBVs) or class-based views (CBVs).
CBVs are the best way to reuse code — by applying the power of Python class inheritance into our views.
In our application, we’ll be using generic views, which allow us to create simple CRUD operations by inheriting Django pre-built classes.
Before starting, we’ll import all the stuff we need to build the views. Open the photoapp/views.py file and paste the code below:
# photoapp/views.py
from django.shortcuts import get_object_or_404

from django.core.exceptions import PermissionDenied

from django.views.generic import ListView, DetailView, CreateView, UpdateView, DeleteView

from django.contrib.auth.mixins import LoginRequiredMixin, UserPassesTestMixin

from django.urls import reverse_lazy

from .models import Photo
Let’s see what we’re importing here:
-
get_object_or_404is a shortcut that allows us to retrieve an object from the database, preventing aDoesNotExistserror and raising a HTTP 404 exception. -
PermissionDeniedraise an HTTP 403 exception when called. -
The pre-built
genericviews help us to build CRUD functionality with few lines of code. -
We’ll use the
LoginRequiredMixinandUserPassesTestMixinto assert the users have the right permissions when accessing to a view. -
reverse_lazyis used in CBVs to redirect the users to a specific URL. -
We need to import
Photoin order to retrieve and update database rows (photo objects).
Note: you can access the views.py file on GitHub.
Photo Lists Views
The generic List View will help us to display many objects of a Model. We’ll compare it with the DetailView later.
In this section, we’re going to build two main Views. The PhotoListView passes as context all the photos uploaded by any user, and the PhotoTagListView takes a tag slug as the argument to show up the photos.
The code below defines the PhotoListView inheriting from ListView:
# photoapp/views.py

class PhotoListView(ListView):

    model = Photo

    template_name = 'photoapp/list.html'

    context_object_name = 'photos'
First, we inherit the ListView and therefore receive all the behavior from that class.
Remember, you can always check the source code of any Django class in the official GitHub repo.
Then we define the model we’re reading the data from, the template we’re going to use (we’ll build the front end later), and the name of the context object we can use to access the data in the template.
Now, it’s time to declare the PhotoTagListView. This view is a little bit more complex, since we have to play with the get_queryset() and get_context_data() methods:
# photoapp/views.py
class PhotoListView(ListView): ...

class PhotoTagListView(PhotoListView):

    template_name = 'photoapp/taglist.html'

    # Custom method
    def get_tag(self):
        return self.kwargs.get('tag')

    def get_queryset(self):
        return self.model.objects.filter(tags__slug=self.get_tag())

    def get_context_data(self, **kwargs):
        context = super().get_context_data(**kwargs)
        context["tag"] = self.get_tag()
        return context
Here, we’re inheriting all the attributes of the PhotoListView. That means we’re using the same model and context_object_name, but we’re changing the template_name.
This view may seem the same as the previous one, except that we’re dealing with custom methods.
We’re creating a custom method get_tag to receive the tag slug from the response Django is going to take and return it. We do it this way because we’re going to use that function in two places.
The get_queryset method is set to return self.model.objects.all() by default. We’ve modified it to return only the photo objects tagged with the slug passed to the URL.
Finally, the get_context_data was modified to also return the tag passed to the URL. This is because we’ll display it later in a template.
Photo Detail View
This view is a simple DetailView that displays all the data related to a unique photo. This includes the title, description, and tags of the desired photo:
# photoapp/views.py

class PhotoListView(ListView): ...
class PhotoTagListView(PhotoListView): ...

class PhotoDetailView(DetailView):

    model = Photo

    template_name = 'photoapp/detail.html'

    context_object_name = 'photo'
We do pretty much the same process as we did with the list views. The only difference is that we’re returning a single object instead of many, and using a different template.
Create photo view
This view allows users to create a photo object only if they’re logged in. We don’t want anonymous users to be able to upload content to our platform. That would be scary!
The simplest way to protect this functionality with Django is to create a class that inherits from CreateView and LoginRequiredMixin. The LoginRequiredMixin tests if a user is logged in. If the user isn’t logged in, they’re redirected to the login page (which we’ll build later):
# photoapp/views.py

class PhotoListView(ListView): ...
class PhotoTagListView(PhotoListView): ...
class PhotoDetailView(DetailView): ...

class PhotoCreateView(LoginRequiredMixin, CreateView):

    model = Photo

    fields = ['title', 'description', 'image', 'tags']

    template_name = 'photoapp/create.html'

    success_url = reverse_lazy('photo:list')

    def form_valid(self, form):

        form.instance.submitter = self.request.user

        return super().form_valid(form)
In this view, Django will create a form with the title, description, image and tags fields.
We’re also using the sucess_url attribute. Users will be redirected to the photo dashboard if the photo creation was successful.
If we take a closer look at the form_valid method, we’ll notice that it’s setting up the user that’s making the request as the submitter of the photo form.
Update and delete photo views
We want the users to be able to modify or delete a photo only if they’re the submitters.
Handling conditional authentication can be difficult if we’re using CBVs. However, we can make use of TestMixins to accomplish this task.
Let’s create a test mixin UserIsSubmitter that checks if the user that’s trying to update or delete a photo actually submitted it:
# photoapp/views.py

class PhotoListView(ListView): ...
class PhotoTagListView(PhotoListView): ...
class PhotoDetailView(DetailView): ...
class PhotoCreateView(LoginRequiredMixin, CreateView): ...

class UserIsSubmitter(UserPassesTestMixin):

    # Custom method
    def get_photo(self):
        return get_object_or_404(Photo, pk=self.kwargs.get('pk'))

    def test_func(self):

        if self.request.user.is_authenticated:
            return self.request.user == self.get_photo().submitter
        else:
            raise PermissionDenied('Sorry you are not allowed here')
First, we’ve created a custom method get_photo that returns a Photo object, with the primary key specified in the URL. If the photo doesn’t exist, it raises an HTTP 404 error.
Then we’ve defined the test function. It will only return true if the user is logged in and is the photo submitter.
If the user isn’t logged in, it’ll raise a PermissionDenied exception.
On the other hand, the PhotoUpdateView and PhotoDeleteView are children of the mixin we created, but also UpdateView and DeleteView respectively:
# photoapp/views.py

class PhotoListView(ListView): ...
class PhotoTagListView(PhotoListView): ...
class PhotoDetailView(DetailView): ...
class PhotoCreateView(LoginRequiredMixin, CreateView): ...
class UserIsSubmitter(UserPassesTestMixin): ...

class PhotoUpdateView(UserIsSubmitter, UpdateView):

    template_name = 'photoapp/update.html'

    model = Photo

    fields = ['title', 'description', 'tags']

    success_url = reverse_lazy('photo:list')

class PhotoDeleteView(UserIsSubmitter, DeleteView):

    template_name = 'photoapp/delete.html'

    model = Photo

    success_url = reverse_lazy('photo:list')
The PhotoUpdateView inherits the test function from the UserIsSubmitter mixin and the update functionality from the UpdateView.
The fields attribute defines the fields the user will be able to edit. We don’t want the image to be changed, and neither the creation date or the submitter.
On the other hand, the PhotoDeleteView also inherits the test function but deletes the photo instead of updating it.
Both views redirect the user to the list URL if everything went well.
That’s all for the views. Now, let’s create a simple authentication app and complete the project.
URL Patterns
We’re almost there. We’ve already defined the database schema and how the user will create and update photos. Let’s see how to handle the URL configuration the photo-sharing app.
Do you remember when we created an empty urlpatterns variable at the start of the project? It’s time to populate it!
First, let’s import all the views and functions we need:
# photoapp/urls.py

from django.urls import path

from .views import (
    PhotoListView,
    PhotoTagListView,
    PhotoDetailView,
    PhotoCreateView,
    PhotoUpdateView,
    PhotoDeleteView
)
The path function receives two arguments, route and view, and an optional argument, name, which is used as part of the namespace:
# photoapp/urls.py
app_name = 'photo'

urlpatterns = [
    path('', PhotoListView.as_view(), name='list'),

    path('tag/<slug:tag>/', PhotoTagListView.as_view(), name='tag'),

    path('photo/<int:pk>/', PhotoDetailView.as_view(), name='detail'),

    path('photo/create/', PhotoCreateView.as_view(), name='create'),

    path('photo/<int:pk>/update/', PhotoUpdateView.as_view(), name='update'),

    path('photo/<int:pk>/delete/', PhotoDeleteView.as_view(), name='delete'),
]
Explaining this configuration, the app_name variable declares the namespace of the app.
That means that whether we’re using the reverse function in views, or the {% url %} tag in templates, we’ll need to use the following namespace:
photo:<<url_name>>
If you want to know more about how the Django URL dispatcher works, feel free to read the documentation.
Authentication System
In this project, we’re going to use the default Django authentication system.
This is because our main focus is to have a functional application as soon as possible. However, we’ll create a custom app, because we want to add sign-up functionality to the project.
At first, we create a users app and do all the same installation process as we did with the photoapp:
python manage.py startapp users

# config/settings.py

INSTALLED_APPS = [
    ...

    # 3rd party apps
    'taggit',

    # Custom apps
    'photoapp',
    'users',
]
Next, we create the urls.py file as we did with the photo app:
cd users/
touch urls.py
Then we include the user’s URLs in the overall project:
# config/urls.py

urlpatterns = [
    path('admin/', admin.site.urls),
    # Main app
    path('', include('photoapp.urls')),
    # Auth app
    path('users/', include('users.urls')),

] + static(settings.MEDIA_URL, document_root=settings.MEDIA_ROOT)
Then we write a SignUpView to allow the user to register through the site:
# users/views.py

from django.views.generic import CreateView

from django.contrib.auth import authenticate, login

from django.contrib.auth.forms import UserCreationForm

from django.urls import reverse_lazy

class SignUpView(CreateView):

    template_name = 'users/signup.html'

    form_class = UserCreationForm

    success_url = reverse_lazy('photo:list')

    def form_valid(self, form):
        to_return = super().form_valid(form)

        user = authenticate(
            username=form.cleaned_data["username"],
            password=form.cleaned_data["password1"],
        )

        login(self.request, user)

        return to_return
This view is a CreateView and works with the built-in UserCreationForm to create a new user.
We’re using the form_valid method to log in the users before redirecting them to the photo dashboard.
We’ll create a login view because we want to use a custom template to display the login page. To do this, we’ll import the built-in LoginView and inherit from it:
# Previous imports
from django.contrib.auth.views import LoginView

class SignUpView(CreateView): ...

class CustomLoginView(LoginView):

    template_name = 'users/login.html'
Finally, it’s time to create the URL routing:
# users/urls.py
from django.urls import path

from django.contrib.auth.views import LogoutView

from .views import SignUpView, CustomLoginView

app_name = 'user'

urlpatterns = [
    path('signup/', SignUpView.as_view(), name='signup'),
    path('login/', CustomLoginView.as_view(), name='login'),
    path('logout/', LogoutView.as_view(), name='logout'),
]
Once again, we’re using the app_name variable. So the namespace of the user application would be like this:
user:<<url_name>>
We’re setting up three URLs. The signup/ and login/ are using the custom views we created, but the logout/ URL is using the Django built-in LogoutView.
Before continuing, let’s configure the authentication redirects in the config/settings.py file:
# Other settings ...
USE_TZ = True

# Django Authentication
LOGIN_URL = 'user:login'
LOGIN_REDIRECT_URL = 'photo:list'

LOGOUT_REDIRECT_URL = 'photo:list'
This tells Django that the login URL is the custom user login URL, and that when the users are logged in they must be redirected to the photo dashboard.
The Front End
After building the back end (what the user can’t see) with Django, it’s time to build the front end (what the user does see).
For that purpose, we’re going to use the Django template language and Bootstrap 5. This allows us to generate HTML dynamically and to produce a different output depending on the state of our database. We can save a lot of code by working with template inheritance. Using Bootstrap 5 means we won’t be using static files.
Writing the base template
In this section, we’re going to build the base.html file, which is the template all the others will inherit from.
To do this we must change the DIRS key inside the TEMPLATES variable located in the settings file:
# config/settings.py

TEMPLATES = [
    {
        # Options ..
        'DIRS': [BASE_DIR / 'templates'],
        'APP_DIRS': True,
        # More options
    },
]
The default behavior of Django is to search for template files inside the templates/ folder of each app.
For example, the templates of the photo-sharing app can be found in photoapp/templates. It’s the same story for the users app (users/templates).
By assigning the DIRS key to [BASE_DIR / 'templates'], we’re telling Django to also search for templates inside of a folder named templates.
Create a directory templates at the root of the project (where the manage.py file is located) and touch the base.html and navbar.html templates:
ls
# manage.py

mkdir templates && cd templates
touch base.html navbar.html
Concluding the templates of our project can be found in any of these three directories:
.
├── photoapp
│   └── templates
│       └── photoapp
├── templates
└── users
    └── templates
        └── users
Remember that you can always check the project structure on the GitHub repository.
Inside the base.html template, we’re going to set up the basic HTML structure, some meta tags, links to the bootstrap CDN, and blocks that other templates will use:
<!-- templates/base.html -->
<!DOCTYPE html>
<html lang="en">
  <head>
    <meta charset="UTF-8" />
    <meta http-equiv="X-UA-Compatible" content="IE=edge" />
    <meta name="viewport" content="width=device-width, initial-scale=1.0" />
    <title>Django Photo Sharing app</title>
    <link
      href="https://cdn.jsdelivr.net/npm/bootstrap@5.0.0/dist/css/bootstrap.min.css"
      rel="stylesheet"
      integrity="sha384-wEmeIV1mKuiNpC+IOBjI7aAzPcEZeedi5yW5f2yOq55WWLwNGmvvx4Um1vskeMj0"
      crossorigin="anonymous"
    />

    <link
      rel="stylesheet"
      href="https://cdnjs.cloudflare.com/ajax/libs/font-awesome/5.15.3/css/all.min.css"
      integrity="sha512-iBBXm8fW90+nuLcSKlbmrPcLa0OT92xO1BIsZ+ywDWZCvqsWgccV3gFoRBv0z+8dLJgyAHIhR35VZc2oM/gI1w=="
      crossorigin="anonymous"
    />
  </head>
  <body>
    {% include 'navbar.html' %}

    <div class="container mt-4">
    {% block body %}

    {% endblock body %}

    </div>

    <script
      src="https://cdn.jsdelivr.net/npm/bootstrap@5.0.0/dist/js/bootstrap.bundle.min.js"
      integrity="sha384-p34f1UUtsS3wqzfto5wAAmdvj+osOnFyQFpp4Ua3gs/ZVWx6oOypYoCJhGGScy+8"
      crossorigin="anonymous"
    ></script>
  </body>
</html>
The {% include %} tag (as the name suggests) includes all the code of the selected template inside base.html file.
Therefore, all the code present inside the navbar.html will be placed at the start of the body.
Note: there’s a lot of HTML and Bootstrap here. Feel free to copy it all, since it’s not the main focus of the tutorial.
Below is the HTML template code for the navbar. This navbar will contain some logic to show up a link to the login page, in case the user isn’t logged in:
<!-- templates/navbar.html -->
<nav class="navbar navbar-expand-md navbar-dark bg-dark">
  <div class="container-fluid">
    <a class="navbar-brand" href="{% url 'photo:list' %}">Photo App</a>
    <button
      class="navbar-toggler"
      type="button"
      data-bs-toggle="collapse"
      data-bs-target="#navbarTogglerDemo02"
      aria-controls="navbarTogglerDemo02"
      aria-expanded="false"
      aria-label="Toggle navigation"
    >
      <span class="navbar-toggler-icon"></span>
    </button>
    <div
      class="collapse navbar-collapse flex-row-reverse"
      id="navbarTogglerDemo02"
    >
      <ul class="navbar-nav">
        {% if user.is_authenticated %}

        <li class="nav-item">
          <a class="nav-link active" href="{% url 'photo:create' %}">Add a photo</a>
        </li>
        <li class="nav-item">
          <a class="nav-link active" href="#">Hi {{user.username}}</a>
        </li>
        {% else %}

        <li class="nav-item">
          <a href="{% url 'user:login' %}" class="btn btn-sm btn-danger"
            >Sign In</a
          >
        </li>
        {% endif %}
      </ul>
    </div>
  </div>
</nav>
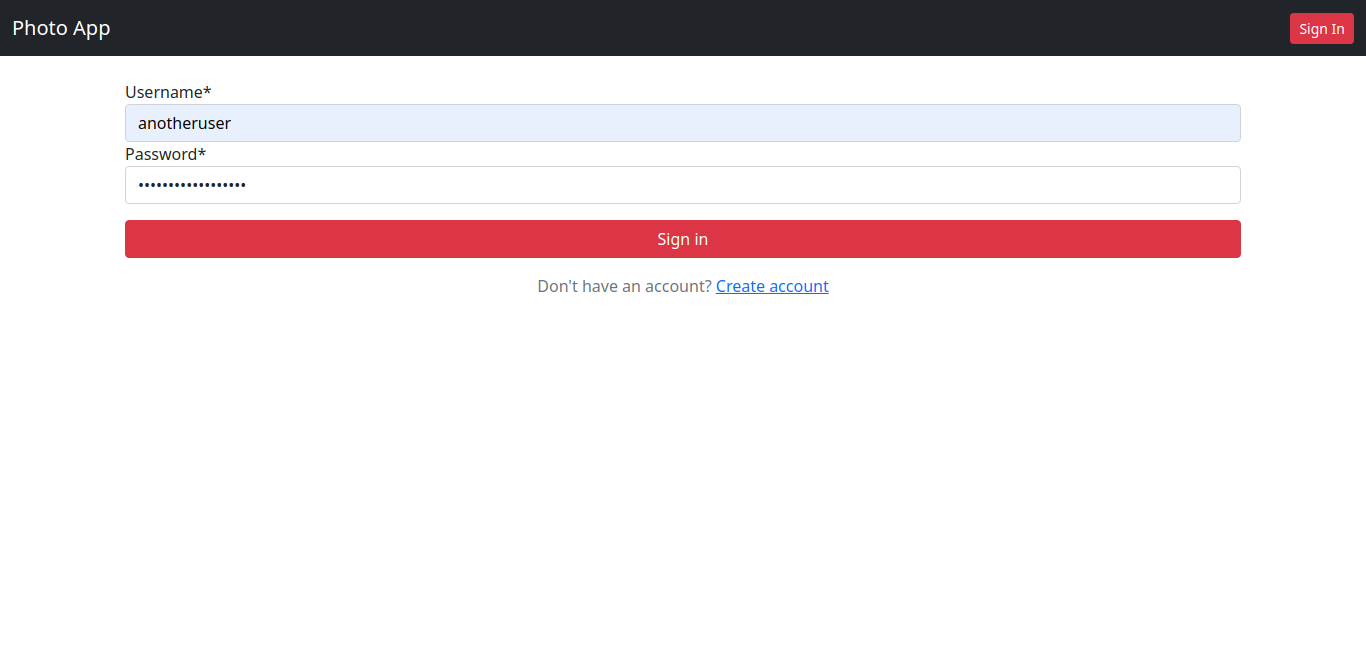
Here’s how the template will be shown when the user is logged in.
![]()
Below is what’s presented when the user isn’t logged in.
![]()
Don’t worry if you get an error in your browser. We haven’t built the photo sharing templates yet.
Photo-sharing Templates
We’re going to write all the files needed in the photo-sharing app. That includes the templates used to accomplish the CRUD operations.
All of these templates will extend the base.html template and will be located in the photoapp/templates/photoapp directory.
But before working with forms in templates we’ll use Django crispy forms to stylize our app:
pip install django-crispy-forms
Once again, crispy_forms is a Django app, and we need to include it on the INSTALLED_APPS list:
# config/settings.py

INSTALLED_APPS = [
    ...

    # 3rd party apps
    'taggit',
    'crispy_forms',

    # Custom apps
    'photoapp',
    'users',
]

# Indicates the frontend framework django crispy forms will use
CRISPY_TEMPLATE_PACK = 'bootstrap4'
We use the template pack of Bootstrap 4, because the Bootstrap form classes are compatible between the 4th and 5th version (at the time of writing).
You may remember we used the following template names on the photoapp/views.py:
'photoapp/list.html'
'photoapp/taglist.html'
'photoapp/detail.html'
'photoapp/create.html'
'photoapp/update.html'
'photoapp/delete.html'
That means all of these templates will be located in photoapp/templates/photoapp.
To create this folder, go to the photo-sharing app and create a directory templates/, and inside it create another folder named photoapp/:
cd photoapp/
mkdir -p templates/photoapp/
cd templates/photoapp/
Now create all the templates we declared on the views:
touch list.html taglist.html detail.html create.html update.html delete.html
List templates
The list.html will inherit from the base.html template, and therefore all the HTML structure will appear in the source code:
<!-- photoapp/templates/photoapp/list.html -->
{% extends 'base.html' %}

{% block body %}

<div class="row">
  {% for photo in photos %}
  <div class="col-lg-3 col-md-4 col-xs-6">
    <a href="{% url 'photo:detail' photo.id %}" class="d-block mb-4 h-100">
      <img src="{{photo.image.url}}" class="img-fluid rounded" alt="{{photo.title}}" />
    </a>
  </div>
  {% endfor %}
</div>

{% endblock body %}
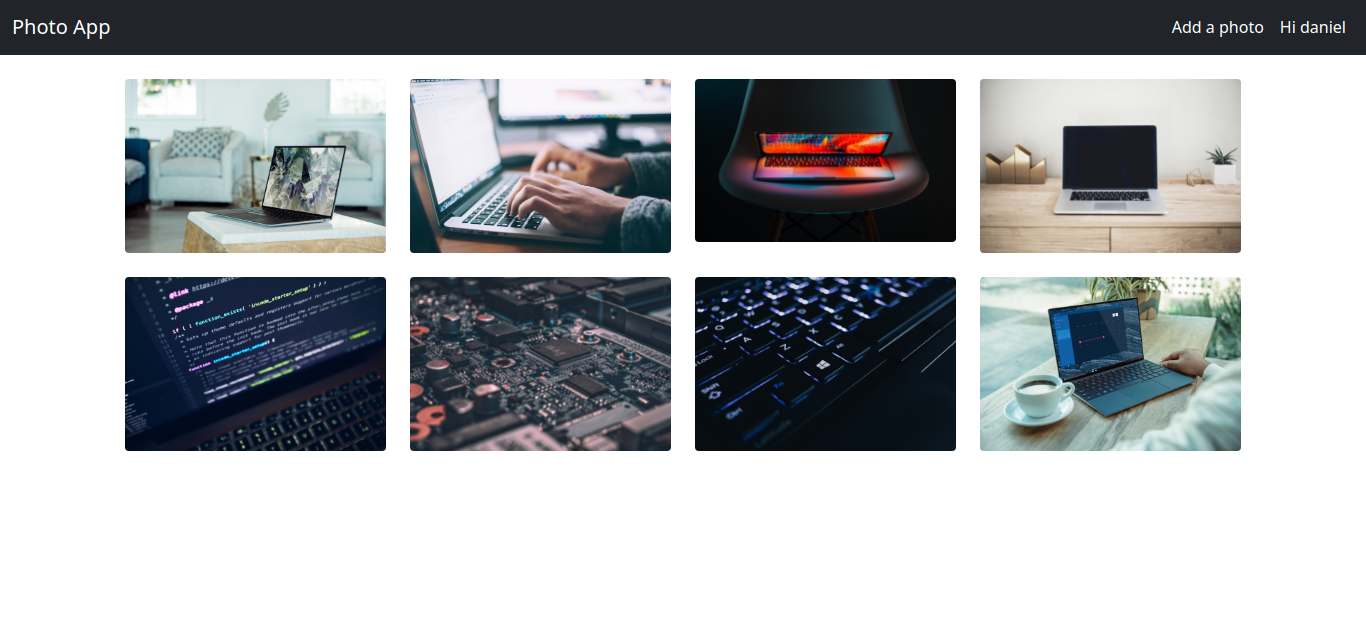
We’re using the template tag for loop, which iterates over the photos and displays them with Bootstrap rows and columns.
Don’t forget to create multiple photo objects in the Django admin.
Visit localhost:8000/ to see how the template looks.
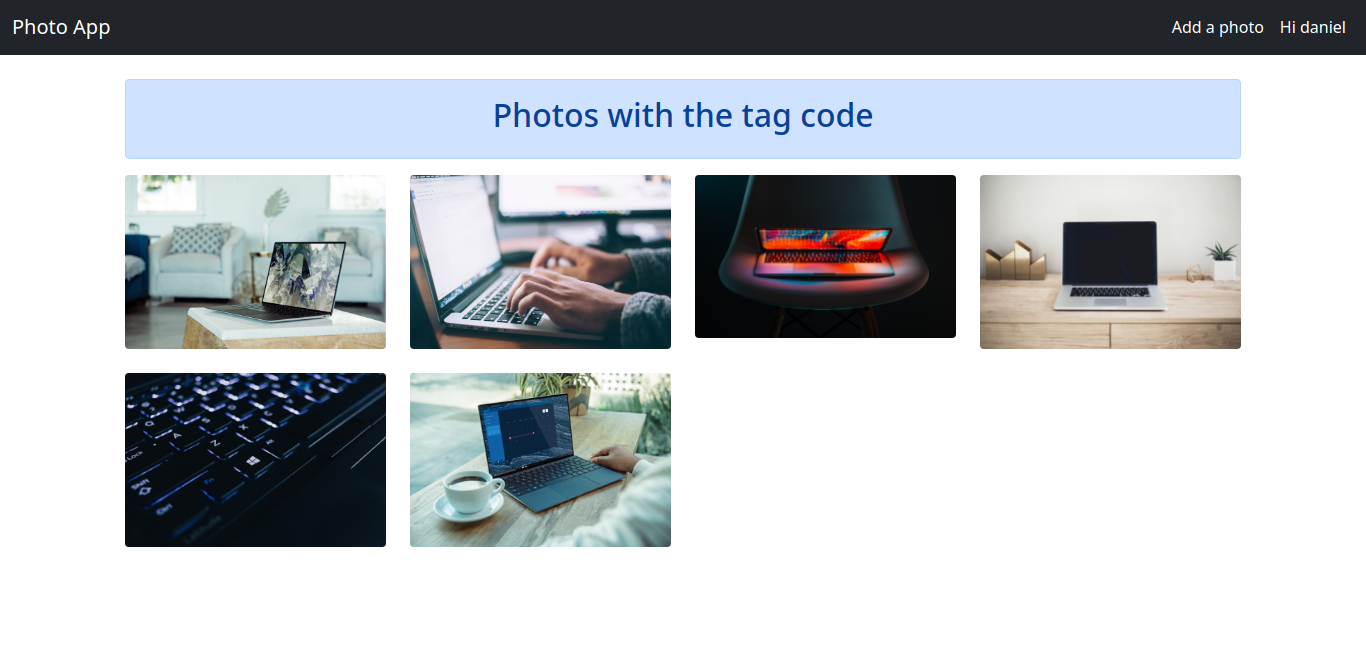
The taglist.html template will inherit from the list.html we just created:
<!-- photoapp/templates/photoapp/taglist.html -->
{% extends 'photoapp/list.html' %}

{% block body %}

<div class="alert alert-primary">
    <h2 class="text-center">Photos with the tag {{tag}}</h2>
</div>

{{ block.super }}

{% endblock body %}
We’re just modifying a bit this template. That’s why we’re calling {{ block.super }}, which contains all the code inside the body block of the list.html template.
Create a couple of objects with the tag code before continuing.
Go to localhost:8000/tag/code/, where the code is the slug of the tag.
Remember that the taglist URL has the following form:
'localhost://8000/tag/<slug:tag>/'
Here, <slug:tag> refers the name of the tag.
Detail photo template
Let’s edit the detail.html template to be able to see our photos in detail:
<!-- photoapp/templates/photoapp/detail.html -->
{% extends 'base.html' %}

{% block body %}
<div class="mx-auto">
  <h1 class="text-center">{{ photo.title }}</h1>
  <p class="text-center fw-light">Uploaded on: {{photo.created}} <br> By {{photo.submitter.username}}</p>
  {% if user == photo.submitter %}
    <p class="text-center">
      <span><a href="{% url 'photo:update' photo.id %}" class="text-primary px-2">Update</a></span>
      <span><a href="{% url 'photo:delete' photo.id %}" class="text-danger px-2">Delete</a></span>
    </p>
  {% endif %}
</div>
<div class="row pb-5">
  <div class="col-md-8">
    <img src="{{photo.image.url}}" alt="" width="100%" />
  </div>
  <div class="col-md-4">
    <h4>More about this photo:</h4>
    <ul class="list-group list-group-horizontal-lg list-unstyled py-4">
      {% for tag in photo.tags.all %}
        <li><a href="{% url 'photo:tag' tag.slug %}" class="btn btn-sm list-group-item list-group-item-primary">{{tag.name}}</a></li>
      {% endfor %}
    </ul>
    <p>{{ photo.description }}</p>
  </div>
</div>

{% endblock body %}
Let’s see how the template looks before digging into the functionality. Follow localhost:8000/photo/1.

Here, we’re accessing the photo properties from the templates through the dot notation. That’s because photo.submitter.username is equal to daniel.
We implement a little bit of logic to show up the links to update or delete the photo in case the user is also the submitter.
Finally, we show up all the tags of the photo iterating over photo.tags.all.
Create the photo template
The next template will include a crispy form, so that we don’t have to display the forms manually. Django will do that for us:
<!-- photoapp/templates/photoapp/create.html -->
{% extends 'base.html' %}
{% load crispy_forms_tags %}

{% block body %}
<div class="mx-auto">
  <h1 class="mt-3 text-center">Add photo</h1>
</div>
<div class="form-group">
  <form action="" method="post" enctype="multipart/form-data">
    {% csrf_token %}
    {{ form|crispy }}
    <button type="submit" class="btn btn-success mb-3">Add Photo</button>
  </form>
</div>
{% endblock body %}
Each time we use crispy forms, we need to load the tags with {% load crispy_forms_tags %}.
It’s extremely important to include enctype="multipart/form-data", because if we don’t the files won’t be uploaded. Here’s a really good response to the implications of using it in forms.
Every Django form must include a {% csrf_token %} inside. You can learn more about this tag on the “Cross Site Request Forgery protection” page.
Notice how we simply display the form with {{form|crispy}}. If you know what pipes are in Linux, we’re doing exactly that by redirecting the form provided by the view to the crispy filter.
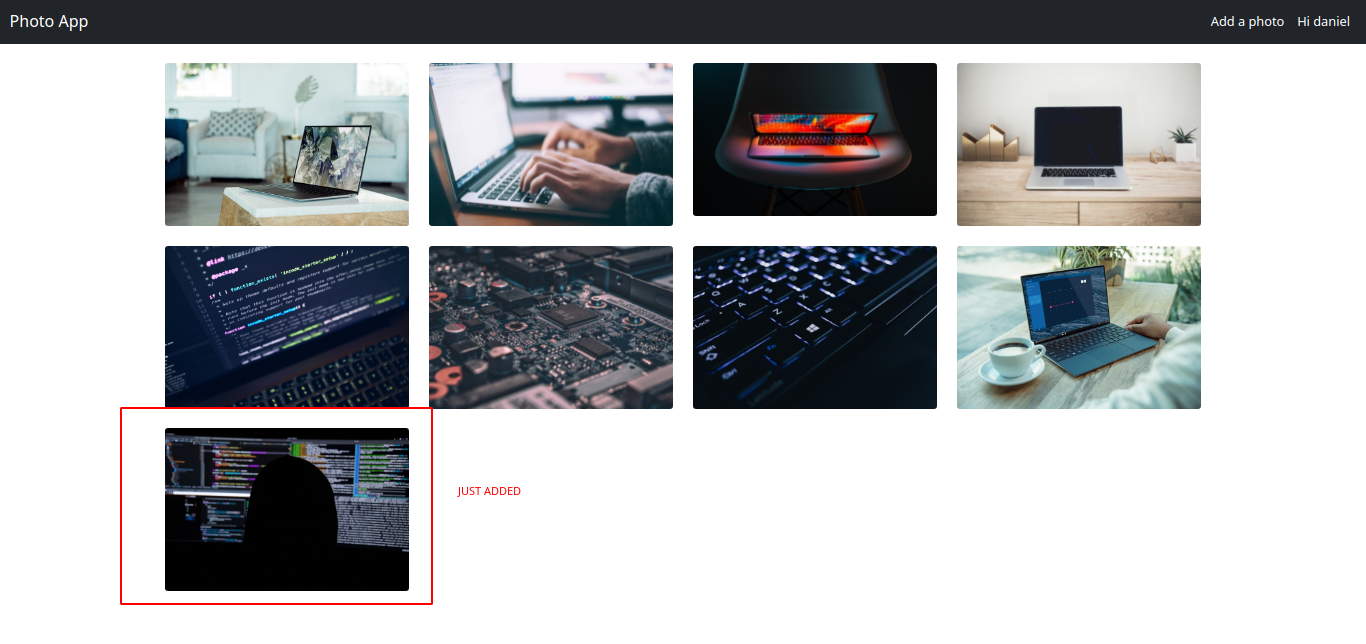
Go to the add photo URL to check if the photo is uploaded.
If everything went well, we should see the added photo in the dashboard.
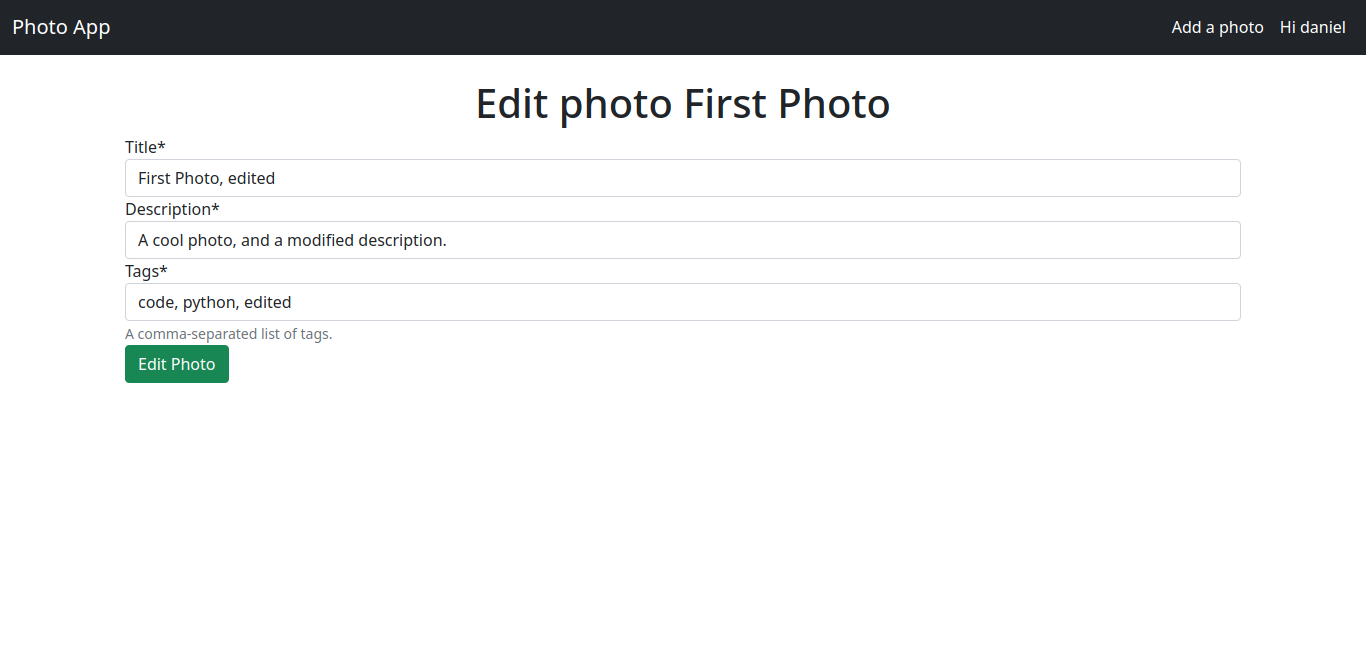
Update and delete templates
Let’s finish the photo-sharing app before heading to the authentication templates.
The following update template is a simple form where the user can update the title, description, and tags of the photo:
<!-- photoapp/templates/photoapp/update.html -->
{% extends 'base.html' %}
{% load crispy_forms_tags %}

{% block body %}
<div class="mx-auto">
  <h1 class="mt-3 text-center">Edit photo {{photo}}</h1>
</div>
<div class="form-group">
  <form action="" method="post" enctype="multipart/form-data">
    {% csrf_token %}
    {{ form|crispy }}
    <button type="submit" class="btn btn-success mb-3">Edit Photo</button>
  </form>
</div>
{% endblock body %}
We can take see how it looks at localhost:8000/photo/1/update.
We also want to give users the option to delete a photo. With the following template, they can decide to delete the photo or not:
<!-- photoapp/templates/photoapp/delete.html -->
{% extends 'base.html' %}

{% block body %}
<div class="form-group mx-auto">
  <h2 class="text-center">
    You are going to <span class="text-danger">delete</span>: "<i
      >{{ photo }}</i
    >
    "
  </h2>
  <p class="text-center">Are you sure, you want to delete the photo ?</p>
  <div class="form-group">
    <form
      action=""
      method="post"
      class="d-flex flex-column align-items-center justify-content-center"
    >
      {% csrf_token %}
      <div class="row">
        <div class="col">
          <a href="{% url 'photo:detail' photo.id %}" class="btn btn-primary"
            >Cancel</a
          >
        </div>
        <div class="col">
          <button type="submit" class="btn btn-danger">Delete</button>
        </div>
      </div>
      <p>This action is irreversible</p>
    </form>
  </div>
</div>

{% endblock body %}
The deletion page would look like this.
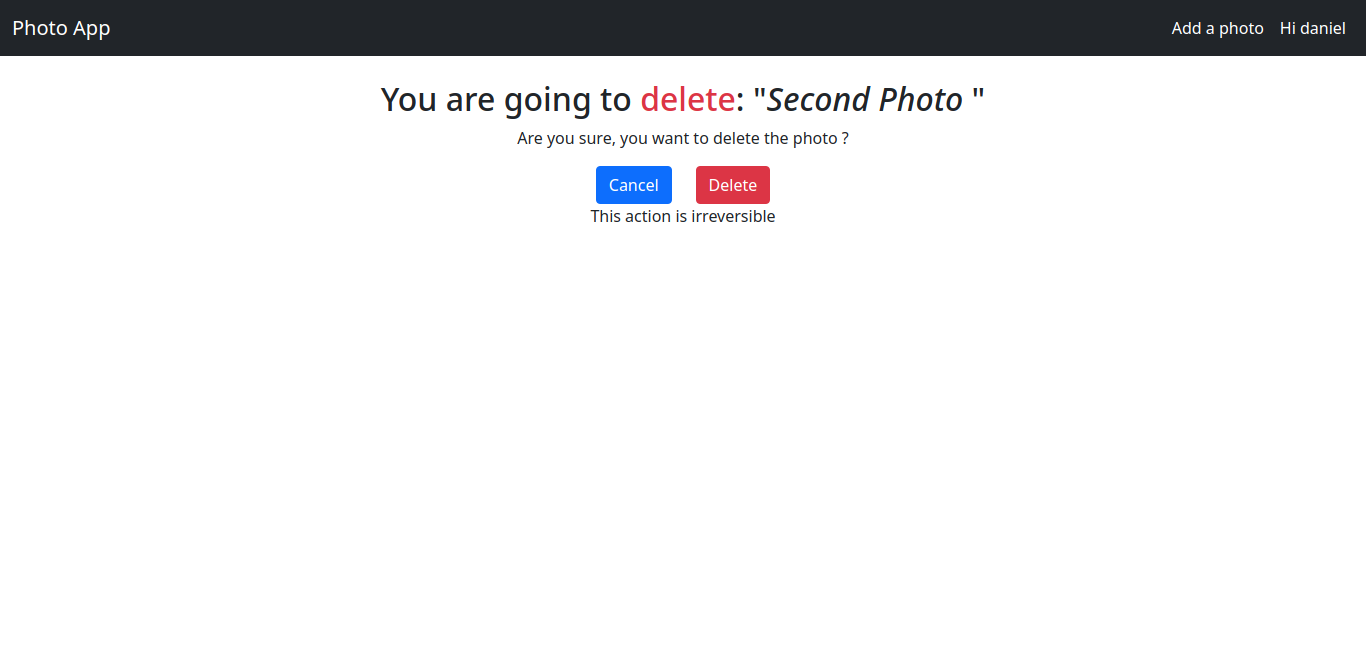
If the user decides to cancel, they’re redirected to the detail page of that photo.
User Authentication Templates
The purpose of this section is to write all the templates related to the authentication. We’ll write the signup.html and login.html templates.
Similar to the photo-sharing app, all of the following templates will be located in a double folder structure: users/templates/users/.
Enter the users app and create the folders in which the templates will be located:
# Enter to the project root directory
cd ../../../

cd users/
mkdir -p templates/users/
Create the sign-up and login template files inside that folder:
cd templates/users/
touch signup.html login.html
Below is the template code for the signup.html template:
<!-- users/templates/users/signup.html -->
{% extends 'base.html' %}
{% load crispy_forms_tags %}
{% block body %}
<div class="mx-auto">
  <div class="form-group">
    <form action="" method="post">
      {% csrf_token %}
      {{ form|crispy }}
      <button type="submit" class="btn btn-danger w-100 my-3">Create account</button>
    </form>
  </div>
  {% comment %}  Already Registered {% endcomment %}
  <div class="text-center w-100">
    <p class="text-muted font-weight-bold">
      Already Registered?
      <a href="{% url 'user:login' %}" class="text-primary ml-2"> Login </a>
    </p>
  </div>
</div>
{% endblock body %}
We can check it out in the browser at localhost:8000/users/signup.

Last but not least, write the login template:
<!-- users/templates/users/login.html -->
{% extends 'base.html' %}
{% load crispy_forms_tags %}

{% block body %}

<div class="mx-auto">
  <div class="form-group">
    <form action="" method="post">
      {% csrf_token %}
      {{ form|crispy }}
      <button type="submit" class="btn btn-danger w-100 my-3">Sign in</button>
    </form>
  </div>
  {% comment %}  Already Registered {% endcomment %}
  <div class="text-center w-100">
    <p class="text-muted font-weight-bold">
      Don't have an account?
      <a href="{% url 'user:signup' %}" class="text-primary ml-2">Create account</a>
    </p>
  </div>
</div>
{% endblock body %}
Django templates allow us to save a lot of time by reusing the same HTML multiple times. Just image how much time you’d expend by copy and pasting the same HTML over and over.
Perfect! Now you have a completely working application. Try to use it, modify it, or even expand its functionality.
Summing Up
Congratulations! You’ve created a full-stack project from scratch.
Django is the most-used Python web framework. It allows you to quickly build complex web applications.
It has a lot of built-in features that accelerate the development process, like server-side template rendering, Class-based views, and Model forms.
Django also offers several third-party packages that give you the option to use someone else’s app. As an example, the project works with Django taggit and Django crispy forms.
In this tutorial, we covered the following:
- Django CRUD operations
- the Django Built-in authentication system
- how to manage media files in Django
- using Django taggit to classify content
- implementing Django forms with crispy forms
- writing Django templates with Bootstrap 5
The best way to keep learning and advancing it to apply the knowledge you’ve acquired to new and challenging projects. Good luck!