Make a Skype Bot with Electron & the Microsoft Bot Framework

Chat bots are getting more and more popular. Facebook is working on providing a framework for building Messenger bots which would allow business owners to build their customer support entirely inside of Facebook’s messaging app. Ordering a pizza, scheduling your next doctor visit, or just trying to find the cheapest flight for your next travel? Find a bot contact in your messaging app and ask for what you need just as you would ask a human contact on your friend list.
David Marcus, VP of Messaging Products at Facebook, gave a talk at Web Summit in November about Facebook’s involvement with chat bots, and it was quite clear Facebook has big plans for enabling customers and business owners to integrate not only customer support into Messenger chat but also some interactions which you would expect to usually be a form in a web page or in an app (e.g. ordering food, configuring your next car purchase, etc.).
In this tutorial, we will use Electron and the Microsoft Bot Framework (MBF) to create a Skype bot for daily scrum meetings.
What Is Out There?
Looking from the technical side, the most popular framework currently seems to be the Microsoft Bot Framework, which allows you to connect your bot with basically all the popular chats out there.
But there are other options out there as well:
- Facebook’s Messenger Platform (Facebook Messenger only).
- The Pandorabots Platform
- Imperson’s Conversational Bots
- api.ai
About Our Bot
We will create the configuration GUI for creating scrum teams and adding members with Electron, and then use the MBF to create a bot that will read from the configuration and prompt all the added users with the three scrum daily meeting questions. When everyone provided the answers, the bot will send a summary of the meeting to all participants within a team.
A Rugby Bot?

No. We are not making a rugby bot. For those that are not familiar with scrum, here is a TL;DR:
Scrum is a methodology which consists of predefined rules and best practices for an agile development process (e.g. a software development team), specifically for teams from ~3-6 people (very rough and varies a lot). Those rules/best practices can consist of things like (again, very roughly, and varies a lot because every team tailors it a bit to their own needs):
- How are tasks created and what should they specify
- Metrics to calculate how quickly the team can deliver an iteration of the product based on previous times needed for task completion.
- Defined roles of every team member
- Product Owner: the person that calls the shots; talks to the customer of the product being developed and based on the customer’s requirements creates User Stories ( fancy name for tasks ) which can then be picked up freely by the developers
- Developers: the technical people
- Scrum master: Sits behind your neck and makes sure that the whole team is acting compliant to scrum rules
- Favours team communication, especially face to face
- Meetings that the team should have
- How often to have those meetings
- What should be discussed in those meeting
One of those meetings is the daily scrum meeting. Usually done first thing in the morning, every team members gives an update to the rest of the team of what they worked on the previous day and what progress has been made. Additionally, every team member reveals what they plan on doing today and, last but not least, any impediments, especially ones that will hinder further development of tasks.
The daily scrum meeting is usually performed “live”, but for remote teams, with different time zones and/or different locations, it can pose a problem. This is where the bot we are making comes in.
The Configurator GUI
Prerequisites:
- Node JS
- npm
- JavaScript (ES6)
- HTML
- Yeoman Generator
All the code for both the bot and the configurator can be found in the article’s accompanying repository.
Boilerplate
In case you are unfamiliar with Electron, it might be a good idea to take a look into this article (at least the introductory paragraphs), which describes the basics of Electron and the reason why it gained popularity quickly. Many of the new desktop applications that are coming out are using Electron (e.g. Slack, Visual Studio Code).
To set up the boilerplate code, we will use a Yeoman generator.
Head over to a folder where you want your project to reside and run the following
npm install -g yo generator-electron
This will install the package for Electron globally on your machine. From this point on, you can call the generator for electron anywhere you like, which is our next step:
yo electron
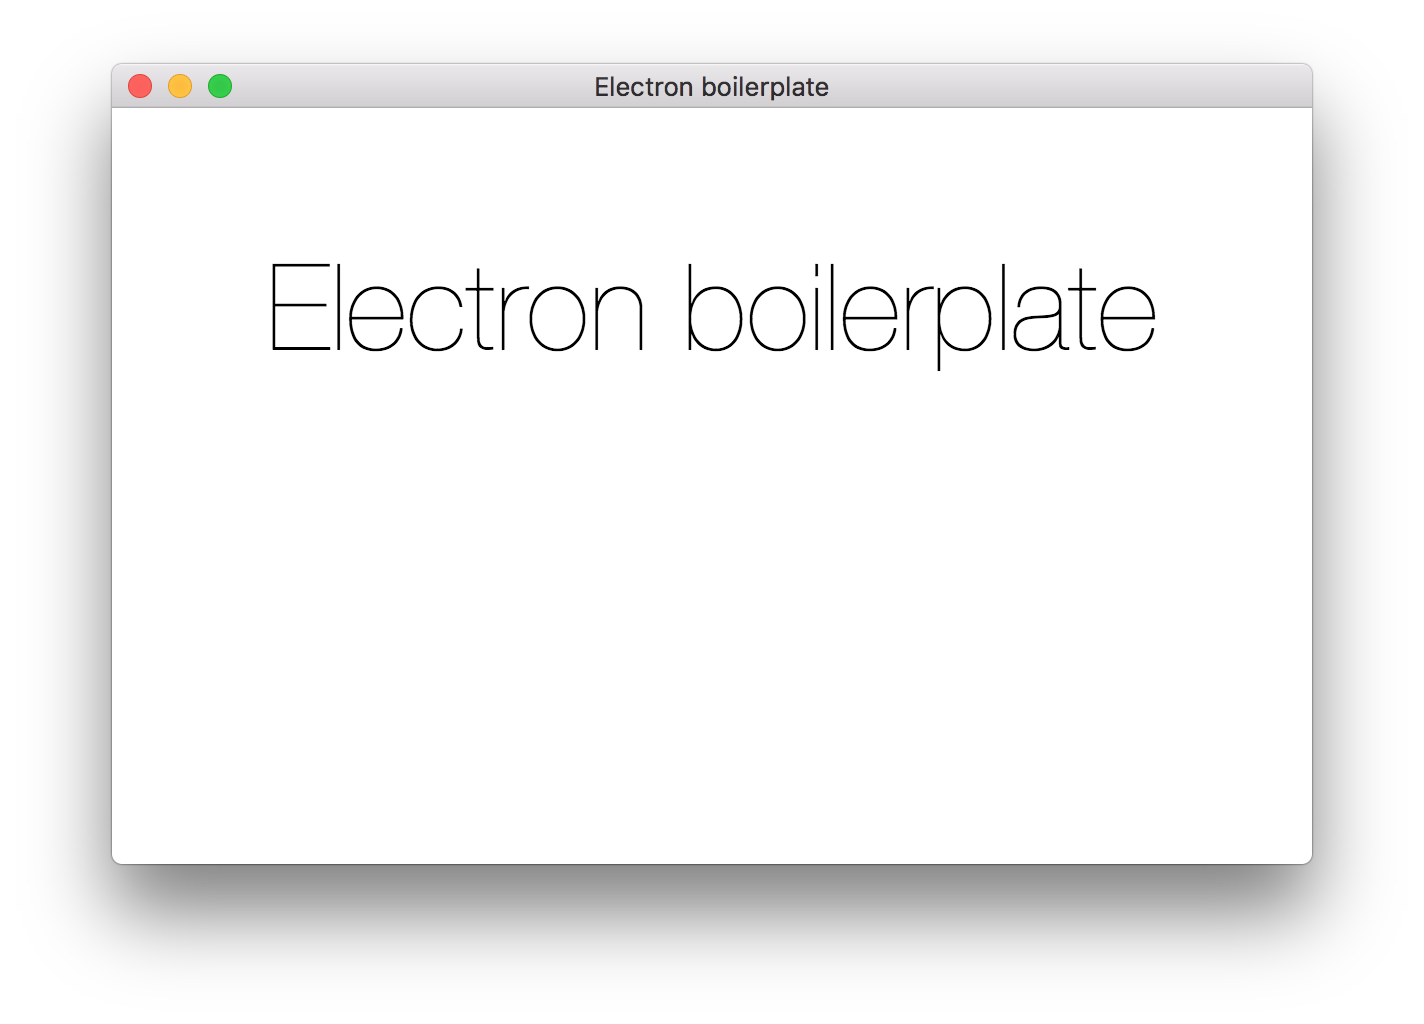
This will provide you with all the files needed to run the ‘Hello World’ Electron app. It will run npm install automatically, so as soon as Yeoman is done you can run:
npm start
And you should see a new application window pop.
Entry point
index.js is the entry point for the application. I recommend you open this file and take a look on your own to see what’s happening.
function createMainWindow() {
  const win = new electron.BrowserWindow({
    width: 600,
    height: 400
  });

  win.loadURL(`file://${__dirname}/index.html`);
  win.on('closed', onClosed);

  return win;
}
createMainWindow() will create the main window (Captain Obvious speaking), by calling the constructor of the BrowserWindow class, and here you can provide some window options like width, height, background color, and many more.
An important thing to note in this function is the win.loadURL method. Why is this important? Here we can see that the content of the app is actually nothing else but an HTML file! No magic and no new functions or frameworks to learn to make a desktop app. All it takes is the web developer’s expertise, thus making all us web developers desktop application developers as well!
const app = electron.app;

app.on("window-all-closed", () => {
  // ...
});

app.on('activate', () => {
  // ...
});

app.on('ready', () => {
  // ...
});
Electron provides us with callbacks to events, see full list here.
-
ready – If you are familiar with jQuery,
readyevent would be something likejQuery(document).ready(). -
activate – Activate is emitted every time the app window is put into focus.
-
windows-all-closed – Triggered when all the windows of the app are closed, which makes it the place to do any cleanup. Be careful with this one as in some cases it will not get called (e.g. if you call
app.quit()from the code, or if the user pressed Cmd + Q).
App logic
The entry point file, index.js, contains the app launch and exit specific code and is more used for global setup. We do not put the app logic in here. As we have already seen, the app itself is nothing more than an HTML file. So let’s head to index.html and add some elements for our configurator GUI.
<!doctype html>
<html>
  <head>
    <meta charset="utf-8">
    <title>Electron boilerplate</title>
    <link rel="stylesheet" href="index.css">
  </head>
  <body>
    <div class="container">
      <section class="main">
        <h2>Teams</h2>
        <div>
          <select id="teams">
            <option>Select a team...</option>
          </select>
          <input type="text" id="newTeamName" placeholder="New team name..."/>
          <button id="addTeam" disabled type="button">+</button>
        </div>

        <div id="members"></div>
        <button id="addMember" type="button">+</button>

        <p id="message"></p>
        <button id="save" type="button">Save</button>

      </section>
      <footer></footer>
    </div>
    <script src="app.js"></script>
  </body>
</html>
Replace the current HTML file with this code. At the end of the body, we added a reference to app.js script, which is where our app logic goes. Remember that the Electron window is nothing more than a browser window embedded inside, so during development you can use the standard shortcuts for rerunning the code (F5, Ctrl + R) and opening the Chrome-like developer tools (F12).
Add a new file to the root of the project, name it app.js, and paste the code from here. There is nothing new going on here, just good old JavaScript.
For persisting data, we’ll use a simple JSON file, which is more than enough for our needs. In the case you want to scale up the app, this would have to be replaced with a database solution .
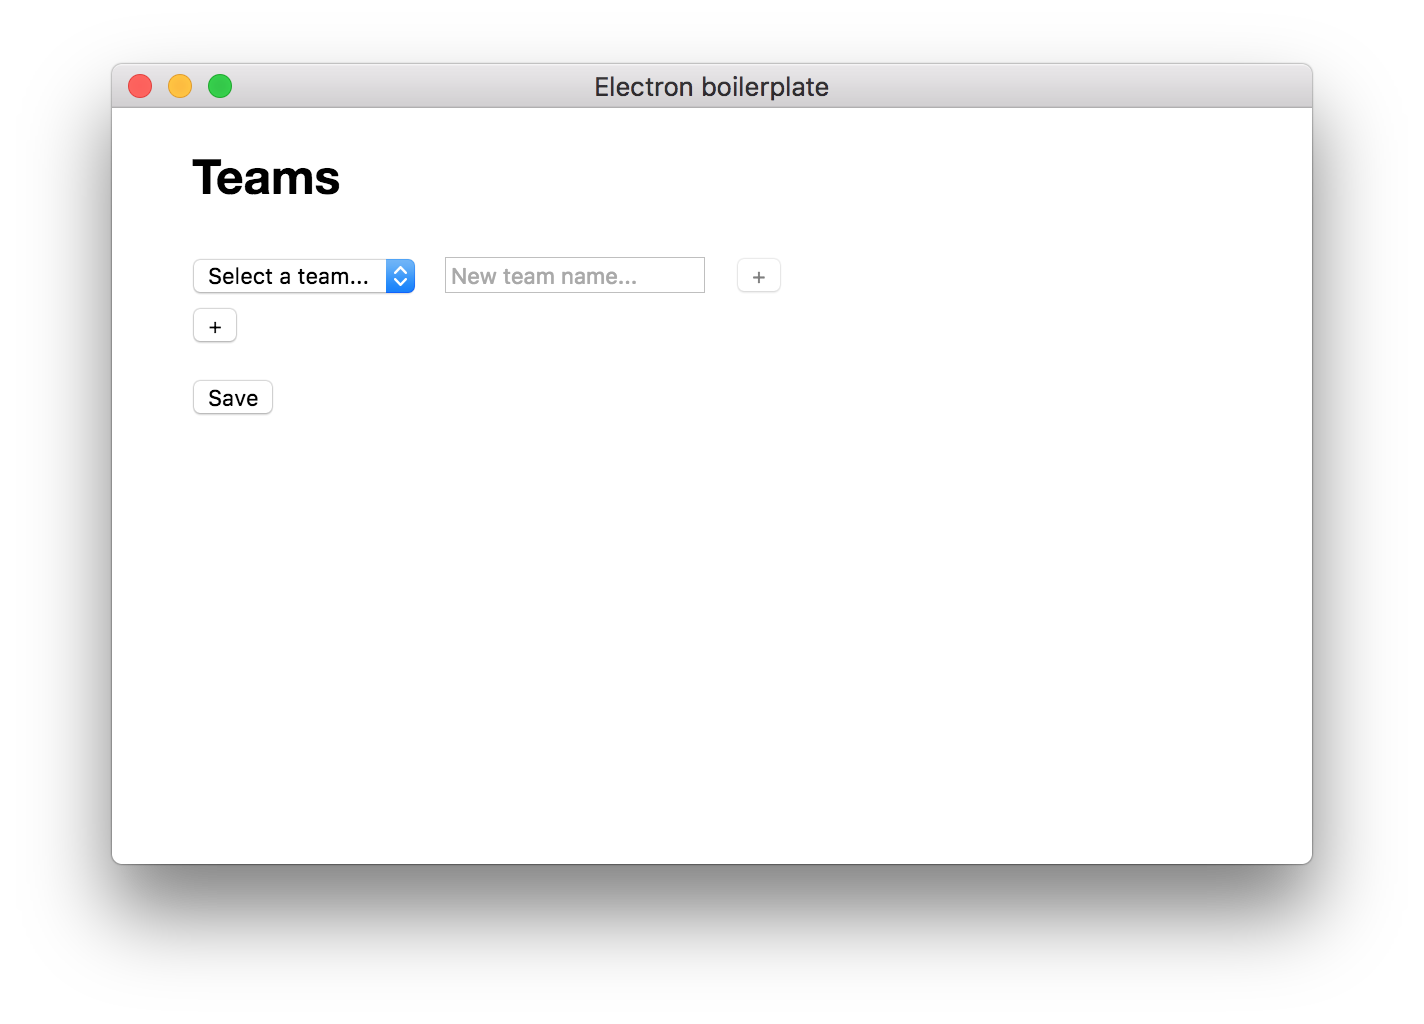
There is a button for adding new teams, and then inside of each team we can add members. Each member is represented by their username on Skype. Later, when we start making the bot itself, you will see that the bot emulator has a chat client built in, used for testing. The username of this user is user.
Additionally, we can load teams by choosing a team name from the dropdown. At the bottom of each team, there is an input box that represents the time of the day during which we should do the daily scrum meeting. We will save this value as a timestamp, which represents the number of seconds from midnight to the time of the meeting.
Let’s fire up the configurator now and try to add a team and a user named “user”.
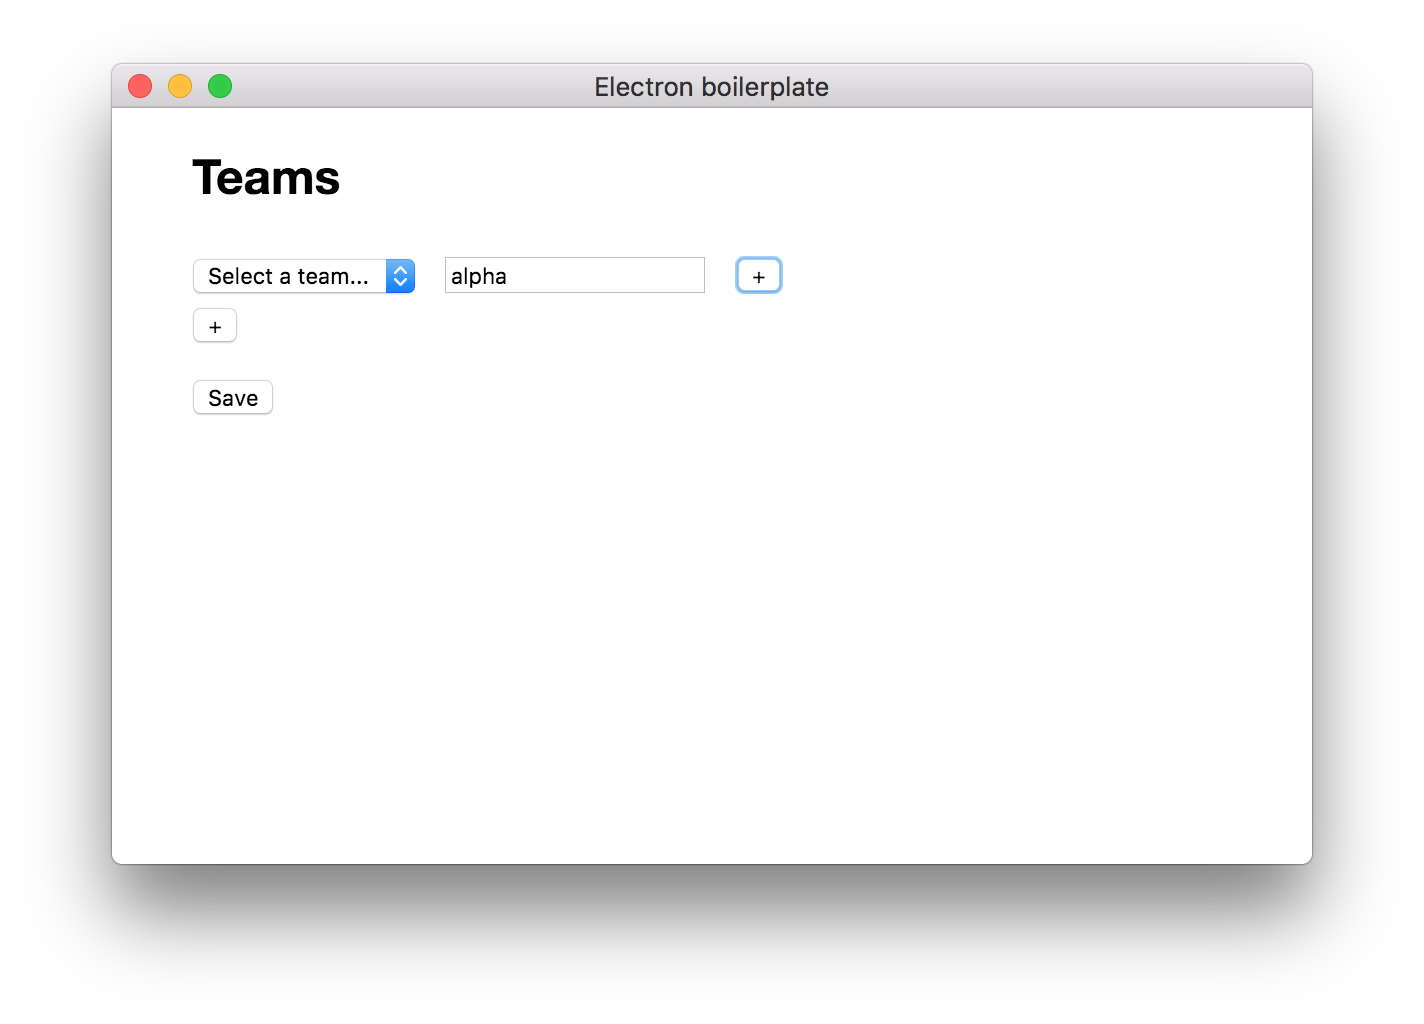
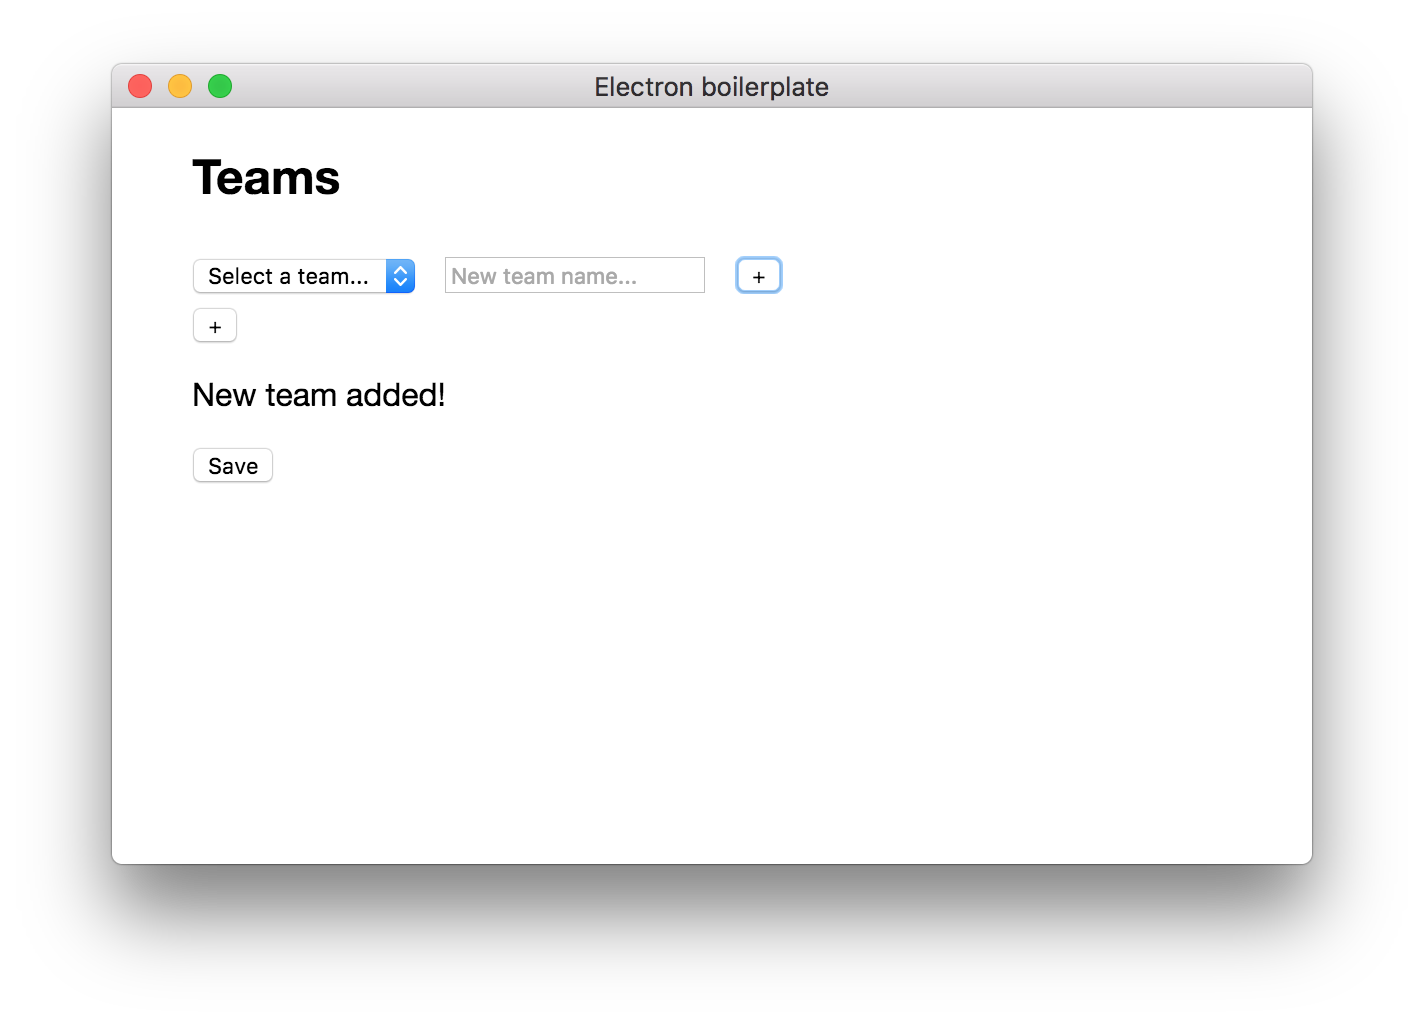
Now, we can select the added team from the dropdown and add some users to it.
Important: You must add the user with username user because the emulator cannot change the name and that’s the hard-coded one. In order for the bot to recognize us while testing, it has to be user.
Set the time to 00:00 (or anything else), and click Save.
Check your teams.json file, this should be its content:
{
  "alpha": {
    "members": {
      "user": {},
      "almir bijedic": {}
    },
    "time": 0
  }
}
This will be later used by the bot.
The Bot

Microsoft Bot Framework
MBF SDK is made in two versions: C# and Node.js. We will be using the Node version. The bot works via a REST API which you can call manually, or use the provided open source SDK. In this tutorial, we will use the SDK, as it’s much quicker. Calling the API with custom functions might be a better option in case you need to integrate the bot with an existing application, or if you cannot use Node.js/C# for some reason.
For testing the bot locally, there are two options:
- Use the ConsoleConnector, which allows you to speak to the bot via command line, or
- Use the ChatConnector class with restify (or something else) to run the local server and run the bot emulator provided by Microsoft which acts as a dummy user on your local machine.
We will go with option number two as it is, let’s say, “more real”.
Routes
The main class for building the chat bot is called UniversalBot. It’s worth knowing that UniversalCallBot also exists, which would allow you to make calls, but we will not be covering that in this tutorial. Additionally, the point of the chat bot is to allow the users to interact without having to call, since it seems we prefer texting over calling.
In order to determine how the bot is going to answer to an incoming message from the user, we use routes. This is very similar to a conventional web app, for example:
// bot is an instance of UniversalBot
bot.dialog("/", function (session) {
  session.send("Hello World");
});
Note that bot here is an instance of the UniversalBot class.
This will send back “Hello World” to the user every time the user sends any message to the bot.
bot.dialog() takes two parameters: the route, and the function to execute when that route is active. In the case of a waterfall model dialog (waterfall will be explained in next section), the second parameter can be an array of functions instead, which will then be executed one after another, thus interacting with the user.
Initial setup
Now would be a good time to try this out. Go back to your Electron project and add a new folder inside named bot. Run npm init inside of that folder and fill out the basic info, the only thing you have to type in is app.js as the entry point, and node app.js as the start script. After you are done, create a new file app.js in the root of the bot folder.
Now we need to install the dependencies for our bot.
npm install --save botbuilder restify fs-extra
Next, go to the app.js file we created in the bot folder and include the libraries we need.
// app.js

var restify = require("restify"),
  builder = require("botbuilder"),
  fse = require("fs-extra");
We need to create a restify server which will listen for incoming connections on a certain port.
// app.js

// Setup Restify Server
var server = restify.createServer();
server.listen(process.env.port || process.env.PORT || 3978, function () {
  console.log("%s listening to %s", server.name, server.url);
});
Now we will connect the restify server to the MBF bot REST service.
// Create chat bot
var connector = new builder.ChatConnector({
  appId: process.env.MICROSOFT_APP_ID,
  appPassword: process.env.MICROSOFT_APP_PASSWORD
});
var bot = new builder.UniversalBot(connector);
server.post("/api/messages", connector.listen());
You can use the MICROSOFT_APP_ID and MICROSOFT_APP_PASSWORD environments variable for Node to provide your login credentials. This is used for authenticating against the Microsoft Bot Directory.
Note: the alternative to ChatConnector is ConsoleConnector, which would ask for input in the console of the running app. This method would not require the emulator we will be installing in a few moments
Last but not least, add a simple dialog on the root route, which will only output “Hello World! to the user.
bot.dialog("/", function(session) {
  session.send("Hello World!");
});
Let’s see how this all works from the big picture perspective since it can be a bit confusing what are we doing with the ChatConnector here and why do we need a restify server.
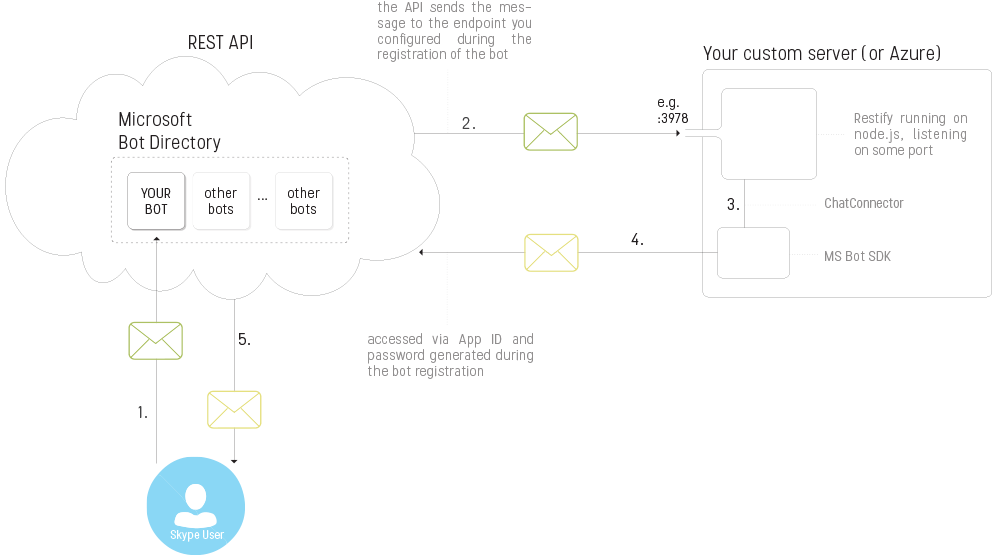
The user added your bot as a Skype contact.
- The user sends a message from their Skype client to the bot. That message is sent to Skype’s servers and is then routed to your bot which you previously registered.
- During registration, you gave the bot a https endpoint, which points to the server where your bot code is running. So Skype’s servers forward the message to your restify server with all the details of the message.
- The ChatConnector receives this request from the restify server and handles it accordingly (as you intended).
- The Bot Framework SDK then generates a response according to your needs and sends it back to the server. During registration, you specified an APP ID and password, which are needed in order for your bot to access the Skype servers. The bot received the location of the REST API together with the message in step #2.
- Skype’s servers recognize the response and forward the message to the user.
In order to test this simple bot we just made, we have to download and install the emulator, which acts as both the client Skype app (user) and the Skype REST API server, which is the left part of the diagram above.
Head over to the emulator page and download, install, and run it.
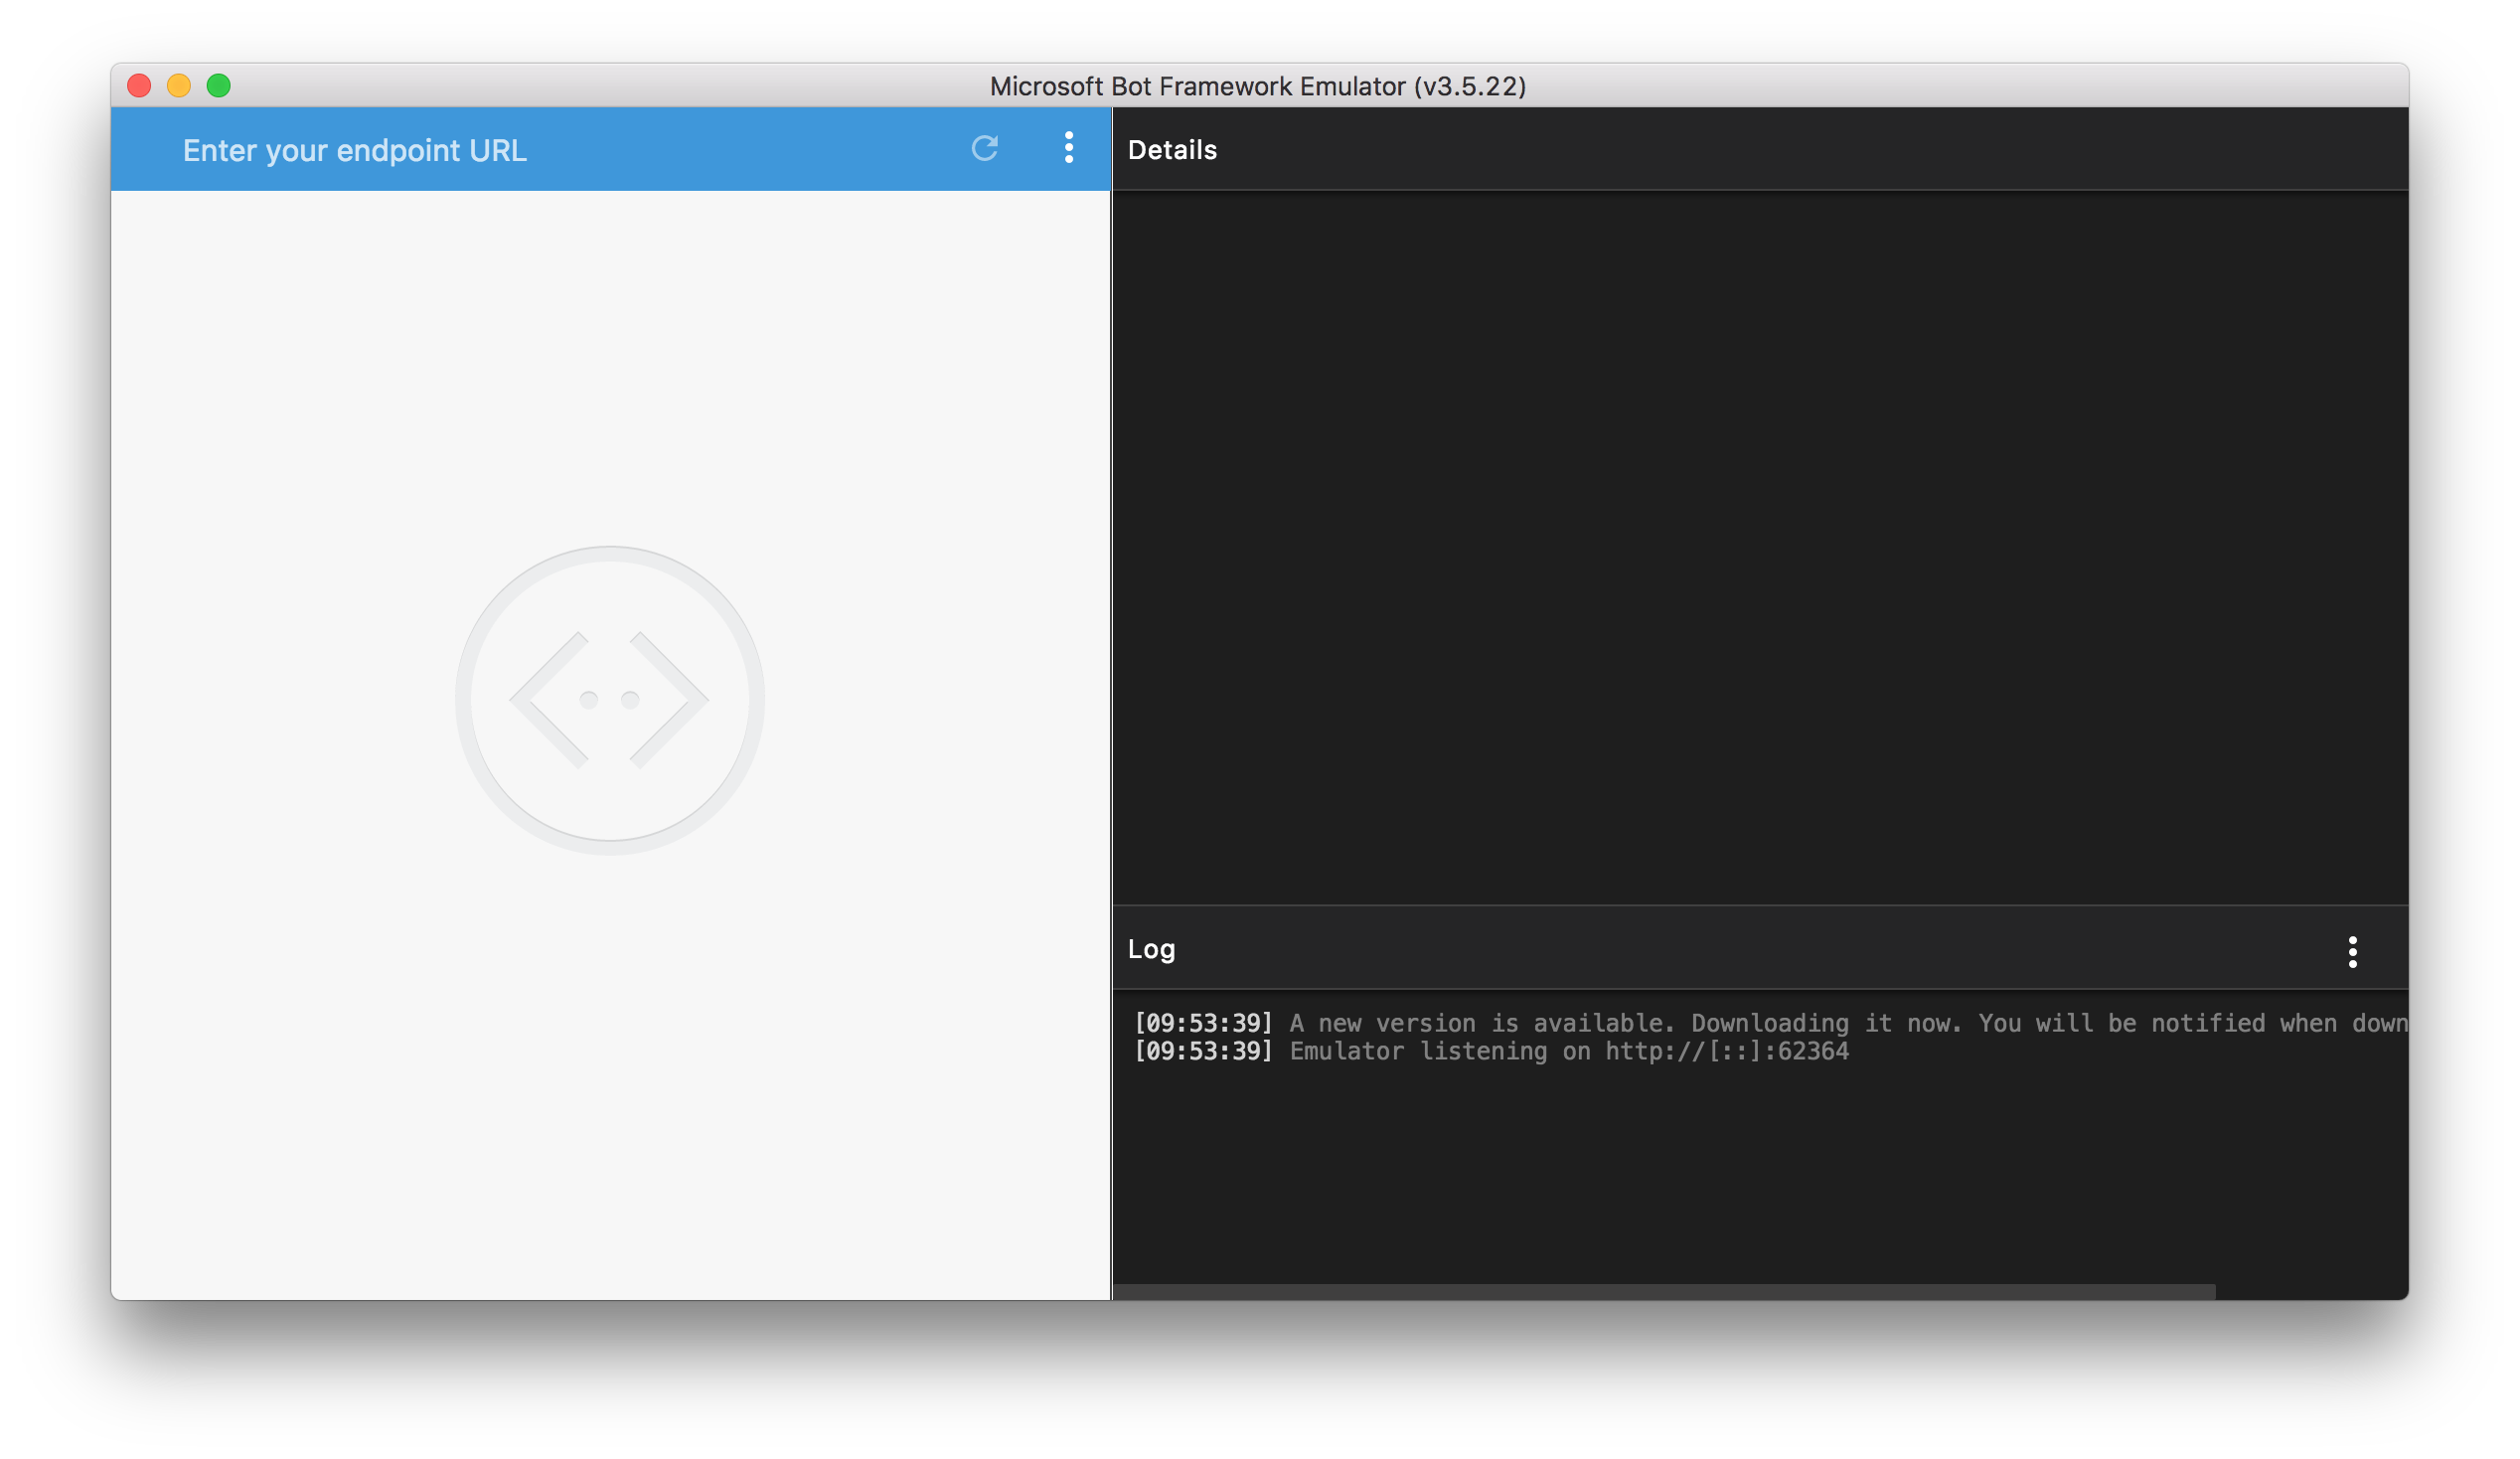
Now we need to give the emulator the endpoint where our bot code is running.
Go back to the bot folder and run npm start. You should see something like this:
restify listening to http://[::]:3978
You can change this port by providing a PORT Node environment variable or by changing the hardcoded fallback value of 3978 in the beginning of the file.
This is an endpoint on localhost, on port 3978. So let’s put that into the emulator. Additionally, don’t forget we are listening on the /api/messages route.
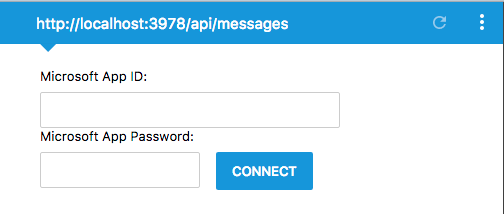
Leave the Microsoft App ID and Password empty; as we are running a test locally, this will not be needed. Click CONNECT.
Now you can try the bot. You will always get the Hello World message back as that’s all we configured so far.
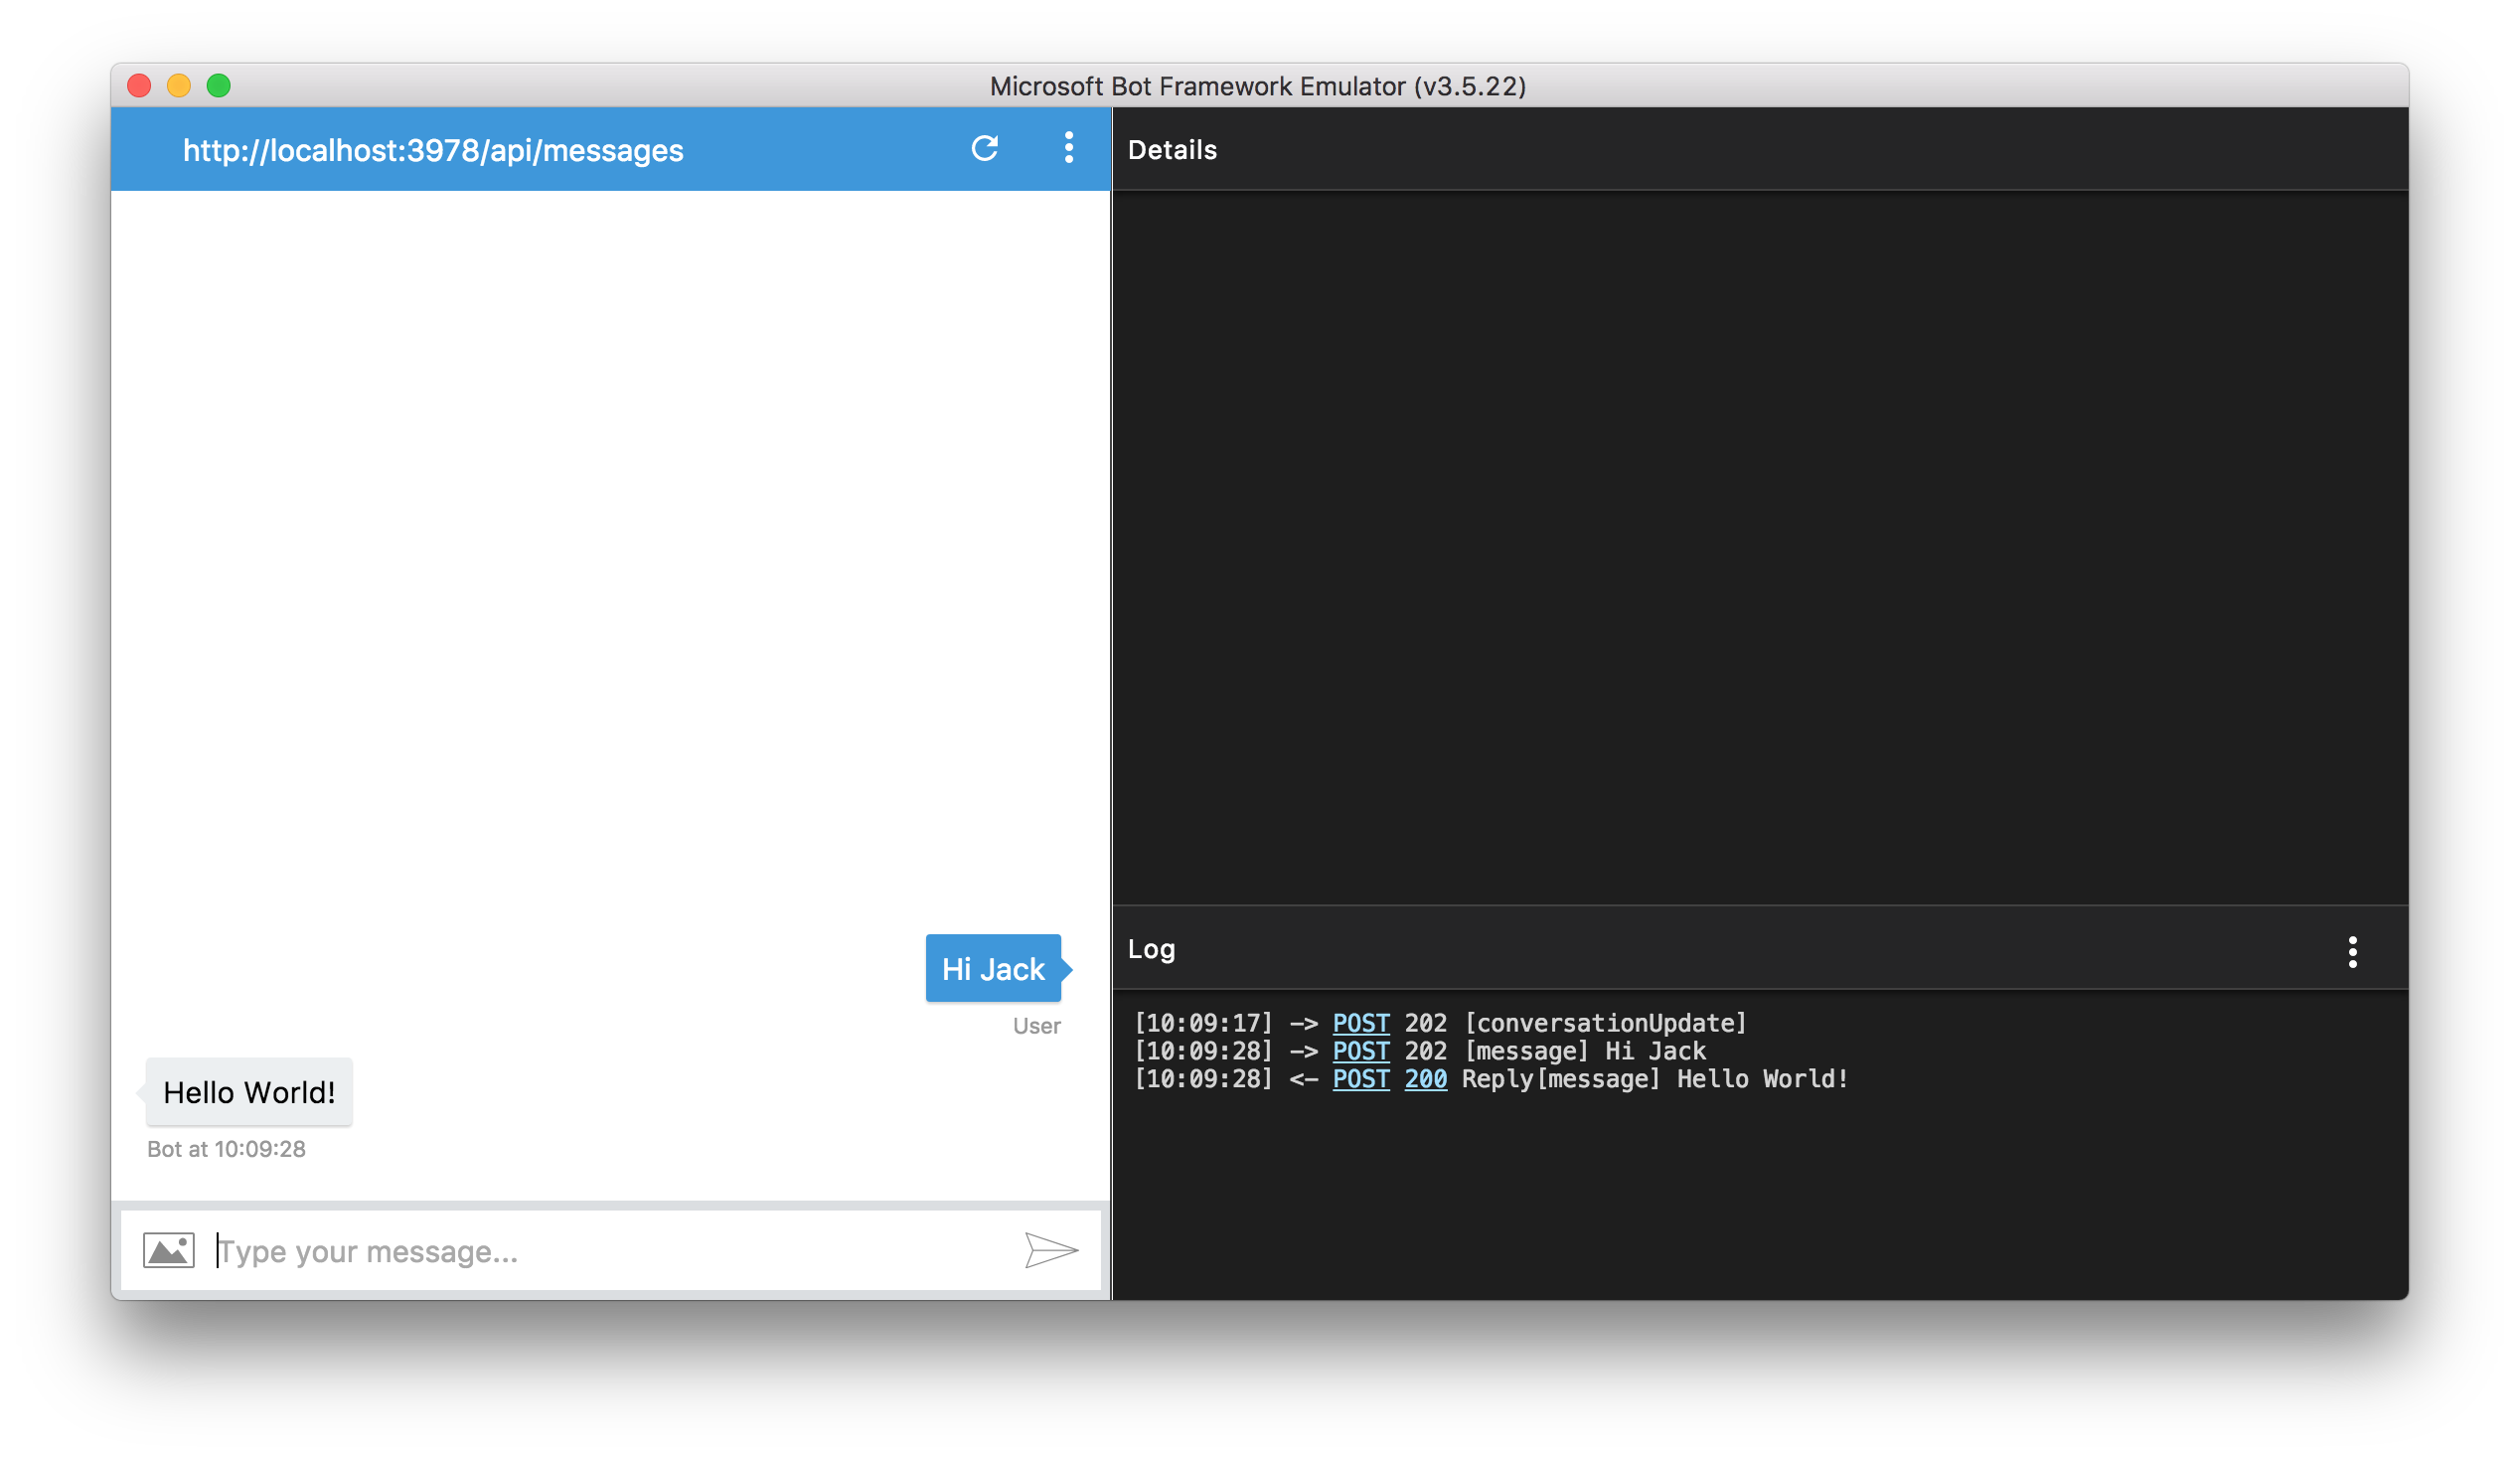
We will need a bot smarter than this. In the next sections we will be implementing the following routes:
/– The root dialog route will only be used when an already registered user sends a message to the bot in between scrum meetings. We are adding it for the sole purpose of showing the user something is happening and the bot is still listening even when we are not in a scrum meeting or registering./firstRun– We need to somehow register the user and save their address in order to be able to send a message to them later./dailyScrumDialog– There will be a timer running withsetInterval()that will check the time of the daily stand-up meeting of all teams. If there is a team whose meeting time has come, look up all the users that registered with the bot (by register we mean the users that are already added to the team in the configurator AND they have also added the bot as a contact on Skype AND they have sent the bot at least one message)./report– The most simple dialog here, used only to send the report of the meeting to all members of the team. This will be triggered by another function running withsetInterval(), checking whether every member of the team has finished answering the three questions. If yes, send everyone’s answers to each team member.
Waterfall
Waterfall is the most basic type of bot dialog. It does exactly as it sounds: it flows down, without going back. We pass an array of functions as a second parameter to the dialog function of the bot. Each function will be executed one after another, under the condition that there is a prompt in the previous step.
builder.Prompts.text(session, "Message to send") is the main way of requesting input from the user. After the user’s response, the next function from the array is executed. This time it has two parameters: the session object, and the results object which contains the user’s message.
bot.dialog("/", [
  function (session) {
    builder.Prompts.text(session, "Hey there, how are you doing?");
  },
  function (session, results) {
    console.log(results.response); // This will print out whatever the user sent as a message
    session.send("Great! Thank you for letting me know.")
  }
]);
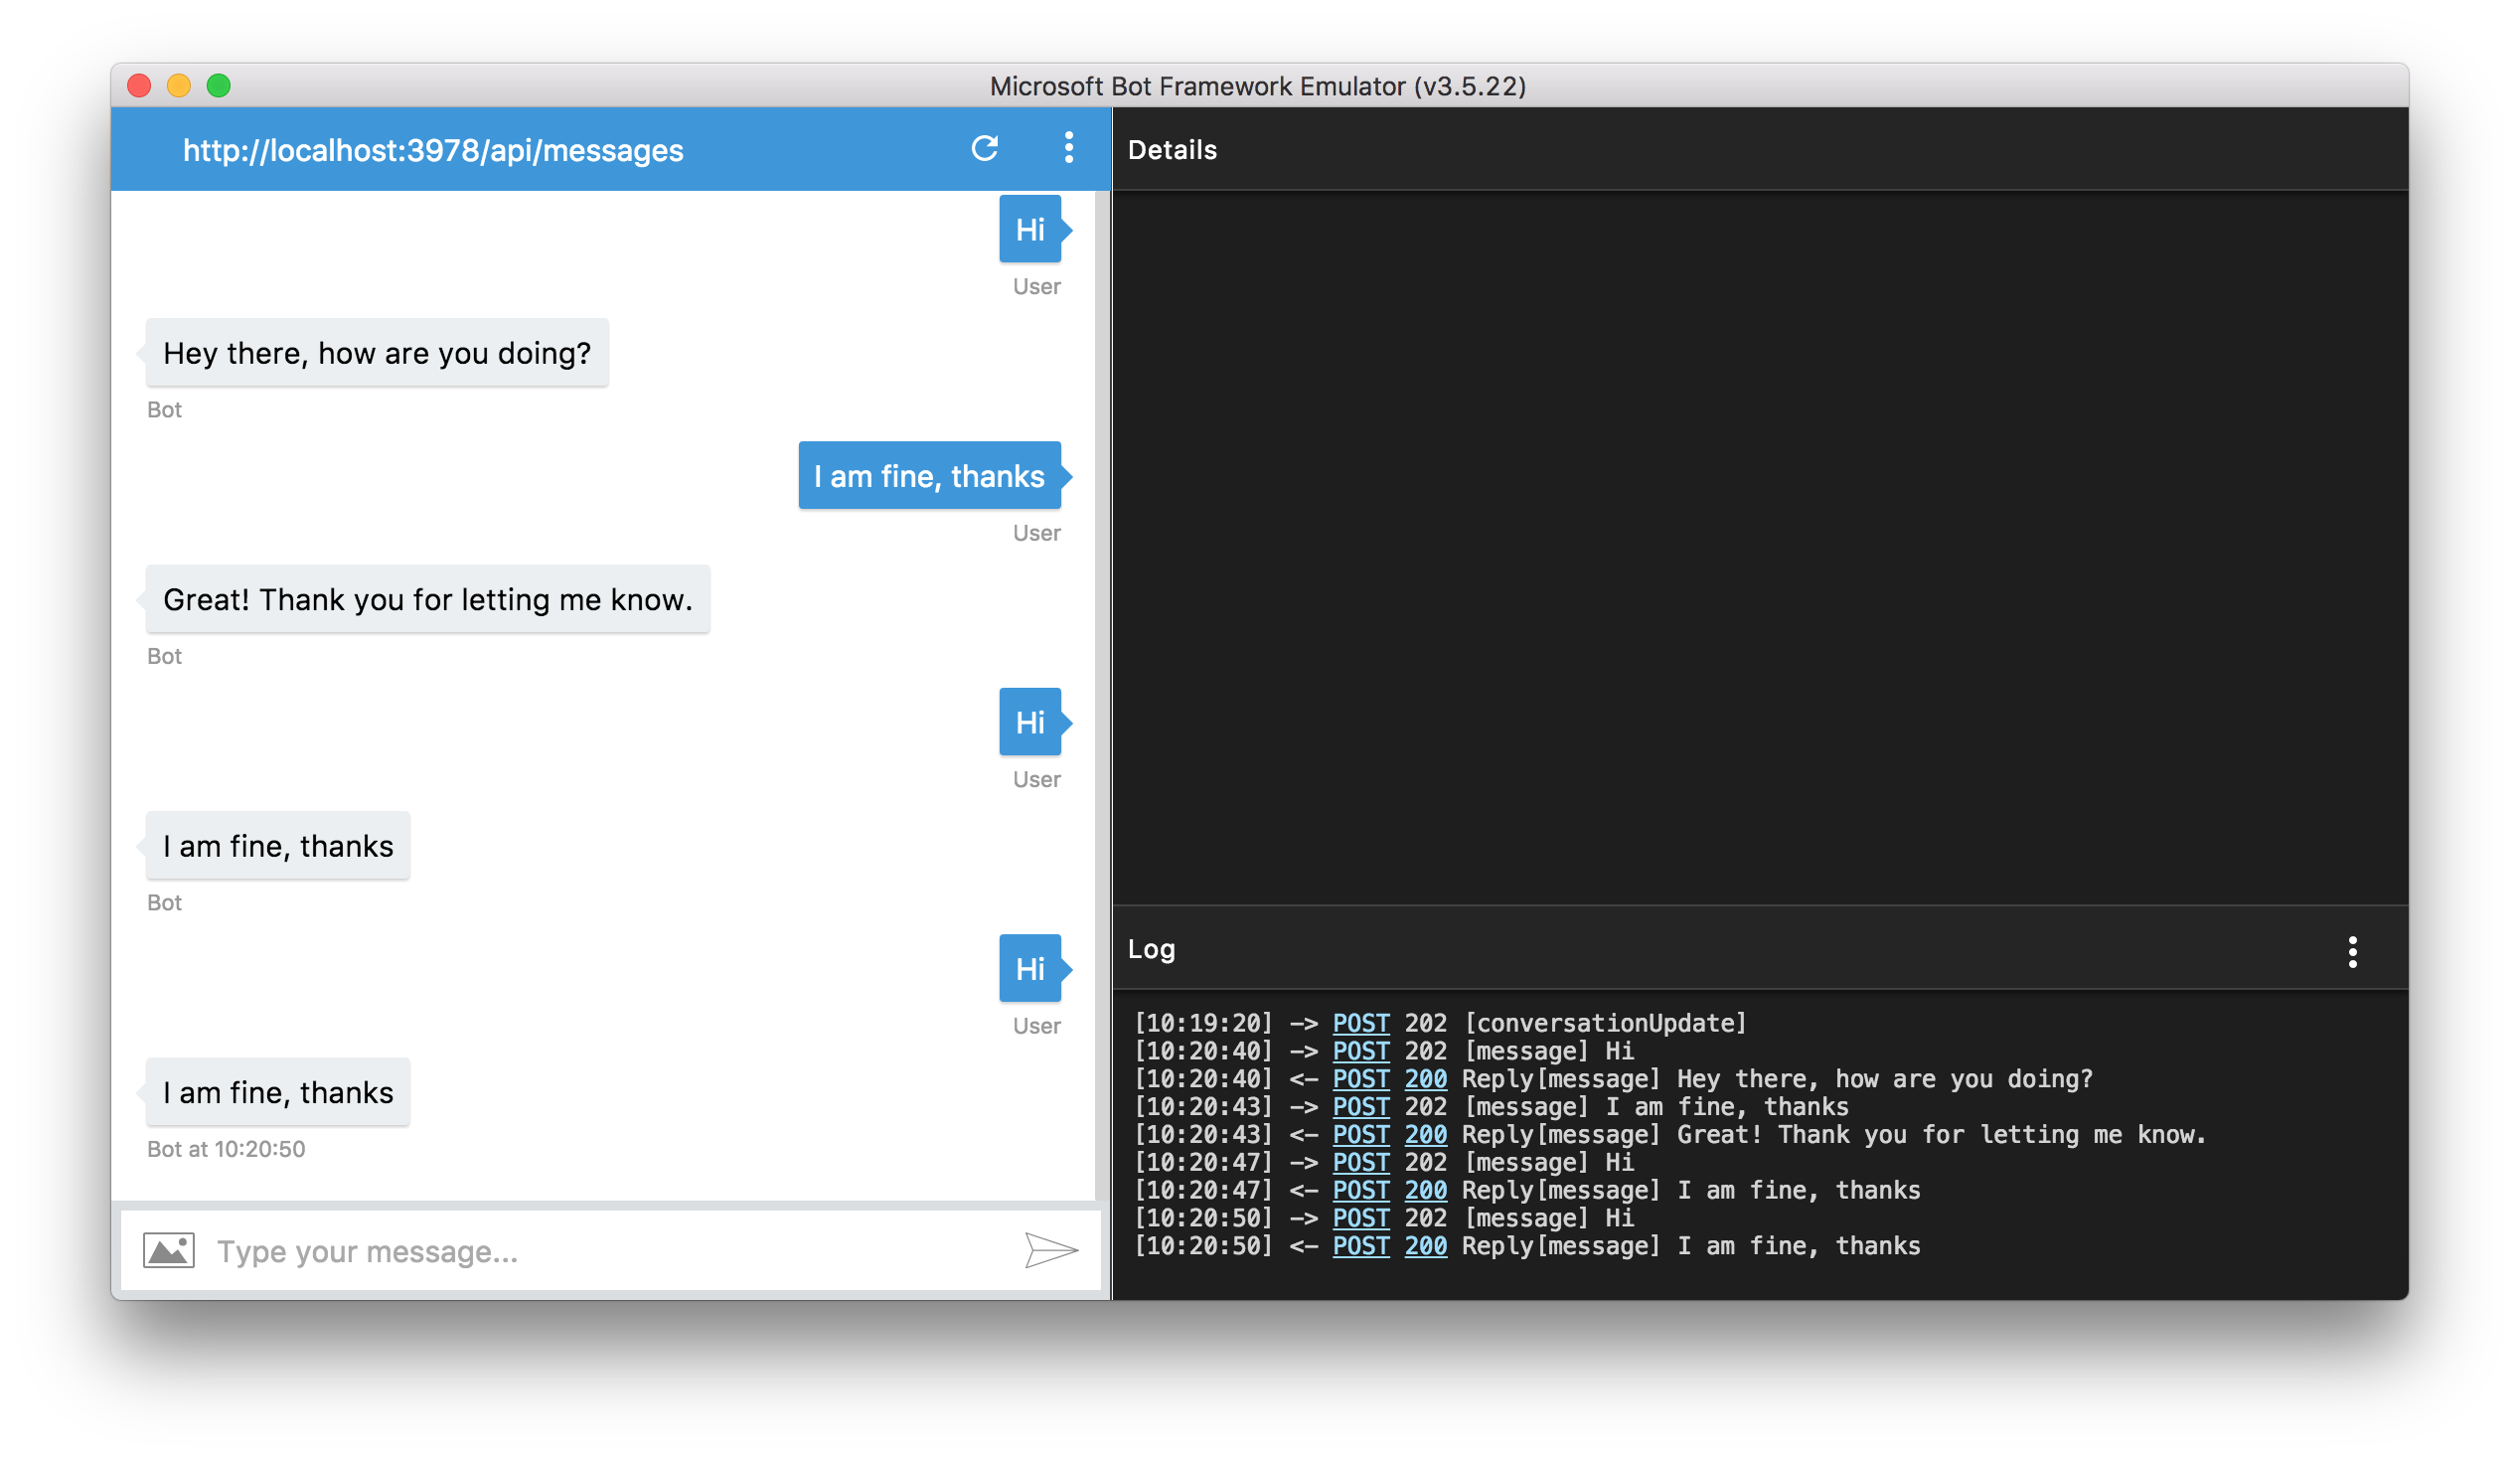
Replace the previous root dialog with the new one, and try it out.
Note that we can also save and persist user data.
bot.dialog("/", [
  function (session) {
    if (session.userData.howIsHe) {
      session.send(session.userData.howIsHe);
    } else {
      builder.Prompts.text(session, "Hey there, how are you doing?");
    }
  },
  function (session, results) {
    session.userData.howIsHe = results.response;
    session.send("Great! Thank you for letting me know.")
  }
]);
Running this will save the user’s response and then send them the response on every next message.
The dialog stack
As already hinted, the bot organizes the chat via dialogs. When a conversation with a user is started, the bot pushes the default dialog on top of the stack. Then we can use on of the following functions to re-route to other dialogs and/or end them.
session.beginDialog(route, args, next)
This function stops the current dialog, adds the dialog with the specified route on top of the stack, and once the newly called dialog is done, it will return to the point in the previous dialog where beginDialog() was called.
session.endDialog()
When we call endDialog(), the current dialog is popped from the stack and we return to the next dialog on the stack.
session.endDialogWithResult(args)
Same as endDialog() with the difference that we can pass in some variable to be used by the calling dialog (the next dialog on the stack).
session.replaceDialog(route, args, next)
In case we do not want to return to the previous dialog once the new one is done, we can use replaceDialog() instead of beginDialog().
session.cancelDialog(dialogId, replaceWithId, replaceWithArgs)
Canceling the dialog results in dialogs being popped off the stack (canceled) until the dialog with the provided ID is reached, which is then also canceled and control is returned to the original caller. That caller can then also check the results.resumed variable to detect cancellation.
Additionally, instead of returning to the original caller, it can also be replaced by providing the ID of the dialog.
session.endConversation()
This is a convenient way to cancel all dialogs. It is basically like calling session.cancelDialog(0) (0 is the ID of the first dialog on the stack, hence all of the dialogs will be canceled). It is handy when you want to also clear the session data for the user.
First run middleware
The bot cannot talk to Skype users (or any other chat platform for that matter — do not forget MBF works with multiple chat clients) before the user has initiated a dialog with the bot. Makes sense doesn’t it? Mostly to avoid spamming.
We need the user’s address (an object containing the ID of the user and the ID of the conversation, amongst some other things) in order to be able to initiate a dialog, therefore, we need some kind of a first run logic which will store the user’s address for later use.
The MBF provides us with a middleware that we can use to indicate a route to which we want to direct the user to the first time the dialog has started.
var version = 1.0;
bot.use(builder.Middleware.firstRun({ version: version, dialogId: "*:/firstRun" }));
This will direct the user registering for the first time to the “firstRun” route, which we then have to define.
bot.dialog("/firstRun", [
  function (session, args) {
    if (session.userData.user && session.userData.team) {
      session.userData["BotBuilder.Data.FirstRunVersion"] = version;
      session.replaceDialog("/dailyScrum");
    } else {
      builder.Prompts.text(session, "Hello... What's your team name?");
    }
  },
  function (session, results) {
    // We'll save the users name and send them an initial greeting. All
    // future messages from the user will be routed to the root dialog.
    var teams = readTeamsFromFile();
    var providedTeamName = results.response.toLowerCase();
    var user = session.message.user.name.toLowerCase();
    if (teams[providedTeamName] && Object.keys(teams[providedTeamName].members).indexOf(user) > -1) {
      teams[providedTeamName].members[user].address = session.message.address;
      writeTeamsToFile(teams);
      session.userData.user = user;
      session.userData.team = providedTeamName;
      session.send("Hi %s, you are now registered for the %s team daily scrum. We will contact you at the time of the meeting, which is at %s", user, providedTeamName, timeToString(teams[providedTeamName].time));
    } else {
      session.send("Wrong team! Try again :D (%s)", user);
      session.replaceDialog("/firstRun");
    }
  }
]);

function readTeamsFromFile() {
  return fse.readJsonSync("./data/teams.json");
}

function writeTeamsToFile(teams) {
  fse.outputJsonSync("./data/teams.json", teams);
}

function timeToString(time) {
  return pad(parseInt(time / 60 / 60 % 24)) + ":" + pad(parseInt(time / 60) % 60)
}

function pad(num) {
  var s = "0" + num;
  return s.substr(s.length - 2);
}
We provide two functions in the second parameter array, which will get called sequentially. After the user provides a response to the first one, the second one gets called. In this case, we are prompting the user for a name with builder.Prompts.text(session, message)) and then in the next one we process the provided team name by searching our JSON with team names. If the team name is found, we add the user’s name to the JSON and send a message informing the user he is now registered and will be prompted at scrum time.
In addition to the /firstRun dialog we also have some helper functions.
readTeamsFromFile() will return a JSON object from the JSON teams file.
writeTeamsTofile() takes an object as an argument (teams JSON in our case) and write it back to the disk.
timeToString takes a UNIX timestamp as a parameter and returns the parsed time as a string.
pad is used to append additional zeros to a string (e.g. 1 hour 3 minutes should be 01:30, not 1:30).
Add the previous two code snippets into our bot/app.js, together with the following code to include the fs-extra library from npm, and let’s give it a try.
var restify = require("restify"),
  builder = require("botbuilder"),
  fse = require("fs-extra");
Before sending a message through the emulator, be sure to quit the emulator and start it again (the Delete User Data function of the emulator has a bug).
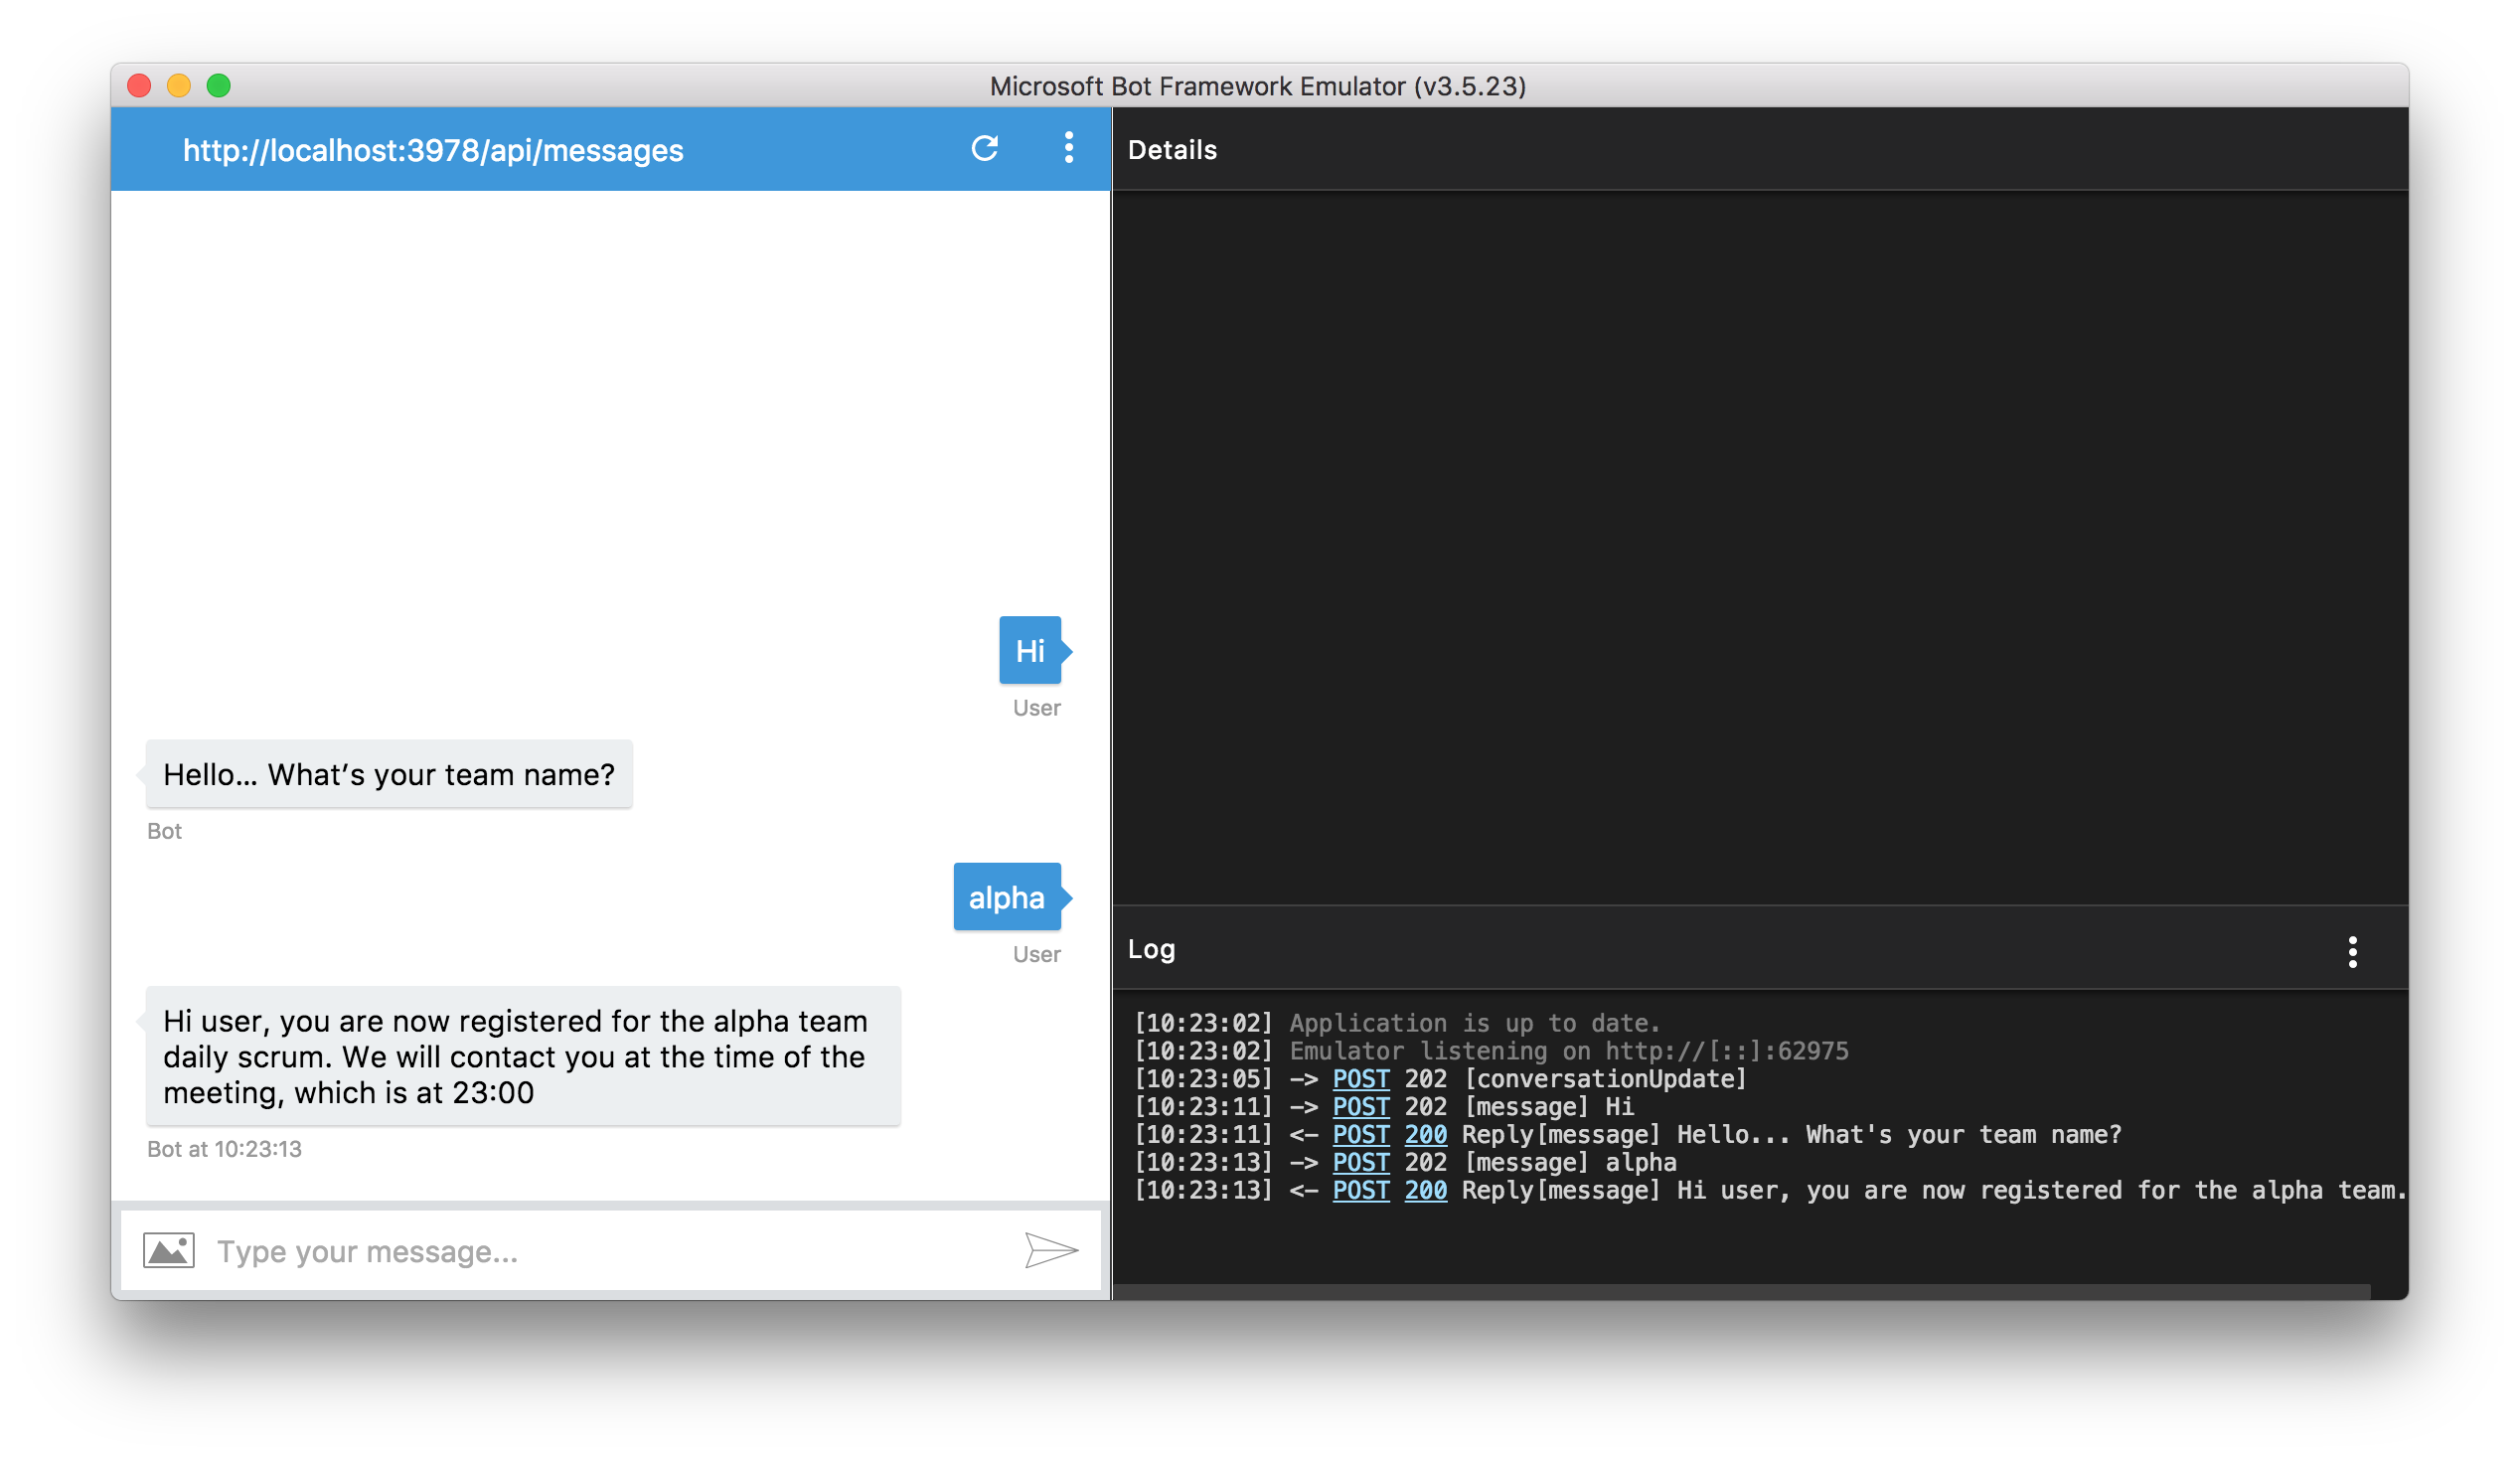
Now you can go into the data/teams.json file and you will see that we have the address of the emulator user saved as an object.
{
  "alpha": {
    "members": {
      "user": {
        "address": {
          "id": "3hk7agejfgehaaf26",
          "channelId": "emulator",
          "user": {
            "id": "default-user",
            "name": "User"
          },
          "conversation": {
            "id": "5kaf6861ll4a7je6"
          },
          "bot": {
            "id": "default-bot"
          },
          "serviceUrl": "http://localhost:54554",
          "useAuth": false
        }
      }
    },
    "time": 0
  }
}
We should also do something more meaningful with the root dialog. Once the user has finished the /firstRun, we should output some kind of message to let the user know something is happening.
bot.dialog("/", function(session) {
  // this is a hack in order to avoid this issue
  // https://github.com/Microsoft/BotBuilder/issues/1837
  if (!session.userData.team || !session.userData.user) {
    session.replaceDialog("/firstRun");
  } else {
    session.send("Hello there, it's not yet scrum time. I'll get back to you later.");
  }
});
Middleware
The first run middleware is just a normal middleware like any other, implemented by default in the framework. We can also create a custom middleware function. It is possible for a conversation ID to change during a chat with a Skype user, therefore we want to update the address (which contains the conversation ID) on every message received from the user. The address will be passed with every message, so let’s add this into our app.js
bot.use({
  botbuilder: function (session, next) {
    if (session.userData.team && session.userData.user) {
      var teams = readTeamsFromFile();
      teams[session.userData.team].members[session.userData.user].address = session.message.address;
      writeTeamsToFile(teams);
    }
    next();
  }
});
We add a middleware by using the use function of the UniversalBot class. It has to contain an object with the botbuilder key, whose value is a function taking two parameters: the session and the next function.
We check whether it’s a user who is already registered by checking if the team and user variables are set in the userData object of the session. If yes, update the address in the JSON file with the new one.
Timer
The next step is to add a function that will check every x seconds if there’s a team whose daily scrum meeting time has arrived. In the case that the meeting is due, start the “/dailyScrum” route with each member of the team by initiating a dialog with them in case that we have the address (the user has registered via “/firstRun”). If there is no address then unfortunately we have to skip this user and prompt them only when the first run is completed.
setInterval(function() {
  var teams = readTeamsFromFile();
  Object.keys(teams).forEach(function(team) {
    if (shouldStartScrum(team)) {
      teamsTmp[team] = { members: {} };
      Object.keys(teams[team].members).forEach(function(member) {
        if (teams[team].members[member].address) {
          bot.beginDialog(teams[team].members[member].address, "/dailyScrum", {team, member});
        }
      });
    }
  });
}, 3 * 1000);

function shouldStartScrum(team) {
  var teams = readTeamsFromFile();
  if (teams[team].time < 24 * 60 * 60 && getTimeInSeconds() > teams[team].time) {
    var nextTime = Math.round(new Date().getTime()/1000) - getTimeInSeconds() + 24 * 60 * 60 + teams[team].time;
    teams[team].time = nextTime;
    writeTeamsToFile(teams);
    return true;
  } else if (Math.round(new Date().getTime()/1000) > teams[team].time) {
    var nextTime = 24 * 60 * 60 + teams[team].time;
    teams[team].time = nextTime;
    writeTeamsToFile(teams);
    return true;
  }

  return false;
}

function getTimeInSeconds() {
  var d = new Date();
  return d.getHours() * 60 * 60 + d.getMinutes() * 60;
}
We also have to add the teamsTmp global variable at the top of the file, in order to keep the answers for each member of the team in memory for report generation.
var teamsTmp = {};
Note the shouldStartScrum function, which checks whether the timestamp is in the JSON file that acts as our storage and link between the Electron configurator and the bot. I would not recommend this to be used in a production environment. This is only for the purpose of this tutorial, to make a simple scheduler in order to show the features of the Bot Framework.
Daily scrum dialog
With everything we learned so far, it’s quite straightforward to add another waterfall dialog with three questions in the row and save data for every answer into a temporary variable, so that later on we can generate a report. This is the dialog that will be initiated by the timer created previously.
/* Add a dailyScrum dialog, which is called when it's a time for a daily scrum meeting, prompting the user in a waterfall fashion dialog */
bot.dialog("/dailyScrum", [
  // 1st question of the daily
  function (session) {
    builder.Prompts.text(session, "What did you do yesterday?");
  },

  /* After the users answer the 1st question, the waterfall dialog progresses to the next function, with the 2nd question, but checking that the input for the previous question was not an empty string. If yes return the user to the first question by calling replaceDialog */
  function(session, results) {
    if (results.response.length > 0) {
      teamsTmp[session.userData.team].members[session.userData.user] = { q1: results.response };
      builder.Prompts.text(session, "What will you do today?");
    } else {
      session.send("It can't be that you did nothing %s! Let's try this again.", session.userData.user);
      session.replaceDialog("/dailyScrum");
    }
  },

  // 3rd question
  function(session, results) {
    teamsTmp[session.userData.team].members[session.userData.user].q2 = results.response ;
    builder.Prompts.text(session, "Are there any impediments in your way?");
  },

  /* Finalize and schedule a report for the user. After the user has answered the third and last daily scrum question, set the isDone variable for that user to true */
  function(session, results) {
    teamsTmp[session.userData.team].members[session.userData.user].q3 = results.response;
    teamsTmp[session.userData.team].members[session.userData.user].isDone = true;
    session.send("Got it! Thank you. When all the members finished answering you will receive a summary.");

    /* If the user is the first to finish for the team, create a checker function for the whole team, which
    will periodically check whether everyone from the team finished, if yes, send all the users in the team
    a report */
    if (!teamsTmp[session.userData.team].checker) {
      teamsTmp[session.userData.team].checker = setInterval(function() {
        if (isEverybodyDone(session.userData.team)) {
          teamsTmp[session.userData.team].isDone = true;
          clearInterval(teamsTmp[session.userData.team].checker);
          var teams = fse.readJsonSync("./data/teams.json");
          Object.keys(teamsTmp[session.userData.team].members).forEach(function(member) {
            bot.beginDialog(teams[session.userData.team].members[member].address, "/report", { report: createReport(session.userData.team) });
          });

          session.endDialog();
        }
      }, 1000);
    }

    session.endDialog();

  }
]);

function isEverybodyDone(team) {
  var everybodyDone = true;

  Object.keys(teamsTmp[team].members).forEach(function (x) {
    if (!teamsTmp[team].members[x].isDone) {
      everybodyDone = false;
    }
  });

  return everybodyDone;
}

function createReport(team) {
  // change to members
  var report = "_"+ team + "_<br />";
  report += "___________<br />";

  Object.keys(teamsTmp[team].members).forEach(function(member) {
    report += "**User:** " + member + "<br />";
    report += "**What did " + member + " do yesterday:** " + teamsTmp[team].members[member].q1 + "<br />";
    report += "**What will " + member + " do today:** " + teamsTmp[team].members[member].q2 + "<br />";
    report += "**Impediments for " + member + ":** " + teamsTmp[team].members[member].q3 + "<br />";
    report += "___________<br />";
  });

  return report;
}
For formatting the messages you can use markdown.
Add it in front of everything, before the line bot.use(builder.Middleware.firstRun ...
Note that at the end of the daily scrum dialog, we are adding another function with setInterval(), which, when the first member of the team is finished, will start tracking whether everyone else in the team has finished with answering. When everyone is done, it begins a new dialog with each team member and sends them the generated report, which will we add as our last dialog path.
bot.dialog("/report", function(session, args) {
  session.send(args.report);
  session.endDialog();
});
Note that we pass in the report as an argument to the begin dialog function and then we can read it again from the args parameter in the called dialog.
Demo
It’s about time to try this out. I recommend that you quit and restart the emulator, and the bot script, in order to make sure that the user data is reset and the latest code from the script is running.
Additionally, change the time of the scrum in the JSON file, so you make sure that the meeting is triggered instead of waiting for the next time saved previously.
Try saying something to the bot and it will prompt you for your team name.

It could happen that the time for scrum has “passed” while starting the emulator or something similar, so in case the emulator does not prompt you with the questions immediately, set the time (either directly in the JSON file or via the Electron configurator) to 0 and it will force the bot to start another meeting for today.
As soon as you change this you should be prompted with the 3-step waterfall daily scrum dialog.
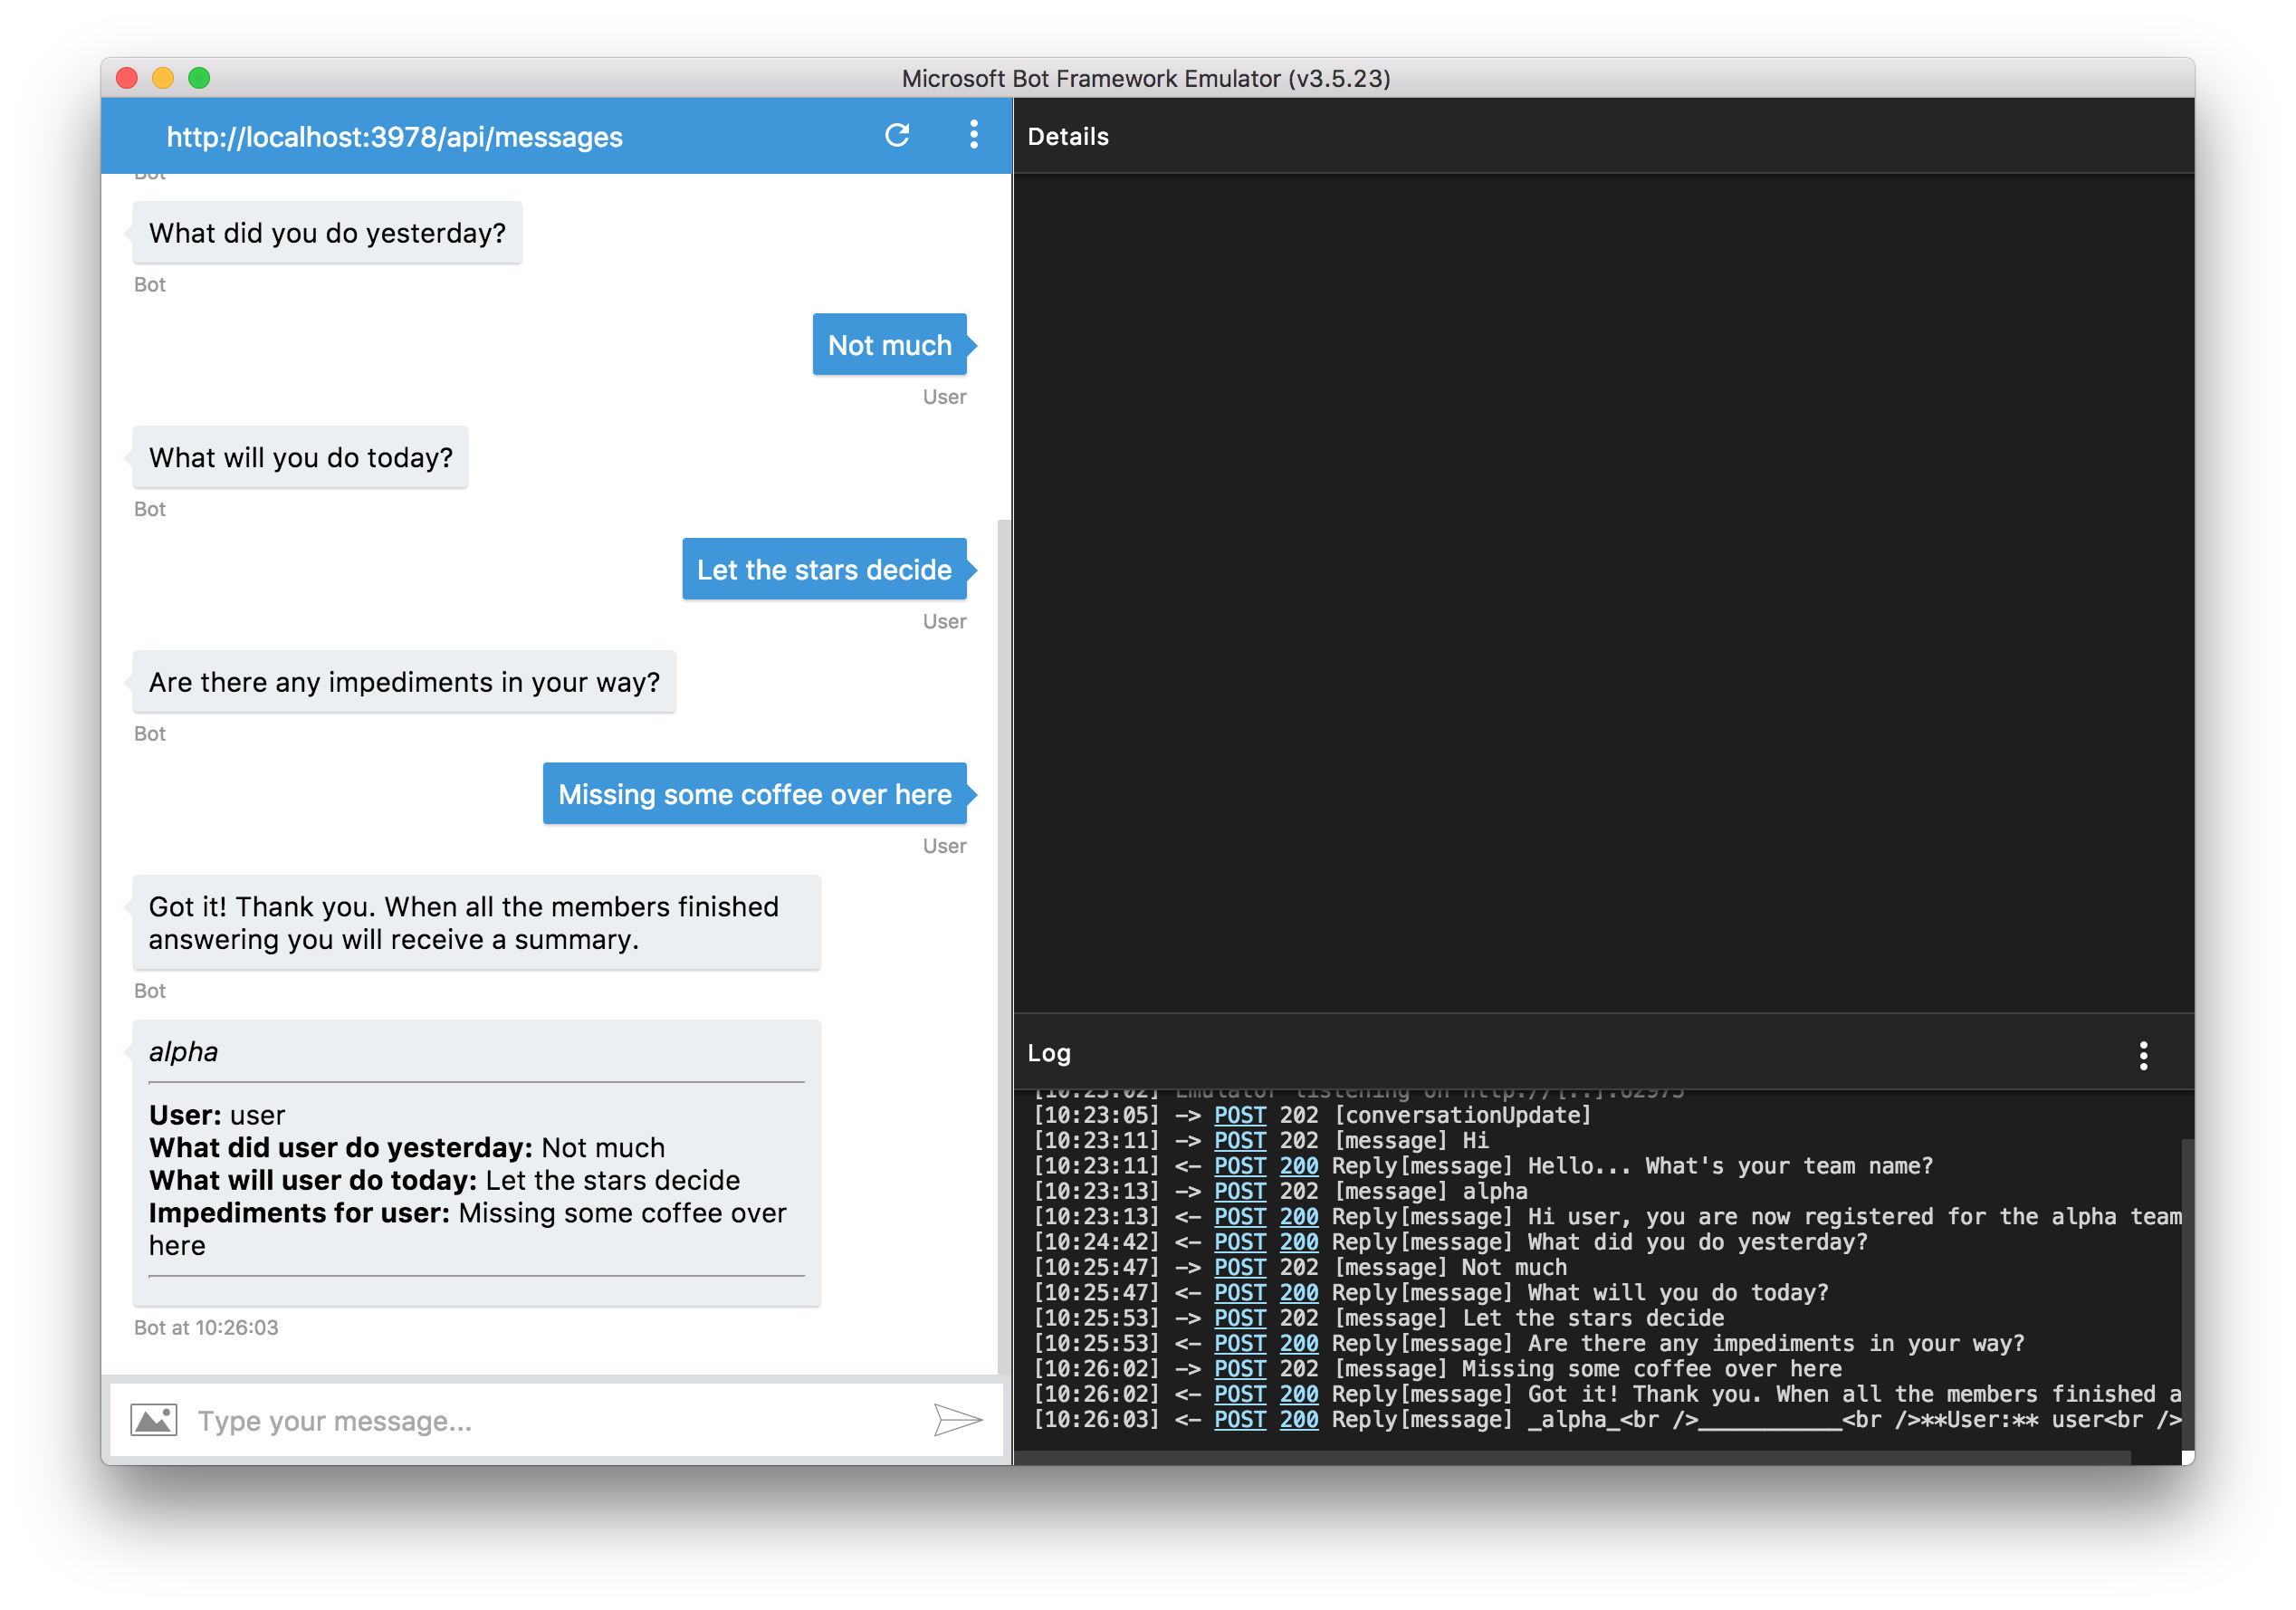
In order to try this with more than one user, we would have to deploy this on a server which is able to serve via SSL, since it’s a requirement of the Microsoft Bot Directory.
Next Steps
We’ve only really scratched the surface of what is possible with the MBF. Below are a couple of things worthy of additional research, to take your bots to the next level.
LUIS
The Microsoft Bot Framework offers much more than this. Some interesting things include LUIS (Language Understanding Intelligent Service), which uses data acquired from Cortana and BING to produce AI that tries to understand what the user wants to say.
Intent Dialogs
A somewhat simpler example are the intent dialogs, which are similar to the normal dialogs we used, but instead of a route they have a regex as a first parameter. Based on the regex, you can try to discover the INTENT of the user, and do some specific stuff for the recognized intent. For example:
// example from https://docs.botframework.com/en-us/node/builder/chat/IntentDialog/
var intents = new builder.IntentDialog();
bot.dialog("/", intents);

intents.matches(/^echo/i, [
  function (session) {
    builder.Prompts.text(session, "What would you like me to say?");
  },
  function (session, results) {
    session.send("Ok... %s", results.response);
  }
]);
What I found very useful are the example repos provided by Microsoft:
https://github.com/Microsoft/BotBuilder-Samples
That’s All Folks
We’ve covered the basics of Electron, Scrum, the dialog stack of the bot framework, waterfall type of dialog, middleware for message transmission, and how to initiate a dialog with a user at random without an initial request from the user.
Thank you for following this tutorial. We will see more and more of chat bots in the future (hopefully not too much?!). If you have any comments, suggestions, or questions, please leave a comment below.
This article was peer reviewed by Vildan Softic and Camilo Reyes. Thanks to all of SitePoint’s peer reviewers for making SitePoint content the best it can be!