Enable PhpMyAdmin’s Extra Features
PhpMyAdmin is one of the most used tools when it comes to managing your databases. By default, PhpMyAdmin does a great job. However, it comes with a lot of handy extra extensions which can be easily activated. In this article, we will activate these extensions and see what they can do for us.
Setup
Before you can continue, please make sure PhpMyAdmin is up and running. After logging in, you will probably notice this message at the bottom of the main panel:
The phpMyAdmin configuration storage is not completely configured, some extended features have been deactivated. To find out why click here.Clicking on here will lead you to a page indicating that you didn’t activate all extensions yet. You can activate them by changing the config.inc.php file and adding the following lines.
$cfg['Servers'][$i]['controluser'] = 'pma';
$cfg['Servers'][$i]['controlpass'] = 'pmapass';
$cfg['Servers'][$i]['pmadb'] = 'phpmyadmin';
$cfg['Servers'][$i]['bookmarktable'] = 'pma__bookmark';
$cfg['Servers'][$i]['relation'] = 'pma__relation';
$cfg['Servers'][$i]['table_info'] = 'pma__table_info';
$cfg['Servers'][$i]['pdf_pages'] = 'pma__pdf_pages';
$cfg['Servers'][$i]['table_coords'] = 'pma__table_coords';
$cfg['Servers'][$i]['column_info'] = 'pma__column_info';
$cfg['Servers'][$i]['history'] = 'pma__history';
$cfg['Servers'][$i]['recent'] = 'pma__recent';
$cfg['Servers'][$i]['table_uiprefs'] = 'pma__table_uiprefs';
$cfg['Servers'][$i]['users'] = 'pma__users';
$cfg['Servers'][$i]['usergroups'] = 'pma__usergroups';
$cfg['Servers'][$i]['navigationhiding'] = 'pma__navigationhiding';
$cfg['Servers'][$i]['tracking'] = 'pma__tracking';
$cfg['Servers'][$i]['userconfig'] = 'pma__userconfig';
$cfg['Servers'][$i]['designer_coords'] = 'pma__designer_coords';
$cfg['Servers'][$i]['favorite'] = ‘pma__favorite’;
$cfg['Servers'][$i]['savedsearches'] = 'pma__savedsearches';
Change the username, password and database name to your own liking. All the other config values are table names. By leaving these blank, you will deactivate these extensions. However, if you want to activate any, I would suggest to keep the same name as I provided above. Depending on your PhpMyAdmin version, not all config values will be available by default. In this case, I used the 4.2.x version of PhpMyAdmin.
When done, it’s time to create the database. Create a database with the name you defined in the config file. Next, you can search for a file named create_tables.sql on your machine, probably in PhpMyAdmin’s root folder or the scripts subfolder. In the case of a Linux machine, you can probably find it in /usr/share/phpMyAdmin/examples/ or /usr/share/doc/phpmyadmin/scripts/. Run this SQL file against your newly created database. If you changed any table name in the config above, make sure you change the name of the table here too.
Next, we need to create the user with the password we configured. Run the queries below, with the username and password you defined.
GRANT USAGE ON mysql.* TO 'pma'@'localhost' IDENTIFIED BY 'pmapass';
GRANT SELECT (
    Host, User, Select_priv, Insert_priv, Update_priv, Delete_priv,
    Create_priv, Drop_priv, Reload_priv, Shutdown_priv, Process_priv,
    File_priv, Grant_priv, References_priv, Index_priv, Alter_priv,
    Show_db_priv, Super_priv, Create_tmp_table_priv, Lock_tables_priv,
    Execute_priv, Repl_slave_priv, Repl_client_priv
    ) ON mysql.user TO 'pma'@'localhost';
GRANT SELECT ON mysql.db TO 'pma'@'localhost';
GRANT SELECT ON mysql.host TO 'pma'@'localhost';
GRANT SELECT (Host, Db, User, Table_name, Table_priv, Column_priv)
    ON mysql.tables_priv TO 'pma'@'localhost';
GRANT SELECT, INSERT, UPDATE, DELETE ON phpmyadmin.* TO 'pma'@'localhost';When logging in and out of PhpMyAdmin, the message we saw earlier should disappear. If it’s still there, click the link to see what is missing.
Let’s dive into all these extensions.
Bookmarking
By enabling bookmark, you are given the ability to bookmark your queries. When you create a query, you can tick a box to bookmark it. Also, when the query has already run, you can bookmark it by scrolling down to the bottom of the page and filling in the bookmark box.

Whenever you go to the SQL tab, you will see at the bottom that you can choose between several bookmarked queries. Pick the one you want to use and define if you want to submit, view or delete the query.

Relation
The option relation is probably one of the best features I have used in this whole list. If you are using foreign keys, those keys will become clickable. By clicking the foreign key, you will be redirected to the other table, showing the record with that particular key.
Also, while adding or editing a record with a foreign key, instead of a text field, you will get a select list with all the possible options.

Table info
Seeing a dropdown with all possible values in case of a foreign key is nice. Yet, it would be even better if it would show a certain column instead of the ID. To achieve this, make sure to activate table_info. Go to the master table, click on structure and click the relation view link. If you scroll all the way down to the bottom of the page, you can define which column to display.

Whenever I am creating a new record with a foreign key now, the value from the column I picked is now displayed next to the primary key. No longer do you need to remember a key.

PDF Pages
It is possible to export your relations to PDF. To be able to do this, you need to activate the pdf_pages, table_coords and relation in your config. Next, open the database you want to export to PDF. Click on the operations tab. Next, click the Edit or export relational schema link and continue. Fill in all fields and click submit. If you completed the form, a PDF will roll out, showing all the data you requested.
Column info
With column info, you can add comments to column names. This can come in handy when you want to make clear to other people what you are expecting in this column or what it contains. You can do so, by changing the column data. You will notice that a new comment field has been added. If you fill in a comment, the comment will then appear just below the column title.

Next to this, you can also apply transformations to columns, the same way you add a comment. With a transformation, you can convert a file name into a clickable link, which will open up the actual file.
History
If you enable history, all queries you run through PhpMyAdmin are saved in your history, until you log out or close your browser. You can view your query history by opening up the query pop-up window and clicking SQL History.
Recent
In the navigation panel, you will notice there is a recent button which contains a drop down with all tables you recently viewed. By default, this list of recent tables is already displayed. However, if you want to keep it persistent between sessions, you can activate recent in your config file, making sure your recent activity is saved.
Table UI Preferences
When viewing a table, you can reorder columns by dragging them to a different place. These changes are only visible changes for you. The order is still the same for the actual table. Next to that, you can also sort columns ascending and descending. During your session, the visual changes you are doing will be saved. However, after logging out, these settings will be set back to default. By enabling table_uiprefs, the settings will be persistent, making sure you always have the same view as you configured.
Users and User groups
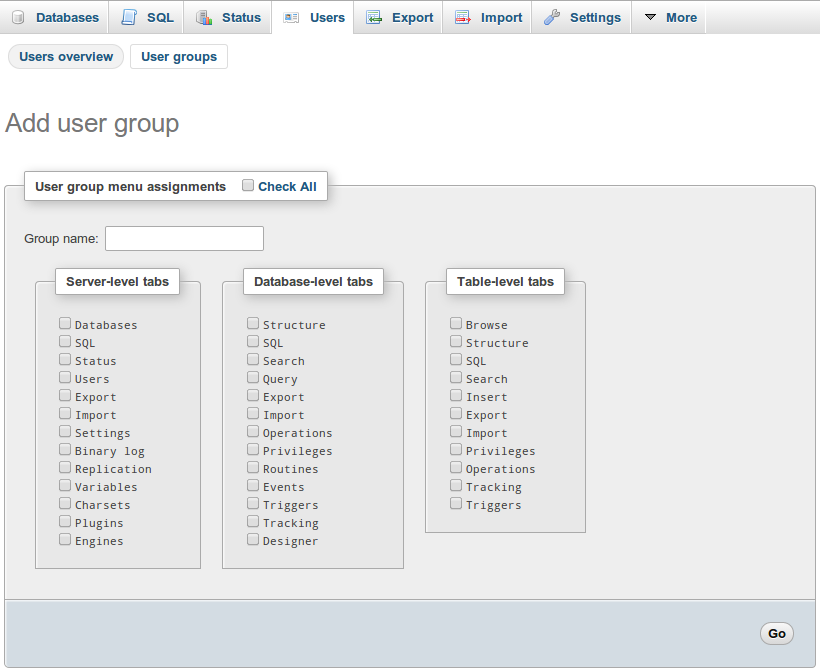
You might not want to show all options to all your users. In that case, you can add user groups to PhpMyAdmin by going to the user tab. Create a new group and define what they can see. Next, you can assign users to this group, making sure they only see the menu items you marked when creating the group. This way, you can show different views to different types of users and make sure you don’t see any options you are not using.

Navigation Hiding
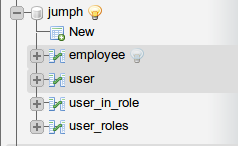
With navigationhiding, you can hide certain tables from your overview in the navigation panel. By clicking the light bulb next to a table, it will disappear. You can make it reappear again, by clicking the light bulb next to the table name. This way, you can make your view a lot cleaner, hiding tables you are not using actively.

Tracking
With tracking, you can track any changes performed through PhpMyAdmin on a particular table. By going to the table and then opening up the tab named tracking, you can create a version of the current table. Any changes to this table which are performed through PhpMyAdmin are now saved. This way, you can easily track what has changed in this table since that version was created.
![]()
User config
Any user configuration is saved by default in your browser. This means that whenever you use a different browser or you clean your browser cache, all your settings will be lost. By activating userconfig, the configuration will be saved in the database, allowing you to keep the same settings.
Designer Coordinates
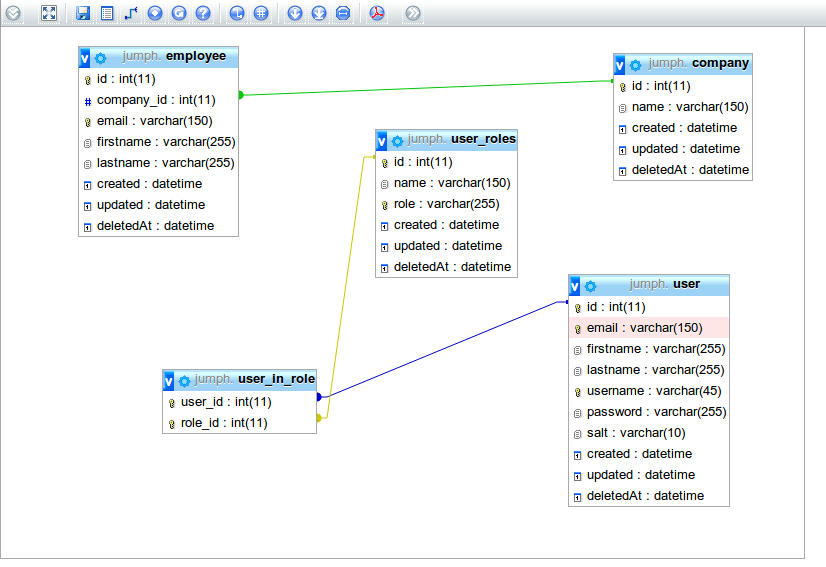
By enabling designer_coords, you can view the relationships between your tables in the designer mode. If you go to a database and click on designer, you will see a similar view like below, indicating all relations. Next to that, you can visually manage these relationships through this window.

Favorites
When viewing a database, you will notice that stars appear next to table names when you activate favorite. By clicking on a star, you add that table to your favorites. In the navigation panel, you will see a favorite drop down. Any tables you added to your favorites, will appear in this drop down.

Saved searches
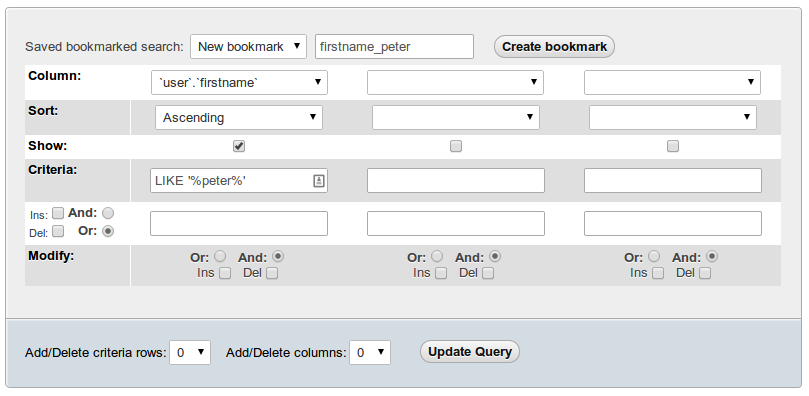
When you open up a database and you are going to the query tab, you can configure an extensive search here. You can save this search by bookmarking it. Note that this is a different bookmark than the SQL bookmarks we have seen earlier. However, this way you can save your searches and perform them later.

Conclusion
Activating these extensions is easy and can really improve the usability of PhpMyAdmin. I especially like the fact that I can click on foreign keys so I can see to which record it is connected. Are you going to activate these extensions in your PhpMyAdmin and if so, which are you going to activate? Have you been using them? I would love to hear from you in the comments below.