PredictionIO: Bootstrapping a Movie Recommendation App
In this tutorial, I’m going to walk you through PredictionIO, an open-source machine learning server, which allows you to create applications that could do the following:
- recommend items (e.g. movies, products, food)
- predict user behavior
- identify item similarity
- rank items

You can pretty much build any machine learning application with ease using PredictionIO. You don’t have to deal with numbers and algorithms and you can just concentrate on building the app itself.
Note that this two-part tutorial is a revival of our older PredictionIO post which, due to some changes in the tool, is no longer accurate to such a degree it warranted a full rewrite.
Installation and Configuration
The first thing that you need to do is install PredictionIO and its dependencies. You can do that in one of the following ways:
- Launch an AWS Instance
- Quick Install Script
- Manual Install
- Vagrant Install
- Docker Install
- Terminal.com
We’ll install using the Vagrant method. This way we can play with PredictionIO locally without having to deal with installation headaches. If you’re feeling adventurous, however, feel free to to pick any installation method mentioned in their documentation. Or, if you already have an existing Homestead Improved setup, you can use that instead and then install PredictionIO with the quick install script.
To install PredictionIO with Vagrant, open a terminal and execute the following command to clone the Vagrant file for bringing up the PredictionIO virtual machine.
git clone https://github.com/PredictionIO/PredictionIO-Vagrant.git
Once done, navigate to the directory and switch to the master branch:
cd PredictionIO-Vagrant/
git checkout master
Open the Vagrantfile and change the cpu execution cap and memory setting if you want. By default memory is set to 2048mb and cpu execution cap is 90. If you have more memory and a powerful processor, bump this up to a higher value. Note that cpuexecutioncap can only have a value of up to 100. The default value of 90 here means that a single virtual CPU can use up to 90% of a single host CPU.
config.vm.provider "virtualbox" do |v|
    v.customize ["modifyvm", :id, "--cpuexecutioncap", "90", "--memory", "2048"]
end
In order to expose the virtual machine to the host machine, you need to comment out the following line. Feel free to change the value for the ip if you want.
config.vm.network :private_network, ip: "192.168.33.10"
You can then edit the host file of the host machine to point out to this IP address. This way you can access the app at, for example, http://movierec.dev on the browser.
192.168.33.10 movierec.dev
Once you’re done configuring the Vagrantfile, save it then execute the following command to boot up the virtual machine:
vagrant up
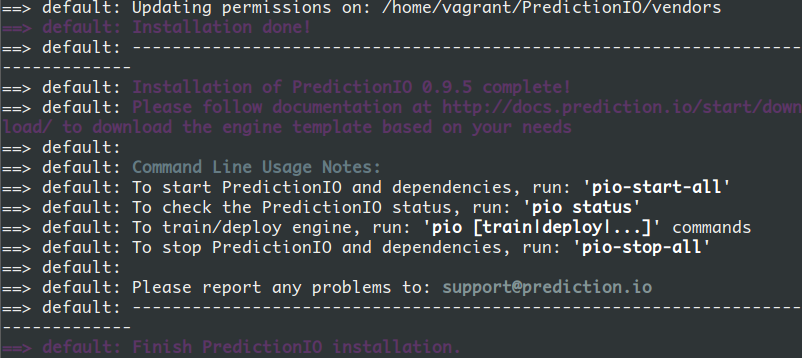
Since this is the first time that you’ve run the command, it will go ahead and execute the installation commands in the provisioning file (provision.sh) which, if you take a look at it, is basically using the quick install script. And if PredictionIO is already installed, it will simply start it with the pio-start-all command. This will start PredictionIO and all of its dependencies.

The Movie DB API
Since we are building a movie recommendation app, we need to have a decent list of movies that we can use for our app. For that, we will use the movie DB API.
In order to get access to their API, you first have to sign up for an account on their website. On your account page, click on the API link. You will then be prompted to enter your personal information along with the type of use. Once you’re done, you will get an email containing the API key that you can use to perform requests.
Overview of the App
Before we build the app, I’ll first provide you with an overview.
The app should be as simple as possible so we’ll only implement two essential features:
-
learning phase – this is the part where the app will randomly pick a specific movie from the database and show it to the user. We will then ask the user for on input whether he likes or dislikes the movie.
-
recommendation phase – this is the part where the app would recommend movies based on the inputs made by the user in the learning phase.
If you’re more of a visual person, here’s what the learning phase looks like:

And here’s the recommendation phase:

We won’t be implementing a log in system. This means that each time the app is accessed in the browser, the user is considered to be a new one. The user’s session will be kept intact throughout the learning phase and will only be cleared after showing the user a list of recommended movies.
Creating the Recommendation Engine
PredictionIO works by utilizing engines. Engines are responsible for making predictions. They contain machine learning algorithms used for crunching the data provided by an app. It can then respond to prediction queries after the machine learning algorithm has done its job.
The PredictionIO team already provides official template engines which can do things like rank products, e-commerce recommendation, recommend similar products, classify items, generic recommendation, and many others. The more advanced PredictionIO users have also created their own engines. These engines can be found at templates.prediction.io. In this tutorial, we’re going to use the generic recommendation engine. You can install an engine by using the pio template get command. This requires two arguments: the ID of the engine and the name that you want to give to the engine.
pio template get PredictionIO/template-scala-parallel-recommendation RecommendationEngine
Note: This will ask you to enter the template’s Scala package name. You can enter anything you want here. A good convention to use is com. and then your name. After that, it will install the engine in the current directory. So if you want to organize things a little bit, you can create a folder named predictionio-engines and put all your engines in there.
Once the engine has been created, we need to update it so it can handle custom events. The default configuration of the recommendation engine only handles ratings given to a specific item. For this movie recommendation app, we will only have the user like or dislike a random movie. We can configure it by editing the src/main/scala/DataSource.scala file which you can find in the root of the engine directory.
Once you have the file opened, look for the eventNames variable and set its value to Some(List("like", "dislike")). Next, look for the ratingValue variable and set its type and value to the following:
Double = event.event match {
  case "like" => 5.0
  case "dislike" => 1.0
  case _ => throw new Exception(s"Unexpected event ${event} is read.")
}
Here’s a side by side comparison of the default one and the updated one:
//default
eventNames = Some(List("rate", "buy")),

//updated
eventNames = Some(List("like", "dislike")),

//default
val ratingValue: Double = event.event match {
  case "rate" => event.properties.get[Double]("rating")
  case "buy" => 4.0 // map buy event to rating value of 4
  case _ => throw new Exception(s"Unexpected event ${event} is read.")
}

//updated
val ratingValue: Double = event.event match {
  case "like" => 5.0
  case "dislike" => 1.0
  case _ => throw new Exception(s"Unexpected event ${event} is read.")
}
Creating a New PredictionIO App
For every app where we want to use PredictionIO, there’s a counterpart PredictionIO app. There can be more than one app hosted on a single server so this is used to identify each app.
You can create a new app by using the pio app new command.
pio app new MovieRecommendationApp
This will return an access key which we can use in the app that we’re going to create. You can take note of the access key now or you can use the pio app list command later to list all the apps that you currently have.
Installing Dependencies
Now we’re ready to build the app. We will be using the Lumen Microframework for this app. You can install it by using the create-project command provided by Composer:
composer create-project laravel/lumen blog "5.1.*"
Once that’s done, we can update the composer.json file inside the lumen directory so we can install the other dependencies. The require object should now look like this:
"require": {
    "laravel/lumen-framework": "5.1.*",
    "vlucas/phpdotenv": "~1.0",
    "predictionio/predictionio": "~0.8.2",
    "elasticsearch/elasticsearch": "~1.0",
    "guzzlehttp/guzzle": "~5.0"
},
The laravel/lumen-framework and vlucas/phpdotenv are there by default since we installed lumen using composer create-project. The other dependencies that we have are the following:
predictionio/predictionio– the PredictionIO PHP SDK. This allows us to talk to the PredictionIO server.elasticsearch/elasticsearch– an elasticsearch client for PHP. We use this to save and retrieve movie details.guzzlehttp/guzzle– an HTTP client for PHP. We use this to make requests to the TMDB API.
After that, all we need to do is execute composer install.
Conclusion
In this introductory part, we’ve learned how to set up PredictionIO, all while customizing the recommendation engine and installing the dependencies. Stay tuned for the next part, where we will start building the movie recommendation app.