Eleventy Guide: A Framework-Agnostic Static Site Generator
Eleventy (or 11ty) is a Node.js static site generator (SSG). SSGs do most rendering work at build time to create a set of static HTML, CSS, and JavaScript files. The resulting pages need not have server-side dependencies such as runtimes or databases.
This leads to several key benefits:
- hosting is simple: you’re serving HTML files
- systems are secure: there’s nothing to hack
- performance can be great.
Eleventy has become increasingly popular and has attracted attention from big names in web development. It’s ideal for content sites and blogs, but has been adapted for online shops and reporting systems.
In most cases, you’ll be using Eleventy to generate HTML pages from Markdown documents which insert content into templates powered by engines such as Nunchucks. However, this tutorial also demonstrates how to use Eleventy as a complete build system for all assets. You don’t necessarily need a separate system such as npm scripts, webpack or Gulp.js, but you can still enjoy automated builds and live reloading.
Do You Need a JavaScript Framework?
A few SSGs adopt client-side JavaScript frameworks such as React or Vue.js. You can use a framework with Eleventy, but it’s not enforced.
In my view, a JavaScript framework is probably unnecessary unless you’re creating a complex app. And if you’re creating an app, an SSG is not the right tool! Gatsby fans may disagree, so please challenge/ridicule me on Twitter!
Show Me the Code
Eleventy claims to be simple, but it can be daunting when moving beyond the basics. This tutorial demonstrates how to build a simple site with pages and blog/article posts — a task often handled by WordPress.
The full code is available at https://github.com/craigbuckler/11ty-starter. You can download, install, and launch it on Windows, macOS, or Linux by entering the following commands in your terminal:
git clone https://github.com/craigbuckler/11ty-starter
cd 11ty-starter
npm i
npx eleventy --serve
Then navigate to the home page at http://localhost:8080 in your browser.
The steps below describe how to build the site from scratch.
Install Eleventy
Like any Node.js project, start by creating a directory and initializing a package.json file:
mkdir mysite
cd mysite
npm init
Then install Eleventy as a development dependency:
npm i @11ty/eleventy --save-dev
Note: this project installs modules as development dependencies since they need only run on a development machine. Some hosts with automated build processes may require you to use standard runtime dependencies.
Render Your First Page
Create a src directory where all source files will reside, then create an index.md file inside it. Add home page content such as:
‐‐‐
title: 11ty starter site
‐‐‐

This is a demonstration website using the [11ty static site generator](https://www.11ty.dev/). It shows pages, blog posts, lists, and tags.

The whole build process is managed through 11ty.
Content between the ‐‐‐ dash markers is known as front matter. It defines name-value metadata about the page which can be used to set parameters for Eleventy and templates. Only a title is set here, but you’ll add descriptions, dates, tags, and other data shortly.
An Eleventy configuration file named .eleventy.js must be created in your project’s root folder. This simple example code returns an object, which specifies the following:
- the source
srcdirectory for source files - the
builddirectory where website files will be created
// 11ty configuration
module.exports = config => {

  // 11ty defaults
  return {

    dir: {
      input: 'src',
      output: 'build'
    }

  };
};
To build the site and start a live-reloading server powered by Browsersync, enter the following:
npx eleventy --serve
Eleventy renders everything it finds in the src directory and outputs the resulting content to build:
$ npx eleventy --serve
Writing build/index.html from ./src/index.md.
Wrote 1 file in 0.12 seconds (v0.11.0)
Watching...
[Browsersync] Access URLs:
 ---------------------------------------
       Local: http://localhost:8080
    External: http://172.27.204.106:8080
 ---------------------------------------
          UI: http://localhost:3001
 UI External: http://localhost:3001
 ---------------------------------------
[Browsersync] Serving files from: build
In this case, a single build/index.html file is created can be accessed by loading the URL http://localhost:8080 in your browser.
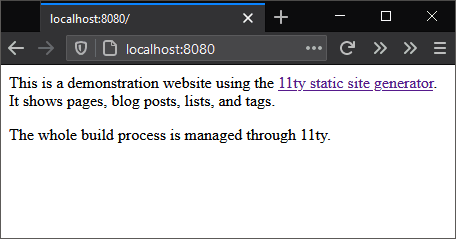
The HTML file created at build/index.html contains content rendered from the markdown file at src/index.md:
<p>This is a demonstration website using the <a href="https://www.11ty.dev/">11ty static site generator</a>. It shows pages, blog posts, lists, and tags.</p>
<p>The whole build process is managed through 11ty.</p>
The Eleventy server can be stopped with Ctrl | Cmd + C.
Note: it’s rarely necessary to stop Eleventy during site development, because new files are automatically rendered. However, the sections below add further configuration options, so restarting is required.
Creating Templates
Eleventy can use almost any JavaScript templating engine. Nunchucks is a good option since it’s comprehensive and used throughout the documentation at 11ty.dev.
Change the front matter in src/index.md to this:
‐‐‐
title: 11ty starter site
description: This is a demonstration website generated using the 11ty static site generator.
layout: page.njk
‐‐‐
This instructs Eleventy to use the page.njk Nunchucks template for layout. By default, Eleventy looks for templates in an _includes sub-directory in the source directory (src/). Any files located there are not rendered themselves but are used during the build process.
Create this new template at src/_includes/page.njk:
{% include "partials/htmlhead.njk" %}

<main>
{% block content %}

  <h1>{{ title }}</h1>

  {{ content | safe }}

{% endblock %}
</main>

{% include "partials/htmlfoot.njk" %}
The template places the title defined in the page’s front matter within an <h1> heading and replaces {{ content }} with HTML generated from the Markdown. (It uses the safe Nunchucks filter to output HTML without escaping quotes and angle brackets.)
The two {% include %} definitions reference files included within the template. Create an HTML header file at src/_includes/partials/htmlhead.njk, which also uses the page’s title and description:
<!DOCTYPE html>
<html lang="en">
<head>
  <meta charset="UTF-8" />
  <meta name="viewport" content="width=device-width, initial-scale=1.0" />
  <title>{{ title }}</title>
  <meta name="description" content="{{ description }}">
</head>
<body>
Then create the HTML footer at src/_includes/partials/htmlfoot.njk:
</body>
</html>
Stop and restart Eleventy with npx eleventy --serve.
The rendered build\index.html file now contains a fully formed HTML page:
<!DOCTYPE html>
<html lang="en">
<head>
  <meta charset="UTF-8" />
  <meta name="viewport" content="width=device-width, initial-scale=1.0" />
  <title>11ty starter site</title>
  <meta name="description" content="This is a demonstration website generated using the 11ty static site generator.">
</head>
<body>

  <h1>11ty starter site</h1>

  <p>This is a demonstration website using the <a href="https://www.11ty.dev/">11ty static site generator</a>. It shows pages, blog posts, lists, and tags.</p>
  <p>The whole build process is managed through 11ty.</p>

</body>
</html>
Note: when you view the source within a browser, you’ll also see a <script> has been added by BrowserSync after the <body> element. This is used to trigger live reloads and will not be present in the final build (see the “Build a Production Site” section below).
Create Further Pages
You can now create further content, such as an obligatory “About Us” section.
src/about/index.md:
‐‐‐
title: About us
description: What we do.
‐‐‐

Some information about us.
src/about/team.md:
‐‐‐
title: Our team
description: Information about us.
‐‐‐

Who are we and what we do.
src/about/privacy.md:
‐‐‐
title: Privacy policy
description: We keep your details private.
‐‐‐

Our privacy policy.
None of these files reference a template in their front matter. Eleventy lets you define defaults for all files in a directory by creating a <directory-name>.json file. In this case, it’s named src/about/about.json. It sets JSON values to use when they’re not explicitly defined in the page’s front matter:
{
  "layout": "page.njk"
}
Rerun npx eleventy --serve and examine the build folder to see how the site is starting to take shape:
index.html: the home pageabout/index.html: about us pageabout/team/index.html: team pageabout/privacy/index.html: privacy policy page
You can therefore use a slug-like URL in your browser. For example, http://localhost:8080/about/team/ shows the team page index.html file.
Unfortunately, it’s impossible to navigate between pages! You need a menu …
Create Navigation Menus
Eleventy provides a standard navigation plugin, which is installed by entering the following:
npm i @11ty/eleventy-navigation --save-dev
Plugins must be referenced in your .eleventy.js configuration file before the final return statement:
// 11ty configuration
module.exports = config => {

  /* --- PLUGINS --- */

  // navigation
  config.addPlugin( require('@11ty/eleventy-navigation') );


  // 11ty defaults
  return {

    dir: {
      input: 'src',
      output: 'build'
    }

  };
};
eleventyNavigation: front-matter sections must be defined in every page you want in the menu. The section sets the following:
- A
keyfor the page’s menu. This could be identical to thetitlebut is often shorter. - An optional
parent, which references the parent page’skey. - An optional
ordernumber; lower values appear first in the menu.
The home page front matter in src/index.md can be updated accordingly:
‐‐‐
title: 11ty starter site
description: This is a demonstration website generated using the 11ty static site generator.
layout: page.njk
eleventyNavigation:
  key: home
  order: 100
‐‐‐
The about page at src/about/index.md:
‐‐‐
title: About us
description: What we do.
eleventyNavigation:
  key: about
  order: 200
‐‐‐
The team page at src/about/team.md:
‐‐‐
title: Our team
description: Information about us.
eleventyNavigation:
  key: team
  parent: about
  order: 210
‐‐‐
The privacy policy page at src/about/privacy.md:
‐‐‐
title: Privacy policy
description: We keep your details private.
eleventyNavigation:
  key: privacy
  parent: about
  order: 220
‐‐‐
Note: using order values in multiples of 10 or higher allows pages to be inserted between others later without any manual renumbering.
A navigation menu can now be added to the page template at src/_includes/page.njk:
{% include "partials/htmlhead.njk" %}

<header>
  <nav>
    {{ collections.all | eleventyNavigation | eleventyNavigationToHtml | safe }}
  </nav>
</header>

<main>
...
This is some magic Eleventy plugin code which examines all pages and filters them with an eleventyNavigation() function to create a hierarchical list. That list render is rendered to HTML using an eleventyNavigationToHtml() function.
Restart npx eleventy --serve load any page to view the menu.
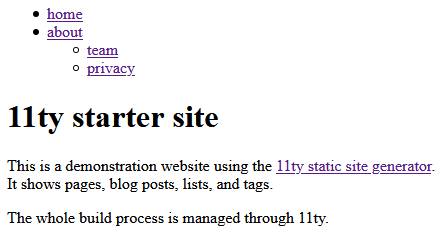
You can now navigate to any page defined within eleventyNavigation front matter.
Improve the Navigation
The navigation plugin returns a basic HTML list:
<ul>
  <li><a href="/">home</a></li>
  <li>
    <a href="/about/">about</a>
    <ul>
      <li><a href="/about/team/">team</a></li>
      <li><a href="/about/privacy/">privacy</a></li>
    </ul>
  </li>
</ul>
This will be adequate for most sites, but you can improve it. For example:
- provide an option to show the menu to a specific level — such as the top level only in the header and all pages in the footer
- highlight the active page while making it unclickable
- set styling classes for active and open menu items.
One way to achieve this is by creating a reusable shortcode, which will be familiar to anyone who’s used WordPress. A shortcode, and any optional arguments, runs a function which returns an HTML string that’s placed in the template.
Stop your Eleventy server and update the src/_includes/page.njk template to use a {% navlist %} shortcode in the <header> and <footer> sections:
{% include "partials/htmlhead.njk" %}

<header>
  <nav>
    {% navlist collections.all | eleventyNavigation, page, 1 %}
  </nav>
</header>

<main>
{% block content %}

  <h1>{{ title }}</h1>

  {{ content | safe }}

{% endblock %}
</main>

<footer>
  <nav>
    {% navlist collections.all | eleventyNavigation, page, 2 %}
  </nav>
</footer>

{% include "partials/htmlfoot.njk" %}
The navlist shortcode is passed three parameters:
- Every page filtered through the
eleventyNavigation()function, which returns a hierarchical list of page objects. Each page defines achildrenarray of subpages. - The current
page. - An optional
level. A value of1returns the HTML for the top level only.2returns the top level and all immediate child pages.
The navlist shortcode must be registered using an .addShortcode() function in .eleventy.js before the return statement. It’s passed a shortcode name and the function to call:
  /* --- SHORTCODES --- */

  // page navigation
  config.addShortcode('navlist', require('./lib/shortcodes/navlist.js'));
You can now export a function in lib/shortcodes/navlist.js. The code below recursively examines all pages to generate the appropriate HTML (don’t worry if this is difficult to follow).
Note: the shortcode file has been created outside of the src folder since it’s not part of the site, but you could also define it in src/_includes.
// generates a page navigation list
const
  listType      = 'ul',
  elementActive = 'strong',
  classActive   = 'active',
  classOpen     = 'open';

// pass in collections.all | eleventyNavigation, (current) page, and maximum depth level
module.exports = (pageNav, page, maxLevel = 999) => {

  function navRecurse(entry, level = 1) {

    let childPages = '';

    if (level < maxLevel) {
      for (let child of entry.children) {
        childPages += navRecurse(child, level++);
      }
    }

    let
      active = (entry.url === page.url),
      classList = [];

    if ((active && childPages) || childPages.includes(`<${ elementActive }>`)) classList.push(classOpen);
    if (active) classList.push(classActive);

    return (
      '<li' +
      (classList.length ? ` class="${ classList.join(' ') }"` : '') +
      '>' +
      (active ? `<${ elementActive }>` : `<a href="${ entry.url }">`) +
      entry.title +
      (active ? `</${ elementActive }>` : '</a>') +
      (childPages ? `<${ listType }>${ childPages }</${ listType }>` : '') +
      '</li>'
    );

  }

  let nav = '';
  for (let entry of pageNav) {
    nav += navRecurse(entry);
  }

  return `<${ listType }>${ nav }</${ listType }>`;

};
Rerun npx eleventy --serve and navigate to the About page. The header <nav> HTML now contains the following:
<ul>
  <li><a href="/">home</a></li>
  <li class="active"><strong>about</strong></li>
</ul>
The footer <nav> HTML contains this:
<ul>
  <li><a href="/">home</a></li>
  <li class="open active">
    <strong>about</strong>
    <ul>
      <li><a href="/about/team/">team</a></li>
      <li><a href="/about/privacy/">privacy</a></li>
    </ul>
  </li>
</ul>
Adding Article/Blog Posts
Articles or blog posts differ from standard pages. They’re normally dated and shown on an index page in reverse chronological order.
Create a new src/articles directory and add some Markdown files. In this example, six files named artice-01.md to article-06.md have been created, although you’d normally use better names to create more readable SEO-friendly URLs.
Example content for article/article-01.md:
‐‐‐
title: The first article
description: This is the first article.
date: 2020-09-01
tags:
  - HTML
  - CSS
‐‐‐

This is an article post.

## Subheading

Lorem ipsum dolor sit amet, consectetur adipiscing elit.
Each post is assigned a date and one or more tags (HTML and CSS are used here). Eleventy automatically creates a collection for each tag. For example, an HTML collection is an array of all posts tagged with HTML. You can use that collection to index or display those pages in interesting ways.
The most recent article-06.md file has a draft value set and a date into the far future:
‐‐‐
title: The sixth article
description: This is the sixth article.
draft: true
date: 2029-09-06
tags:
  - HTML
  - CSS
  - JavaScript
‐‐‐
This indicates the post should not be published (on the live site) until the date has passed and the draft has been removed. Eleventy doesn’t implement this functionality, so you must create your own custom collection which omits draft posts.
Add a couple of lines to the top of .eleventy.js to detect development mode and return the current datetime:
// 11ty configuration
const
  dev  = global.dev  = (process.env.ELEVENTY_ENV === 'development'),
  now = new Date();

module.exports = config => {
...
}
Then define a collection named post by calling .addCollection() before the return statement. The following code extracts all md files in the src/articles directory but removes any where draft or a future publication date is set (unless you’re using development mode):
  // post collection (in src/articles)
  config.addCollection('post', collection =>

    collection
      .getFilteredByGlob('./src/articles/*.md')
      .filter(p => dev || (!p.data.draft && p.date <= now))

  );
Create a new src/_includes/post.njk template for posts. This is based on the page.njk template, but the content block also shows the article date, word count, and next/previous links extracted from this post collection:
{% extends "page.njk" %}

{% block content %}

  <h1>{{ title }}</h1>

  {% if date %}<p class="time"><time datetime="{{ date }}">{{ date }}</time></p>{% endif %}

  <p class="words">{{ content | wordcount }} words</p>

  {{ content | safe }}

  {% set nextPost = collections.post | getNextCollectionItem(page) %}
  {% if nextPost %}<p>Next article: <a href="{{ nextPost.url }}">{{ nextPost.data.title }}</a></p>{% endif %}

  {% set previousPost = collections.post | getPreviousCollectionItem(page) %}
  {% if previousPost %}<p>Previous article: <a href="{{ previousPost.url }}">{{ previousPost.data.title }}</a></p>{% endif %}

{% endblock %}
Finally, define an src/articles/article.json file to set post.njk as the default template:
{
  "layout": "post.njk"
}
Run npx eleventy --serve, and navigate to http://localhost:8080/articles/article-01/:
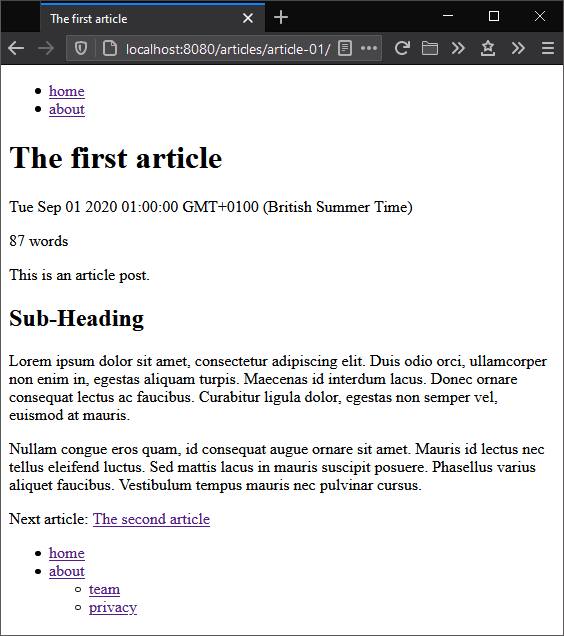
Create an Article/Blog Index Page
Although you can navigate from one post to another, it would be useful to create an index page at http://localhost:8080/articles/ to show all posts in reverse chronological order (newest first).
Eleventy provides a pagination facility which can create any number of pages by iterating through a set of data — such as the posts collection created above.
Create a new file at src/articles/index.md with the following content:
‐‐‐
title: Article index
description: A list of articles published on this site.
layout: page.njk
eleventyNavigation:
  key: articles
  order: 900
pagination:
  data: collections.post
  alias: pagelist
  reverse: true
  size: 3
‐‐‐

The following articles are available.
The front matter configuration does the following:
- It sets the standard
page.njktemplate. - It adds the page as an
articlesmenu item. - It creates a list named
pagelistfromcollections.post, reverses it (newest posts first), and allows up to three items per page. With six articles, Eleventy will generate two pages with three posts on each.
Now modify the content block in src/_includes/page.njk to include a new pagelist.njk partial:
{% block content %}

  <h1>{{ title }}</h1>

  {{ content | safe }}

  {% include "partials/pagelist.njk" %}

{% endblock %}
Create that partial at src/_includes/partials/pagelist.njk with code to loop through the pagelist pagination object and output each post’s link, title, date, and description:
{% if pagelist %}
<aside class="pagelist">

  {%- for post in pagelist -%}
  <article>

    <h2><a href="{{ post.url }}">{{ post.data.title }}</a></h2>

    {% if post.data.date %}<p class="time"><time datetime="{{ post.data.date }}">{{ post.data.date }}</time></p>{% endif %}

    <p>{{ post.data.description }}</p>

  </article>
  {%- endfor -%}

</aside>
{% endif %}
Below this code, you can add next and previous links to navigate through the paginated index:
{% if pagination.href.previous or pagination.href.next %}
<nav class="pagenav">

  {% if pagination.href.previous %}
    <p><a href="{{ pagination.href.previous }}">previous</a></p>
  {% endif %}

  {% if pagination.href.next %}
    <p><a href="{{ pagination.href.next }}">next</a></p>
  {% endif %}

</nav>
{% endif %}
Before you restart the build process, set the ELEVENTY_ENV environment variable to development to ensure draft and future-dated posts are included in the build. On Linux/macOS, enter:
ELEVENTY_ENV=development
or at the Windows cmd prompt:
set ELEVENTY_ENV=development
or Windows Powershell:
$env:ELEVENTY_ENV="development"
Re-run npx eleventy --serve and refresh your browser. A new articles link will have appeared in the menu which shows the three most recent articles at http://localhost:8080/articles/:
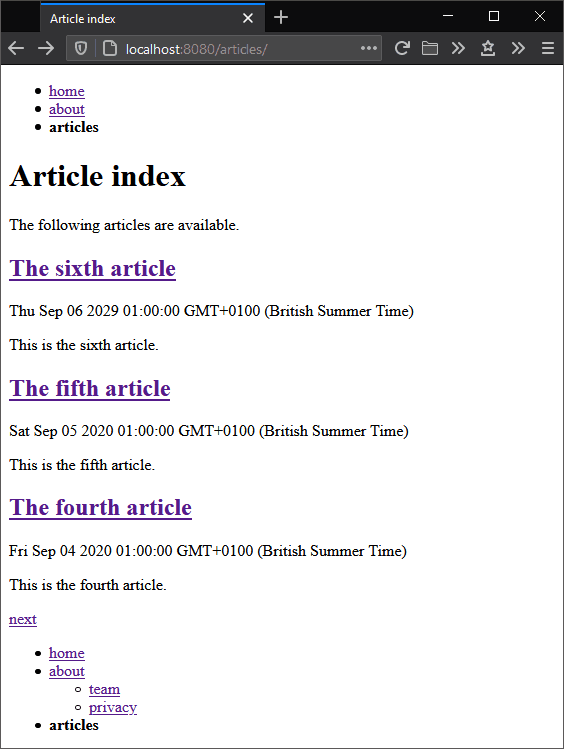
The next link leads to a further page of articles at http://localhost:8080/articles/1/.
Creating Custom Filters
The screenshots above show dates as unfriendly JavaScript strings. Eleventy provides filters which can modify data and return a string. You’ve already seen this used when Markdown-generated content is passed through a safe filter to output unencoded HTML: {{ content | safe }}.
Create a new lib/filters/dateformat.js file with the following code. It exports two functions:
ymd()which converts a date to machine-readableYYYY-MM-DDformat for the HTMLdatetimeattribute, andfriendly()which converts a date to a human-readable format, e.g.1 January, 2020.
// date formatting functions
const toMonth = new Intl.DateTimeFormat('en', { month: 'long' });


// format a date to YYYY-MM-DD
module.exports.ymd = date => (

  date instanceof Date ?
    `${ date.getUTCFullYear() }-${ String(date.getUTCMonth() + 1).padStart(2, '0') }-${ String(date.getUTCDate()).padStart(2, '0') }` : ''

);


// format a date to DD MMMM, YYYY
module.exports.friendly = date => (

  date instanceof Date ?
    date.getUTCDate() + ' ' + toMonth.format(date) + ', ' + date.getUTCFullYear() : ''

);
You can also create a filter which shows the number of words in a post rounded up to the nearest ten and formatted with comma separators as well as the estimated read time. Create lib/filters/readtime.js with the following code:
// format number of words and reading time
const
  roundTo     = 10,
  readPerMin  = 200,
  numFormat   = new Intl.NumberFormat('en');

module.exports = count => {

  const
    words     = Math.ceil(count / roundTo) * roundTo,
    mins      = Math.ceil(count / readPerMin);

  return `${ numFormat.format(words) } words, ${ numFormat.format(mins) }-minute read`;

};
Register the filters in .eleventy.js anywhere before the return statement:
  /* --- FILTERS --- */

  // format dates
  const dateformat = require('./lib/filters/dateformat');
  config.addFilter('datefriendly', dateformat.friendly);
  config.addFilter('dateymd', dateformat.ymd);

  // format word count and reading time
  config.addFilter('readtime', require('./lib/filters/readtime'));
Then update src/_includes/post.njk to use the dateymd, datefriendly, and readtime filters:
  {% if date %}<p class="time"><time datetime="{{ date | dateymd }}">{{ date | datefriendly }}</time></p>{% endif %}

  <p class="words">{{ content | wordcount | readtime }}</p>
Then change the article index partial at src/_includes/partials/pagelist.njk to use the dateymd and datefriendly filters:
{% if post.data.date %}<p class="time"><time datetime="{{ post.data.date | dateymd }}">{{ post.data.date | datefriendly }}</time></p>{% endif %}
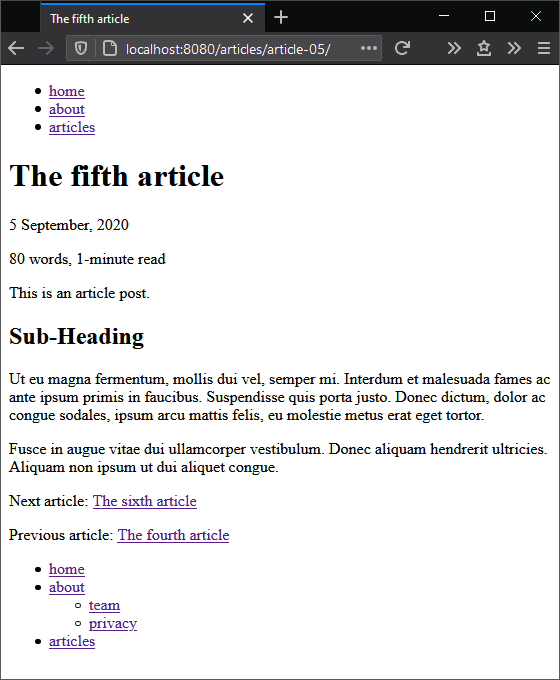
Restart the build with npx eleventy --serve and refresh your browser. Load any article to see friendly dates, a formatted word count, and a reading time estimate:
The resulting HTML:
<p class="time"><time datetime="2020-09-05">5 September, 2020</time></p>

<p class="words">80 words, 1-minute read</p>
Process Images with JavaScript Templates
Eleventy can copy files from any folder using the .addPassthroughCopy() function in .eleventy.js. For example, to copy all files in src/images/ to build/images/, you would add:
config.addPassthroughCopy('src/images');
That may be adequate if your images are already optimized, but automated build-time optimization guarantees file reductions. At this point, developers often turn to another system such as npm scripts, webpack, or Gulp.js but that may not be necessary.
JavaScript is a first-class templating option in Eleventy. Any file ending .11ty.js will be processed during the build. The file must export a JavaScript class with:
- a
data()method which returns front-matter settings as a JavaScript object - a
render()method — which typically returns a string, but it can also run synchronous or asynchronous processes and returntrue.
To reduce image sizes, install imagemin and plugins for JPEG, PNG and SVG files:
npm i imagemin imagemin-mozjpeg imagemin-pngquant imagemin-svgo --save-dev
Create an images directory in src, add some images, then create a new src/images/images.11ty.js file with the following code:
// image minification
const
  dest = './build/images',

  fsp = require('fs').promises,
  imagemin = require('imagemin'),
  plugins = [
    require('imagemin-mozjpeg')(),
    require('imagemin-pngquant')({ strip: true }),
    require('imagemin-svgo')()
  ];

module.exports = class {

  data() {

    return {
      permalink: false,
      eleventyExcludeFromCollections: true
    };

  }

  // process all files
  async render() {

    // destination already exists?
    try {
      let dir = await fsp.stat(dest);
      if (dir.isDirectory()) return true;
    }
    catch(e){}

    // process images
    console.log('optimizing images');

    await imagemin(['src/images/*', '!src/images/*.js'], {
      destination: dest,
      plugins
    });

    return true;

  }
};
Re-run npx eleventy --serve and optimized versions of your images will be copied to the build/images/ folder.
Note: the code above ends if a build/images directory is found. This is a simple solution to abandon reprocessing the same images during every build and ensures Eleventy remains fast. If you add further images, delete the build/images folder first to ensure they’re all generated. Better options are available, but they require far more code!
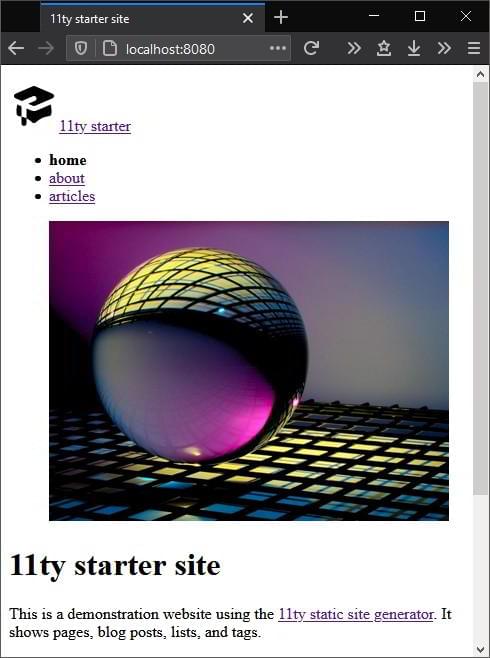
Images can now be added within Markdown or template files. For example, the <header> defined in src/_includes/page.njk can have a logo and hero image:
<header>

  <p class="logo"><a href="/"><img src="/images/logo.svg" width="50" height="50" alt="11ty starter">11ty starter</a></p>

  <nav>
    {% navlist collections.all | eleventyNavigation, page, 1 %}
  </nav>

  <figure><img src="/images/{% if hero %}{{ hero }}{% else %}orb.jpg{% endif %}" width="400" height="300" alt="decoration" /></figure>

</header>
A hero value can be set in front-matter as necessary — for example, in src/articles/articles.json:
{
  "layout": "post.njk",
  "hero": "phone.jpg"
}
Process CSS with Transforms
You could process CSS in a similar way or use any other a build system. However, Eleventy transforms are a good option in this situation. Transforms are functions which are passed the current rendered string content and a file path. They then return a modified version of that content.
I considered using Sass for CSS preprocessing, but PostCSS with a few plugins can implement a lightweight alternative which still supports partials, variables, mixins, and nesting. Install the PostCSS modules in your project:
npm i postcss postcss-advanced-variables postcss-nested postcss-scss cssnano --save-dev
Then create a lib/transforms/postcss.js file with the following code. It verifies a .css file is being passed before processing, minifying, and adding source maps when the build runs in development mode:
// PostCSS CSS processing

/* global dev */

const
  postcss = require('postcss'),
  postcssPlugins = [
    require('postcss-advanced-variables'),
    require('postcss-nested'),
    require('cssnano')
  ],
  postcssOptions = {
    from: 'src/scss/entry.scss',
    syntax: require('postcss-scss'),
    map: dev ? { inline: true } : false
  };

module.exports = async (content, outputPath) => {

  if (!String(outputPath).endsWith('.css')) return content;

  return (
    await postcss(postcssPlugins).process(content, postcssOptions)
  ).css;

};
The transform must be registered using an .addTransform() function in .eleventy.js before the return statement. An .addWatchTarget() call will trigger a full site rebuild whenever a file changes in the src/scss/ directory:
  // CSS processing
  config.addTransform('postcss', require('./lib/transforms/postcss'));
  config.addWatchTarget('./src/scss/');
Create a src/scss/main.scss file and include whatever SCSS or CSS code you need. The example code imports further SCSS files:
// settings
@import '01-settings/_variables';
@import '01-settings/_mixins';

// reset
@import '02-generic/_reset';

// elements
@import '03-elements/_primary';

// etc...
Eleventy will not process CSS or SCSS files directly, so you must create a new template file at src/scss/main.njk with the following code:
‐‐‐
permalink: /css/main.css
eleventyExcludeFromCollections: true
‐‐‐
@import 'main.scss';
This imports your main.scss file and renders it to build/css/main.css before the transform function processes it accordingly. Similar SCSS/CSS and .njk files can be created if you require more than one CSS file.
Re-run npx eleventy --serve and check the content of CSS files built to build/css/main.css. The source map ensures the CSS declaration’s original source file location is available when inspecting styles in your browser’s developer tools.
Minifying HTML with Transforms
A similar transform can be used to minify HTML with html-minifier. Install it like so:
npm i html-minifier --save-dev
Create a new lib/transforms/htmlminify.js file with the following code. It verifies an .html file is being processed and returns a minified version:
// minify HTML
const htmlmin = require('html-minifier');

module.exports = (content, outputPath = '.html') => {

  if (!String(outputPath).endsWith('.html')) return content;

  return htmlmin.minify(content, {
    useShortDoctype: true,
    removeComments: true,
    collapseWhitespace: true
  });

};
As before, register the transform in .eleventy.js somewhere before the return statement:
  // minify HTML
  config.addTransform('htmlminify', require('./lib/transforms/htmlminify'));
Note: you could consider not minifying or even beautifying HTML during development. That said, HTML whitespace can affect browser rendering, so it’s usually best to build the code in the same way you do for production. Source viewing will become more difficult, but browser developer tools show the resulting DOM.
Inlining Assets with Transforms
It’s often necessary to inline other assets within your HTML. SVGs are prime candidates because the images become part of the DOM and can be manipulated with CSS. It can also be practical to reduce HTTP requests by inlining CSS in <style> elements, JavaScript in <script> elements, or base64-encoded images in <img> elements.
The inline-source module can handle all situations for you. Install it with this:
npm i inline-source --save-dev
Now add a new lib/transforms/inline.js file with the following code to check and process HTML content:
// inline data
const { inlineSource } = require('inline-source');

module.exports = async (content, outputPath) => {

  if (!String(outputPath).endsWith('.html')) return content;

  return await inlineSource(content, {
    compress: true,
    rootpath: './build/'
  });

};
Register the transform in .eleventy.js before the return statement:
  // inline assets
  config.addTransform('inline', require('./lib/transforms/inline'));
Now add inline attributes to any <img>, <link>, or <script> tag. For example:
<img src="/images/logo.svg" width="50" height="50" alt="11ty starter" inline>
During the build, the transform will replace the <img> tag with the imported <svg> code.
Process JavaScript with JavaScript Templates
Client-side JavaScript could be handled with a transform, but JavaScript templates named <something>.11ty.js are also an option because they’re automatically processed by Eleventy (see the “Process Images with JavaScript Templates” section above).
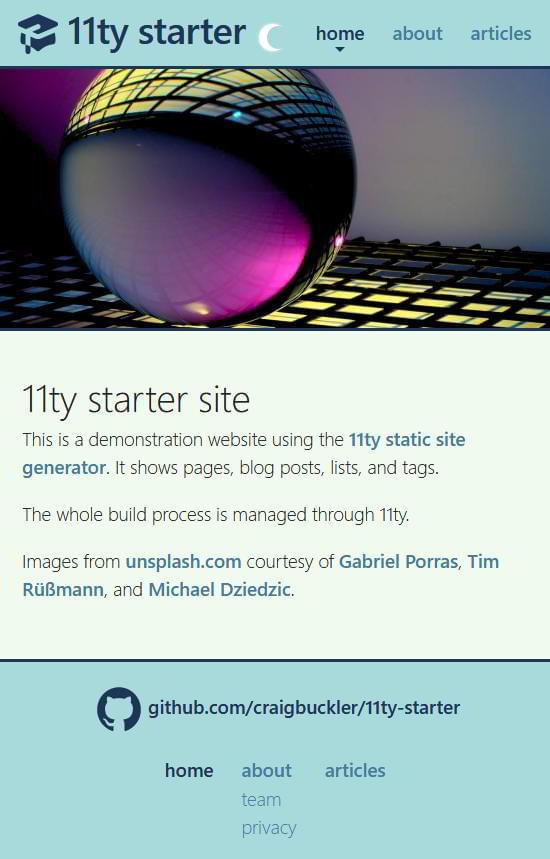
The example code provides ES6 scripts to implement simple dark/light theme switching. Rollup.js is used to bundle all modules referenced by main.js into a single file and perform tree-shaking to remove any unused functions. The terser plugin then minifies the resulting code.
Install the Rollup.js modules with the following:
npm i rollup rollup-plugin-terser --save-dev
Then create a js directory in src and add your ES6 scripts. A single src/js/main.js entry script must be defined which imports others. For example:
import * as theme from './lib/theme.js';
Create a new src/js/javascript.11ty.js file with the following code to process src/js/main.js into a single bundle and add a source map when building in development mode:
// JavaScript processing

/* global dev */

const
  jsMain = 'js/main.js',

  rollup = require('rollup'),
  terser = require('rollup-plugin-terser').terser,

  inputOpts = {
    input: './src/' + jsMain
  },

  outputOpts = {
    format: 'es',
    sourcemap: dev,
    plugins: [
      terser({
        mangle: {
          toplevel: true
        },
        compress: {
          drop_console: !dev,
          drop_debugger: !dev
        },
        output: {
          quote_style: 1
        }
      })
    ]
  }
  ;


module.exports = class {

  data() {

    return {
      permalink: jsMain,
      eleventyExcludeFromCollections: true
    };

  }

  // PostCSS processing
  async render() {

    const
      bundle = await rollup.rollup(inputOpts),
      { output } = await bundle.generate(outputOpts),
      out = output.length && output[0];

    let code = '';
    if (out) {

      // JS code
      code = out.code;

      // inline source map
      if (out.map) {
        let b64 = new Buffer.from(out.map.toString());
        code += '//# sourceMappingURL=data:application/json;base64,' + b64.toString('base64');
      }

    }

    return code;

  }
};
Any changes to your JavaScript files can trigger rebuilds by adding the following line to .eleventy.js before the return:
config.addWatchTarget('./src/js/');
The resulting script can then be included in your pages — for example, in src/_includes/partials/htmlfoot.njk:
<script type="module" src="/js/main.js"></script>

</body>
</html>
Note: the sample code builds ES6 modules rather than transpiling to ES5. The script is smaller, but browser compatibility will be more limited. That said, it’s a progressive enhancement and the site works without JavaScript.
Restart npx eleventy --serve and your minified script will load and run. The final site can now be viewed in its award-winning glory:
Build a Production Site
Once you’re happy with your site, you can build it in production mode without source maps and other development options.
Delete the build folder and set ELEVENTY_ENV to production on Linux/macOS:
ELEVENTY_ENV=production
or the Windows cmd prompt:
set ELEVENTY_ENV=production
or Windows Powershell:
$env:ELEVENTY_ENV="production"
Then run npx eleventy to build the full site.
The resulting files in the /build directory can be uploaded to any host. Some static site specialist services can automatically build and publish your site whenever new code is pushed to GitHub or similar repositories.
Your Next Steps with Eleventy
This example project demonstrates the basics of Eleventy with some options for building different types of content. However, Eleventy is flexible, and you’re free to use whatever techniques you prefer. There are dozens of starter projects and each takes a slightly different approach.
Suggestions for further site features:
- Create an index page for each tag listing the associated articles. Remember Eleventy automatically creates separate collections for each tag.
- Generate an RSS
feed.xmlfile listing all posts. - Create a
sitemap.xmlfile listing all pages. - Build a 404 error page and generate appropriate code to handle it (such as an
.htaccessfile for Apache). - Generate other root files such as
favicon.icoor a service worker. - Use Eleventy’s pagination feature to generate pages from data.
- And score bonus points for importing WordPress content into static pages.
Is Eleventy for You?
Static site generators are an ideal solution for any web site that primarily serves content which does not change too frequently. Pages can be versioned in Git repositories, development is easier to control, testing is simple, performance is excellent, and security issues disappear. (I get immense joy laughing at all the failed wp-login.php attempts in server logs!)
There are many SSGs to choose from, but Eleventy is a great choice if you:
- are new to SSGs or unhappy with your current option
- like Node.js and want to use JavaScript during development
- want to jump on the latest cool thing!
Good luck!
Get up to speed with the Jamstack using our Jamstack Foundations collection, where we curate our guides and how-to content on the Jamstack and Jamstack tools like Eleventy to best help you learn.
FAQs About Eleventy
Eleventy, often abbreviated as 11ty, is a static site generator (SSG) designed to simplify the process of building static websites. It is flexible, easy to use, and supports a variety of templating engines, making it suitable for a wide range of web projects.
Eleventy distinguishes itself by its agnostic approach to templating engines. It doesn’t impose a specific templating language and allows developers to choose from a variety of options like Nunjucks, Liquid, Handlebars, and more. This flexibility makes it versatile and adaptable to different project requirements.
Eleventy supports a range of templating engines, including but not limited to Liquid, Nunjucks, Handlebars, Mustache, and Markdown. This flexibility allows developers to work with their preferred templating language or switch between them as needed.
Yes, Eleventy is well-suited for blogs and content-heavy websites. Its support for Markdown and various templating engines makes it easy to create and manage content, and it provides the flexibility needed for structuring and organizing blog posts.
Yes, Eleventy has a plugin system that allows developers to extend its functionality. There are various plugins available to add features such as syntax highlighting, pagination, and more. Developers can also create custom plugins to meet specific project requirements.