7 MORE Photoshop Master Tips to Speed up Your Workflow
Speed and quality.
Those are the two qualities that everyone is looking for when they use Photoshop. That's why knowing how to fully automate and optimize your working process is so important.
In the previous article, we explored some of the best tips which can help you to boost your workflow. Now, we're going to examine seven more tips, focused on streamlining the way your work with Photoshop.
Again, for the sake of brevity, we'll talk mostly what needs to be done, rather than the nitty-gritty detail. For fine-grained instructions, dig into the Photoshop's documentation or you can search the Web for practical solutions and tutorials.
1. Learn and Practice Keyboard Shortcuts
When beginners start using Photoshop, they usually learn to perform a particular task by following a logical set of steps. During their movement from point A to point B, they are like a tourist train that needs to stop at every way station along the route.
This is not wrong – we all started in that way – but at some point you have to step up your game. Once we know how to perform a particular task, we need to catch that express train that skips the way stations. That express train is the keyboard shortcut!
Here is a Photoshop's default keyboard shortcuts list. If you prefer other shortcuts, you can edit the existing ones or even create your own for the tasks which don't have a shortcut assigned. Just go to Edit > Keyboard Shortcuts and make the needed changes.
2. Swap Your Computer Mouse with Graphic Tablet
Let's face it: Using a mouse for drawing and painting is not natural. There is a good reason that pencils aren't shaped like potatoes.
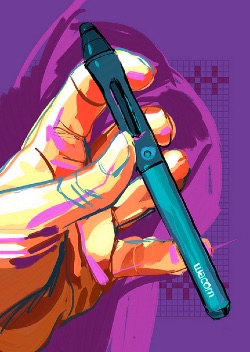
Artwork: Susan Murtaugh
Using a tablet for the first time may feel a little strange, but once you get used to working with it, you'll wonder how you coped without it.
With one hand on your keyboard (remember those keyboard shortcuts) and the other on the pen, your speed will really spike for tasks like masking, retouching, and vector linework.
The key factors to consider when buying a drawing tablet are:
-
size
-
pressure sensitivity
-
tilt sensitivity
-
price
You don't need to spend a great deal but if you use Photoshop for painting you might find a tablet with tilt sensitivity useful.
There are also some other handy features, like touch support and shortcut keys, which can add an extra layer of speediness and comfort to your workflow, but are dependent on your budget.

Photo: Finbar Bogerd
Rather than going into fine detail on tablets here, I'd recommend you check out Parka Blogs excellent 2015 tablet buyers guide for a great summary of what you'll need in a tablet.
Personally, I use an old Bamboo Pen with no tilt sensitivity, no touch support, and no express keys, as I don't generally use Photoshop for painting or drawing. The tablet works perfectly for making selections, using tools such as Dodge and Burn, etc. – all the features I need for my current Photoshop work.
3. Automate Your Workflow with Photoshop's Actions, Droplets, and Scripts
Photoshop's actions can be one of the most powerful weapons in your automation arsenal. A task made up of multiple steps can be performed automatically with one single click. It takes time to record an action the first time, but time is saved every time that action is repeated in future.
Let's say that you have a dozen images which you want to convert to a specific size and resolution. Instead of repeating the conversion for each one of the images, you can perform the task once, and save it as an action.
Applying actions in Photoshop requires you to:
- open the Actions panel
- find the desired action
- click the Play button
Wouldn't it be great, if we could perform this operation in a faster and easier way? Well… there is such a way, and it's called droplet.
Take Advantage of Droplets
A droplet is a special file – which you create and save on your hard drive – containing a specific action defined by you. To apply that action, you only need to drag an image over the droplet and.. well.. drop it. Voilá!.
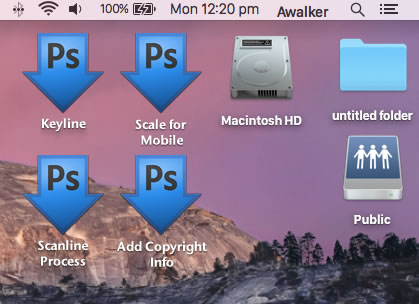
Drag and Drop images onto a droplet.
The cool part is you don't even have to open Photoshop!
Besides actions, there is one more similar method to automate your workflow. Photoshop allows you to use built-in or user-created scripts. A script is more flexible and powerful than a standard action because it can change its behavior according to certain conditions – but you will need at least a decent working knowledge of JavaScript to write it.
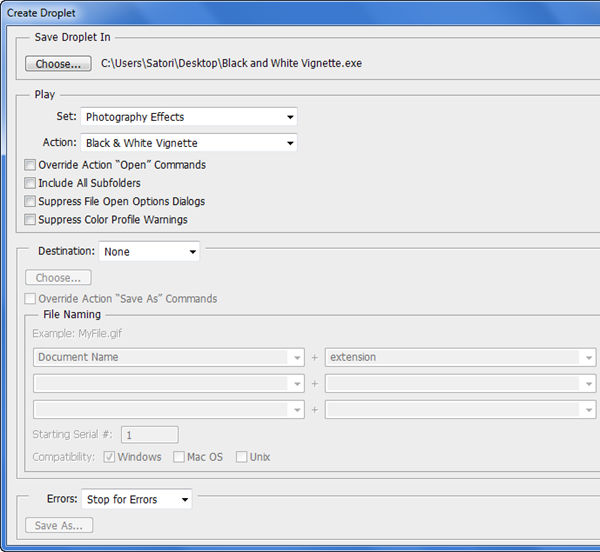
Creating a droplet with Photoshop
This is not a big problem. There are plenty of scripts built by other people which you can download and use. One the other hand, if you know JavaScript, you can surely take the advantage of writing your own custom scripts.
4. Process Them All
Here is the problem: You have a bunch of images which you need to be cropped to a certain size, turn them to black and white, and add a vignette effect to each one of them (and perhaps save them in a different format).
Sounds like a good candidate for an action, right?
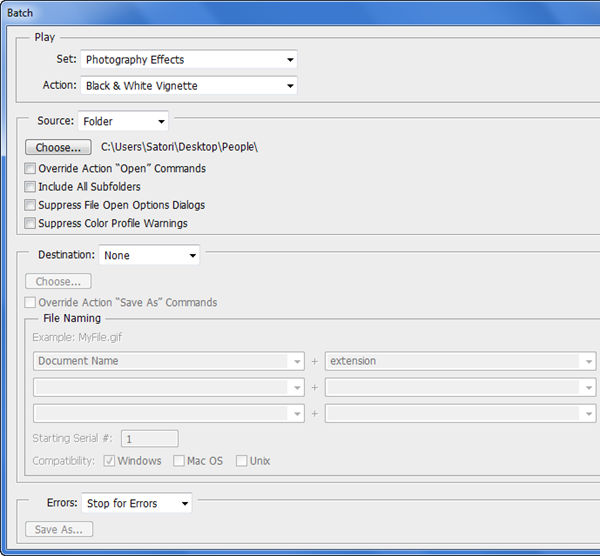
Of course, you could create such an action, but to run it against hundreds or thousands of images you would still have to open each image and apply the action to one individually. This definitely doesn't sound like an exciting experience.
So, what we can do?
The solution is to use Photoshop's capacity to run an action against multiple files.
- Using the Batch command. The Batch command run actions over an entire folder of images. Thus, you can put your images in one folder and using the Batch command to apply the selected action to all of them.
- Using a Droplet. A droplet can be used on more than one image file. Creating a droplet is pretty similar to batch processing. But in this case, the batch process is saved as a file with all presets. To use a droplet on multiple files, you need to select all the image files to which you want to apply the droplet and then drag and drop them over the droplet.
- Using the Image Processor script. The Image Processor script allows you to convert and resize multiple images without the need of an action, as it is with the Batch command. But you can also use actions if you need.
5. Expand Photoshop's Powers with Filters & Plugins
Reinventing the wheel is not a thing you should do if your objectives are speed and efficiency. There are many plugins out there which can perform the hard work for you.
Though the default Photoshop's filters set is quite expressive, but there are many more out there that can help your workflow. While I avoid overloading Photoshop with third-party filters, I have a few 'must-haves' on my system. They include:
- Perfect Effects 9 Free This free package gives you a vast variety of photo effects and filters to experiment with.
- Eye Candy This paid package provides you with a huge set of realistic effects which will be difficult and time-consuming to create in Photoshop from scratch.
- FilterForge This plugin not only gives you access to thousands of filters but also allows you to create your own filters.
6. Fill In the "Missing" Photoshop's Features with Additional Extensions
No application in the world provides a truly all-in-one feature set. And although Photoshop is the one of the most feature-rich applications ever created, occasionally you will find a 'functionality hole' for specific tasks.
But, have no fear! Like taking a magic pill, you can 'back-fill' functionality in a form of an extension. Let me give you an example.
Till now, working with guides and grids in Photoshop was a relatively tedious task, which made working with website templates, technical drawing, and matte painting harder than it needed to be. Thankfully, the ability to create fast and flexible grids was dramatically improved latest versions of Photoshop CC.
But what about users of Photoshop CS6 or CS5?
No need to worry. Photoshop CS6 can use the extension functionality to add that "missing" functionality by installing the GuideGuide extension, which in some points is even better than that provided by the latest Photoshop.
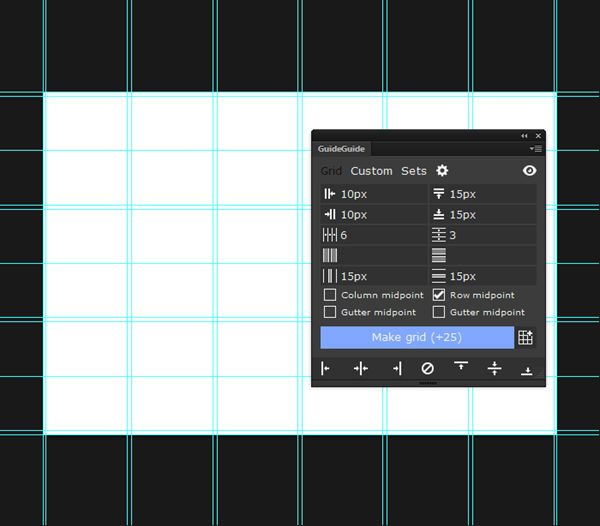
Guide Guide
Extensions are often free, making them a very viable alternative to a full software upgrade.
7. Create Your Own Custom Photoshop Panels
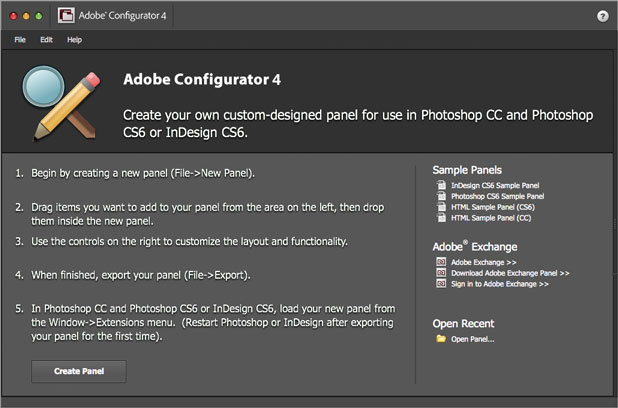
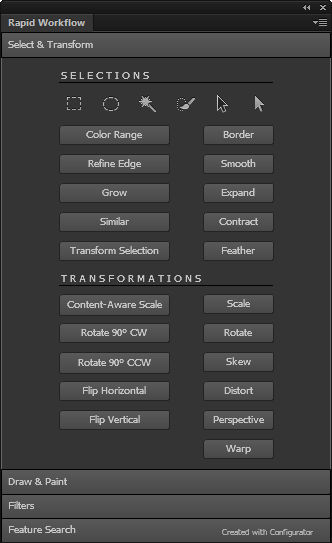
Finally, here is a little-known fact. Even most experienced and long-time Photoshop's users aren't aware that Adobe offer a tool for creating custom panels for Photoshop (and InDesign for that matter), called Configurator.
The tool is free and can help you to customize the Photoshop's interface without writing a single line of code. You just design the desired panel in a WYSIWYG interface, export it and use it.
It's easy, it's fun, and it's useful. In a couple of hours, you can create a useful custom panel, which can serve you as long as you wish and save you a good amount of time.
To get a notion about the process and the final result you could achieve, see this Adobe Configurator tutorial. It's a bit outdated, but still a good example of Configurator's capabilities.
Summary
There are two main principles when working with Photoshop: KISS and DRY. Always try to find the shortest, fastest, easiest, and the most efficient way to do a particular task in Photoshop.
Whether you are a photographer, painter, or designer; following the above tips should drastically improve your workflow, helping you to achieve more with less.


