How to Optimize CSS and JS for Faster Sites

This article was sponsored by Aussie Hosting. Thank you for supporting the partners who make SitePoint possible.
User experience is the most important factor when it comes to the success of your online venture.
It doesn't matter if you run a niche blog, SaaS site, or an online store. If you somehow manage to botch up your audience's experience, don't expect to convert any of them into paying customers.
The good news is, any brand can methodically improve user experience by narrowing down on specific on-page factors.
Loading speed, for instance, is something that most website owners easily overlook.
According to conversion rate data, increasing your Internet site speed from eight seconds to two seconds may lead to a 74 percent increase in conversion rate.
That means that a slow site could cost you nearly half of your potential customers.
Seeing the Full Picture with PageSpeed Insights
To determine issues on your website that affect loading speed, you can use Google PageSpeed Insights. It's a free tool that automatically scans both the desktop and mobile versions of your site.
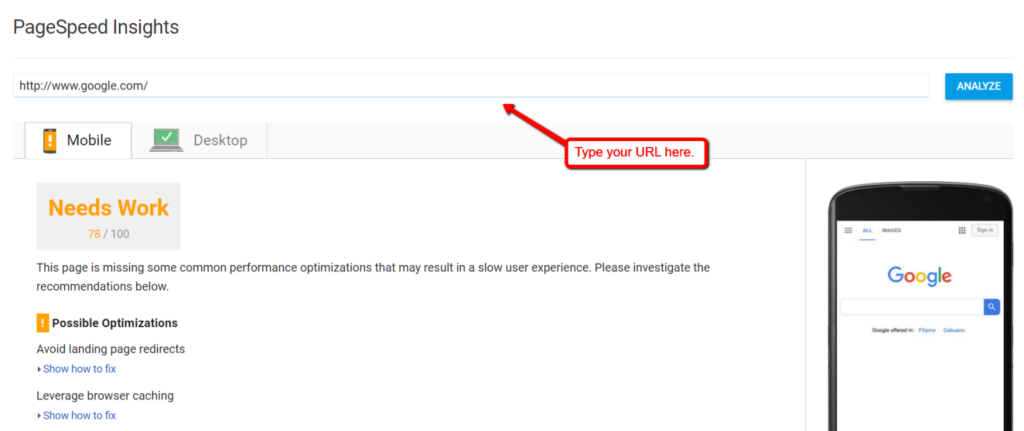
In addition to the issues detected, PageSpeed Insights will also show you a handful of actionable recommendations.
For site owners who never gave any thought to page loading speed, you may encounter the following issues:
These indicate that your CSS and JavaScript code is slowing your site down. And while it might sound like a job for full-fledged web developers, they're fairly easy to optimize with the help of tools.
Without further ado, here are the steps you need to take to minify your CSS and JavaScript assets.
Determine the Code to be Minified
Code minification is the practice of deleting characters that don't serve any function other than improving readability.
For example, inline comments may help developers comprehend what a particular section of code does. While it's useful for reviewing or debugging, they may also bloat the size of the code.
Minification removes these excess characters — therefore reduces bandwidth usage and boosts page loading speed.
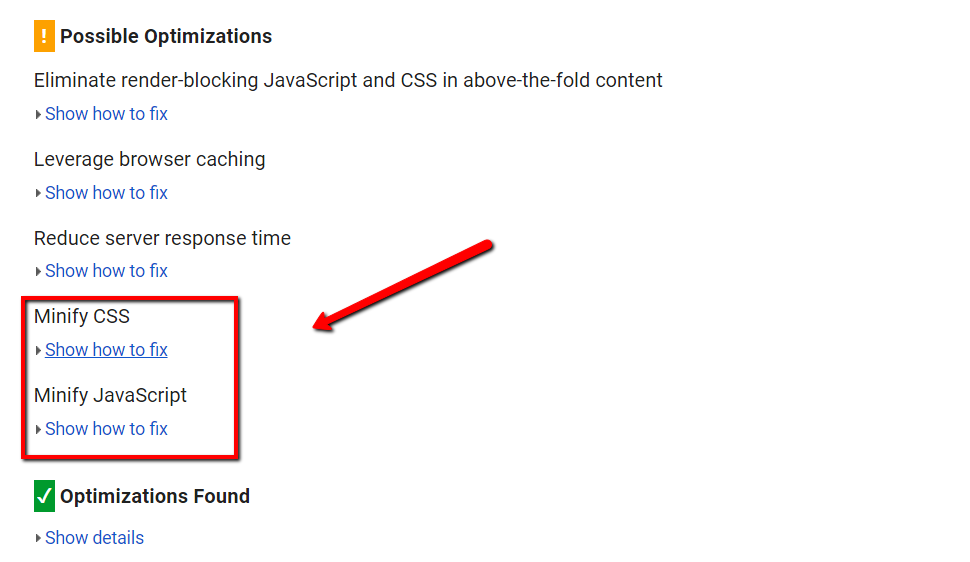
Using PageSpeed Insights, you can easily identify which code requires minification. Simply click "Show how to fix" and follow the path in your CMS (Content Management System) or FTP (File Transfer Protocol) client.

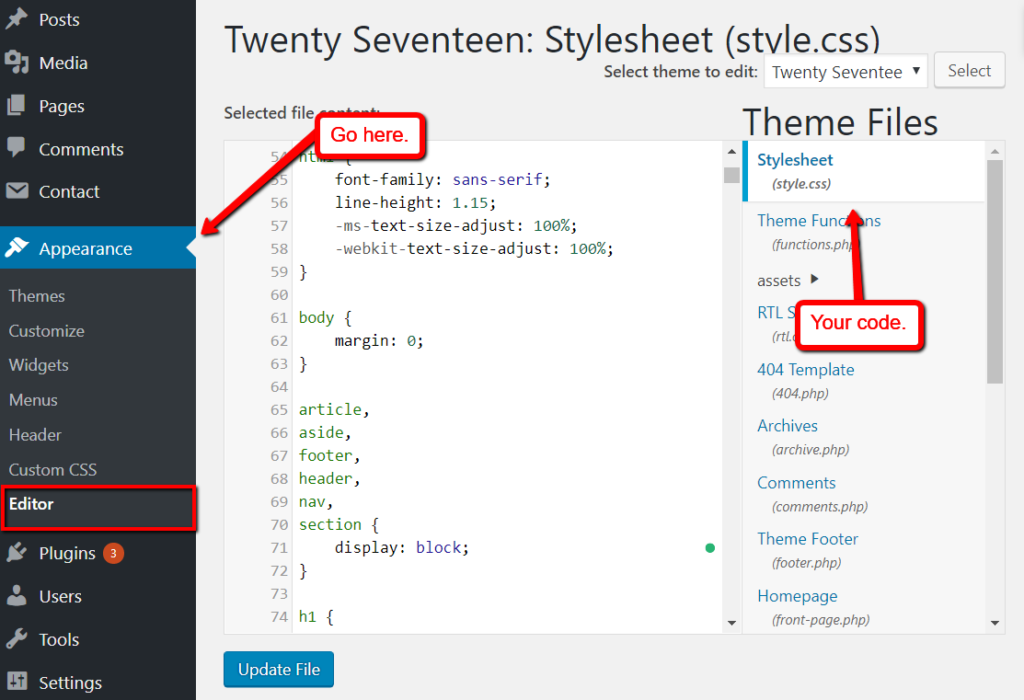
For example, if your website runs on WordPress, then all of your code should be consolidated in the "Editor" section. This can be found by under the "Appearance" tab from the primary dashboard.
Optimizing Your Codes
Now that you've found the code in question, it's time to learn how to minify them.
Perhaps the easiest way to minify your code is to leverage automated tools. When it comes to CSS and JavaScript, some of the best tools for the job are CSS Minifier and JSCompress.
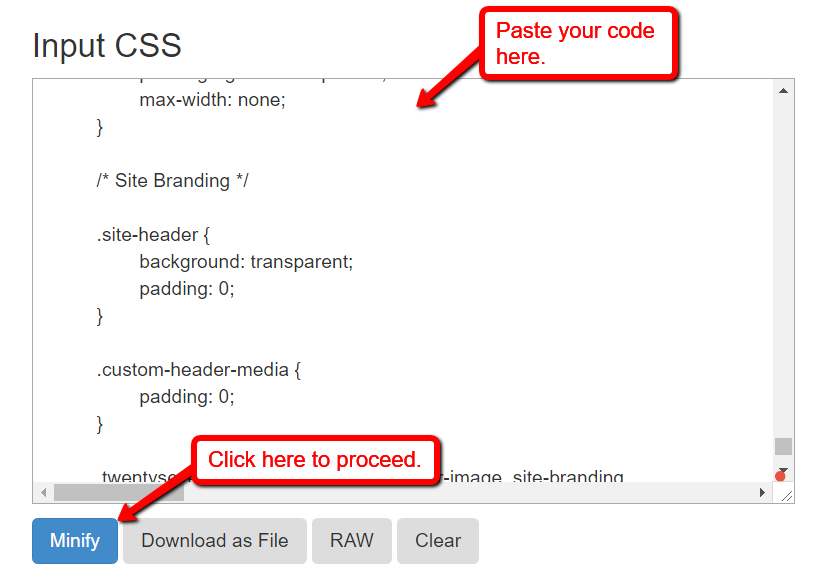
Using CSS Minifier
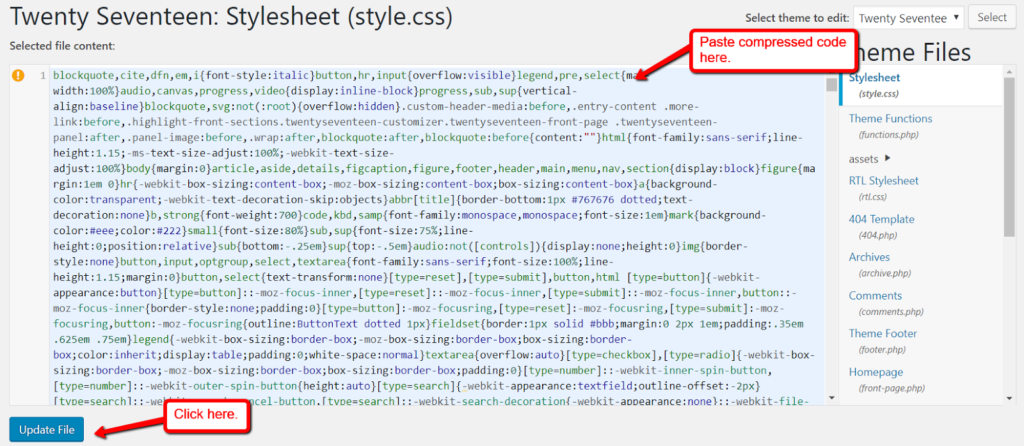
CSS Minifier is a free and simple tool that automatically compresses CSS assets. All you need to do is paste the code into the input field, set a compression level, and click "Minify."
Depending on the size of your code, it may take a few seconds to a minute to minify your code. Your new code can then be copied back into your CMS or FTP client interface.
Important: As a precaution, don't forget to create backups before making any changes in your site's code. Creating offline or cloud-based copies is a straightforward way to do this.
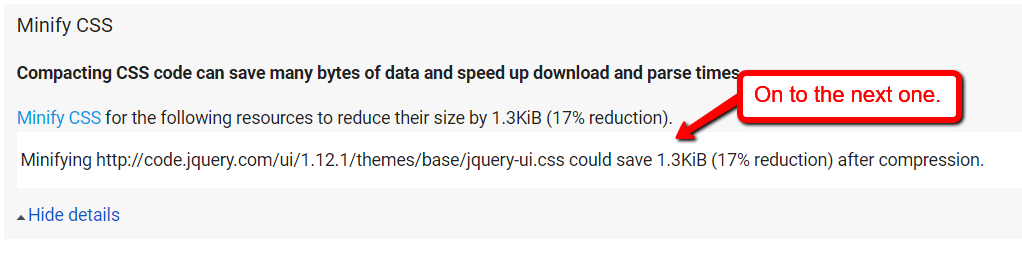
To test if your minification worked, go ahead and run another analysis on PageSpeed Insights. The CSS file you recently compressed should no longer appear under the "Minify CSS" details.
Using Asynchronous Loading on JavaScript
Compared to CSS, JavaScript is slightly trickier to minify correctly. Before you run your code through JSCompress, consider implementing asynchronous code loading first.
Also referred to as "Lazy Loading" — but in the context of JavaScript, asynchronous loading works by dynamically loading functions.
To use asynchronous loading, just add the "async" tag when calling the .js file. This can be done in your website's HTML source code.
Here's an example on how to do this:
<script src=”yourscript.js” async> </script>
You can refer to this post for more information on how this works and its usage. If you're completely new to HTML, read this beginner's guide until you're comfortable with the basics.
Combining JavaScript Files
Another point worth mentioning when it comes to optimizing JavaScript is to combine files in a single page. Doing so will reduce the number of HTTP requests that the browser makes, which would invariably speed up loading time.
For example, rather than calling multiple .js files in your source code:
<script src=”http://www.yoursite.com/menu.js”> </script>
<script src=”http://www.yoursite.com/tools.js”> </script>
<script src=”http://www.yoursite.com/footer.js”> </script>
You can combine them into a single JavaScript file using your editor and call them all at once:
<script src=”http://www.yoursite.com/all.js”> </script>
To further improve the processing time of your scripts, also practice omitting the "http" and "type" tags. For example, rather than using:
<script src=" http: //www.yoursite.com/all.js" type="text/javascript" > </script>You can simply use:
<script src="//www.yoursite.com/all.js"> </script>Using JSCompress
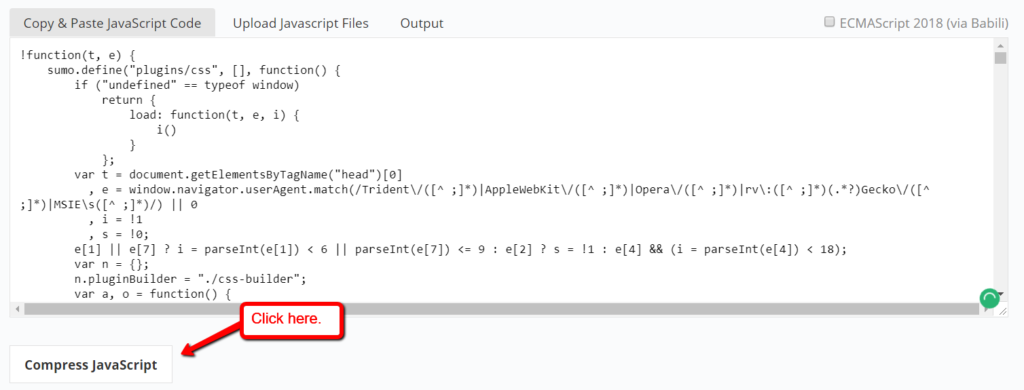
Finally, using JSCompress is just as simple as using CSS Minifier. Simply paste your code into the input field and click the "Compress JavaScript" button.
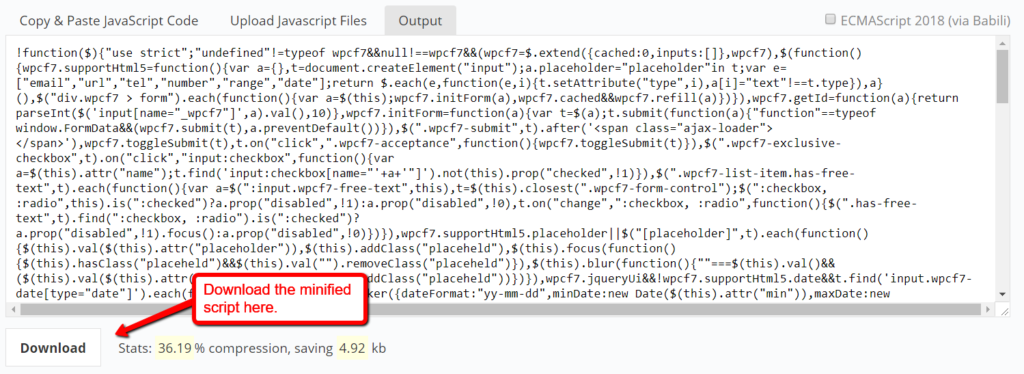
Next, navigate to the "Output" tab to view your compressed JavaScript:
Removing Redundant Code
Another performance issue that your site may have is the presence of redundant or duplicate code. These are usually caused by page elements that were deleted, causing the code to remain unused.
A great way to find redundant code is to use the built-in developer tools in Google Chrome. This can be enabled by opening the main menu, selecting "More Tools," and then clicking "Developer Tools."
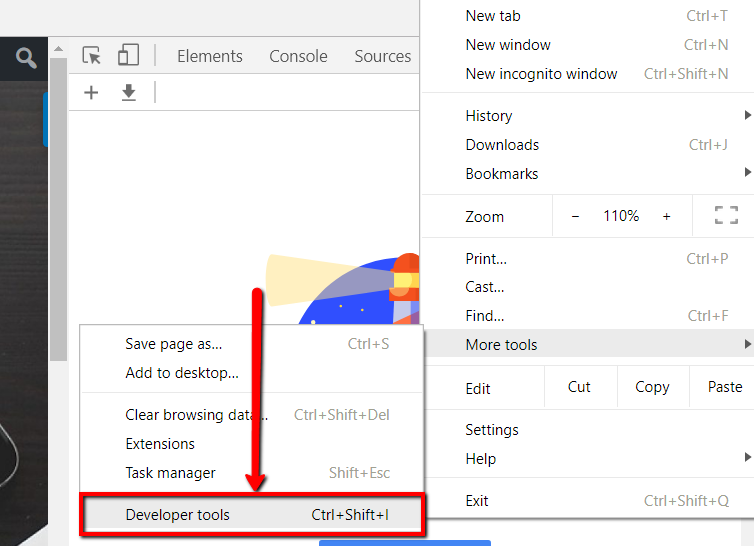
Make sure you are on the page you want to optimize when you do this.
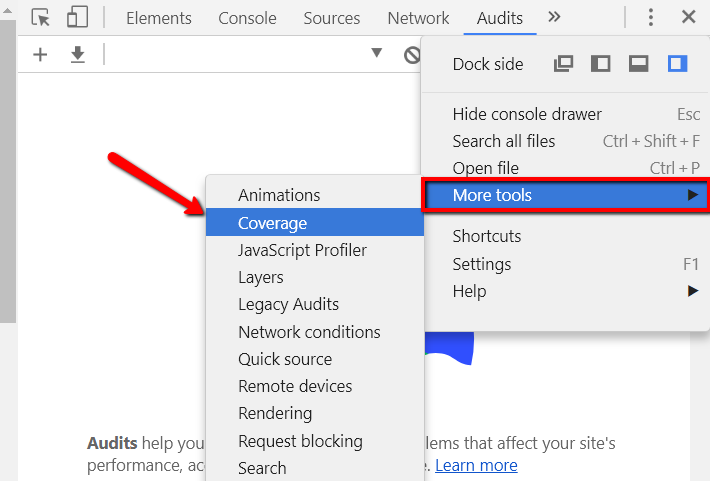
After activating developer tools, look for "Coverage" in the "More Tools" subsection from the settings menu.
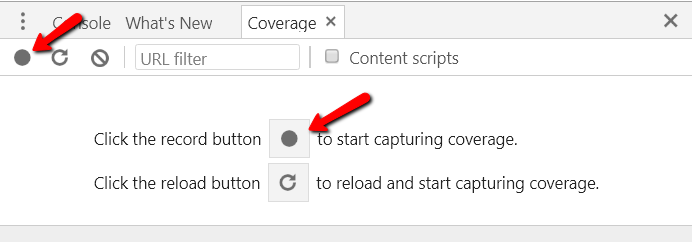
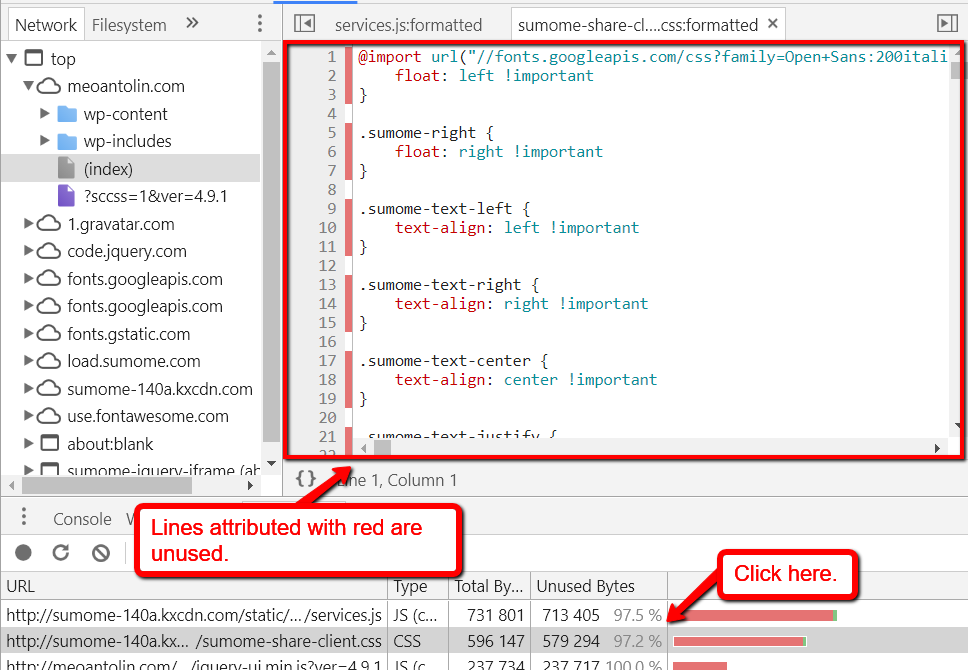
This will open the "Coverage" tab under the developer console. From there, click the "Instrument Coverage" button to start the test.
Once the test finishes, you should see a list of code assets along with their unused bytes. This is represented by the red and green bar to the right.
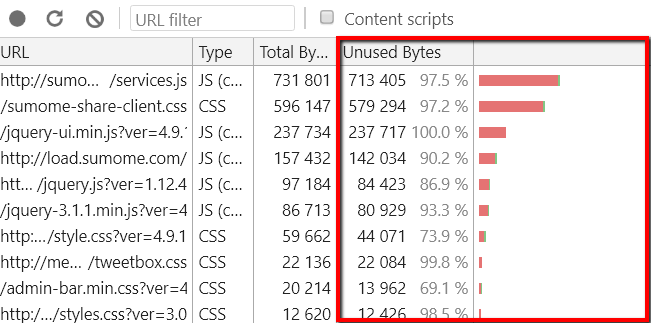
If this is your first time checking for redundant code, you'll notice a mix of CSS and JavaScript assets in the list. Closely inspect these to find out whether any are not in use.
Removing all the excess code assets one by one may be tedious. But if you want to offer a flawless user experience, then it's a necessity.
Also, remember that unused code may build up over time, so schedule another time to revisit and clean up your repository.
Conclusion
For non-developers, optimizing your website's CSS and JavaScript code may sound too technical at the surface. But with the right tools and web host, you don't need to be a seasoned web developer to make it happen.