Understanding URL Routing in Flask

In this article, we’ll explore URL routing in Flask, discussing its significance in web development and providing insights into how it works.
We’ll delve into various aspects, such as defining routes, handling dynamic URL patterns, supporting different HTTP methods, managing redirects and errors, and following best practices for effective URL routing in Flask.
Flask and URL Routing
Flask is a popular web framework for Python that enables web developers to build web applications easily and efficiently.
This is an advanced article on Flask, so you’ll need to have a basic understanding of how Flask works. You can get up to speed by looking at our introduction to Flask. You can also get up to speed by looking over the Flask documentation.
One key features of Flask is its powerful URL routing system.
URL routing is a fundamental concept in web development that involves mapping (binding) URLs to specific functionalities or resources within a web application. It’s a way of determining how incoming requests are handled, and by which view functions. Routing is about accepting requests and directing them to the appropriate view functions that will handle them and generate the desired response.
Basic Routing in Flask
Routing in Flask determines how incoming requests are handled based on the URL a user has requested. Flask uses the route() decorator method of the Flask application instance to define routes and then bind them to appropriate view functions.
To demonstrate basic routing in Flask, we start by importing the Flask class from the flask module:
from flask import FlaskOnce we have the Flask class, we can create the application instance and store it in a variable called app. The Flask class takes in a __name__ argument, which is a special Python variable denoting the name of the current module containing the Flask application instance:
app = Flask(__name__)Using the application instance, we have access to its various methods and decorators, which we can use to define routes, handle requests, and perform other tasks in our web application. However, for this example, we’ll be interested in the route() decorator, a special method which, when applied to a function in Flask, turns it into a view function that will handle web requests. It takes in a mandatory URL pattern and optional HTTP methods as its arguments. The route() decorator enables us to associate a URL pattern with the decorated function, essentially saying that if a user visits the URL defined in the decorator, the function will be triggered to handle this request:
@app.route('/')
def index():
 return "This is a basic flask application"
In the code snippet above, we have the route(/) decorator applied to the index() function, meaning that the function will handle requests to the root URL ’/’. So when a user accesses the URL, Flask will trigger the index() function that will return the string “This is a basic Flask application”, and it will be displayed in the browser.
To ensure the application runs when this module is invoked with Python in the command line, add the if __name__ check:
if __name__ == '__main__':
 app.run()
Putting all the above code snippets into one file gives us the following Flask application:
# app.py
from flask import Flask

app = Flask(__name__)

@app.route('/')
def index():
 return "This is a basic flask application"

if __name__ == '__main__':
 app.run()
By using the route() decorator, we can define routes for different URLs and map them to the appropriate view functions that will generate the desired response. This allows us to create a structured and organized web application with distinct functionalities for different routes.
Variable Rules
In the example above, we created a simple URL. Flask enables us to create dynamic URLs that can respond to various scenarios, user input and specific requirements. By passing variables in URL patterns, developers can design routes that adapt dynamically and deliver personalized, engaging experiences to users.
When defining routes in Flask, we can include variable placeholders marked by <variable_name> in the URL pattern. By default, these variables hold string values. However, if we need to pass other types of data, Flask provides converters that enable us to specify the type of data to be captured, like this: <converter:variable_name>.
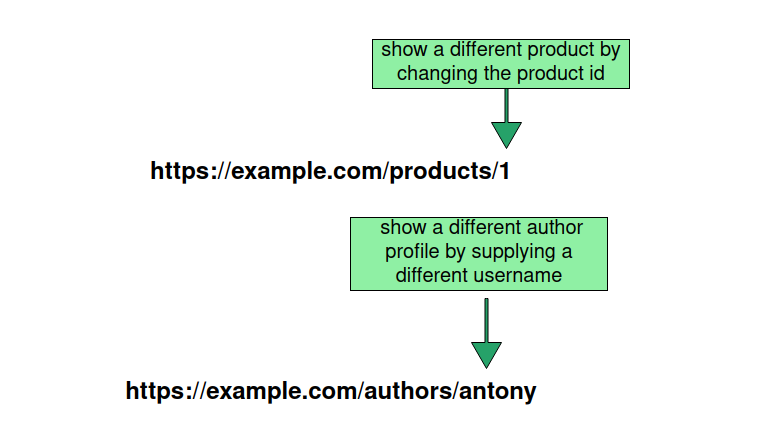
Below is an example diagram showing various variable URLs. The URLs change depending on the value a user supplies. For example, we could fetch a different product every time by giving a different ID, or we could show a different author profile by changing the username on the URL.
Say we have a blogging application and we want to create a URL for a view that shows the profile of an author. We could pass the username of the author like so:
@app.route('/authors/<username>')
def show_author(username):
 return f"Return the author profile of {username}"
In this example, the URL pattern is '/authors/<username>', where <username> is the variable that will be replaced with the actual username of the author. It will be passed to the show_author() function as a parameter. Using this value, we can perform further actions, such as retrieving the author data from the database and generating a response based on the information we get from the database.
We can also pass more than one variable in a URL:
@app.route('/posts/<int:post_id>/<slug>')
def show_post(post_id, slug):
 # carry out some processing like
 # retrieval from a database
 return f"Post {post_id} - Slug: {slug}"
In this example, we have a URL pattern that has more than one variable rule. It also incorporates a converter for the post_id in the form of <int:post_id>, indicating that an integer is expected to the variable. We also have <slug>, which will capture a slug string for this variable.
So when a request is made to this URL, Flask will capture the values specified in the URL and pass them as arguments to the show_post() function for further processing. For example, if a request is made to /posts/456/flask-intro, Flask will capture post_id=456 and slug=flask-intro, and these values will be passed as arguments to the show_post() function. Within the function, we can perform various operations, such as retrieving the corresponding post from a database based on the post_id and slug values. In the example code, we simply return a string response that includes the captured values:
return f"Post {post_id} - Slug: {slug}"This example shows how we can use variable rules and converters in Flask to create dynamic URLs that capture different types of data — such integers and strings — and process them within view functions. This allows us to build apps that respond to specific user input and deliver custom content.
URL Building
Once we define our URL patterns and map them to view functions, we can use them anywhere else in our code or in the templates, instead of hard coding the URLs Flask provides the url_for() function. The function will automatically build a URL depending on the arguments we provide to it. It takes the name view function as the first required argument and any number of optional keyword arguments, each corresponding to a variable part of the URL rule.
Building URLs using the url_for() function has several benefits. It’s more descriptive in our code if we have something like url_for(‘login’) instead of /login. We’ll also be able to change our URLs in one go instead of needing to remember to manually change all hard-coded URLs. This function also handles escaping of special characters transparently and automatically. The generated URLs will be absolute paths, removing the problem of relative paths in browsers; no matter the structure of our application, the url_for() function will handle that for us properly.
Let’s use the url_for() function to generate URLs for the view functions we’ve already seen above:
from flask import Flask, url_for

app = Flask(__name__)

@app.route('/')
def index():
 return "This is a basic flask application"

@app.route('/authors/<username>')
def show_author(username):
  return f"Return the author profile of {username}"

@app.route('/post/<int:post_id>/<slug>')
def show_post(post_id):
 return f"Showing post with ID: {post_id}"

if __name__ == '__main__':
 with app.test_request_context():
   # Generate URLs using url_for()
   home_url = url_for('index')
   profile_url = url_for('show_author', username='antony')
   post_url = url_for('show_post', post_id=456, slug='flask-intro' )

   print("Generated URLs:")
   print("Home URL:", home_url)
   print("Author profile URL:", profile_url)
   print("Post URL:", post_url)
This example demonstrates the usage of the url_for() function to generate URLs. In order to use the function, we import it from the flask module. It defines three routes: '/', '/authors/<username>', and '/post/<int:post_id>/<slug>'.
Within the if __name__ == '__main__': block, a test request context is created using app.test_request_context() to allow access to the url_for() function. It tells Flask to behave as if it’s handling a request even while we use the shell.
We then store the generated URLs in variables (home_url, profile_url, and post_url) and then print them, giving an output similar to the one shown below:
Generated URLs:
Home URL: /
Author profile URL: /authors/antony
Post URL: /post/456/flask-intro
We can also use the url_for() in templates. Let’s update the Flask application to render templates and see how we can move from one template to the other, by generating URLs using the url_for() function:
#app.py
from flask import Flask, render_template

app = Flask(__name__)

@app.route('/')
def index():
   return render_template("index.html")

@app.route('/authors/<username>')
def show_author(username):
   return render_template('profile.html', username=username)

if __name__ == '__main__':
 app.run()
Create a templates directory in the root of the project and create the following two files.
index.html:
<!DOCTYPE html>
<html>
<head>
 <title>Home Page</title>
</head>
<body>
 <h1>Welcome to the home page!</h1>
 <a href="{{ url_for('show_author', username='Antony') }}">Visit Antony's profile</a>
</body>
</html>profile.html:
<!DOCTYPE html>
<html>
<head>
 <title>User Profile</title>
</head>
<body>
 <h1>Welcome, {{ username }}!</h1>
 <a href="{{ url_for('index') }}">Go back to home page</a>
</body>
</html>
In the index.html template, we use the url_for() function to generate the URL for the 'profile' endpoint and pass the username argument as 'Antony'. This generates a link to Antony’s profile page. Similarly, in the profile.html template, we generate a link to the home page using url_for('index').
When the templates are rendered, Flask will replace {{ url_for(...) }} with the corresponding generated URLs. This allows for dynamic URL generation within the templates, making it easy to create links to other routes or pass arguments to those routes.
Using url_for() in templates helps ensure that the generated URLs are correct and maintainable, even if the routes change in the future. It provides a convenient way to create dynamic links that adapt to the current state of our Flask application.
Overall, we can see that, by using the url_for() function, we can dynamically generate URLs in Flask based on the route endpoints (the name of the view function) and other optional arguments. This provides a flexible and reliable way to create URLs that adapt to the specific functionalities of our web app.
HTTP Methods
Web applications use different HTTP methods when accessing URLs, and applications built using the Flask framework are no exception. Flask supports various HTTP methods such as GET, POST, PUT, DELETE and more. These methods define the actions we can carry out on the resources that are available when accessing the various URLs we’ve defined in our application. Using the different HTTP methods, we can handle different types of requests and perform related operations in our Flask application.
In Flask, we can define the HTTP methods that a route can accept using the methods parameter of the route decorator. When we specify the methods a route accepts, Flask ensures that the route is only accessible for those specified methods.
Here’s an example:
from flask import Flask, request

app = Flask(__name__)

@app.route('/', methods=['GET'])
def index():
 return "This is the home page"

@app.route('/authors', methods=['GET', 'POST'])
def authors():
 if request.method == 'GET':
    return "Get all authors"
 elif request.method == 'POST':
    # Create a new author
    return "Create a new author"

@app.route('/authors/<int:author_id>', methods=['GET', 'PUT', 'DELETE'])
def author(author_id):
 if request.method == 'GET':
    return f"Get author with ID: {author_id}"
 elif request.method == 'PUT':
    # Update author with ID: author_id
    return f"Update author with ID: {author_id}"
 elif request.method == 'DELETE':
    # Delete author with ID: author_id
    return f"Delete user with ID: {author_id}"

if __name__ == '__main__':
 app.run()
This updated code demonstrates the usage of HTTP methods in Flask. It defines three routes: '/','/authors', and '/authors/<int:author_id>'. Each route has specific HTTP methods associated with it.
The '/‘ route only allows GET requests, and the index() function handles GET requests to this route. It returns the string This is the home page
when accessed via a GET request. We can omit the GET method parameter, since GET is the default for all methods unless explicitly stated.
The '/authors' route allows both GET and POST requests, and the authors() function handles these requests. If the request method is GET, it returns the string Get all authors
. If the request method is POST, it performs the necessary actions to create a new author and returns the string Create a new author
.
The '/authors/<int:author_id>' route allows GET, PUT, and DELETE requests, and the author() function handles these requests. If the request method is GET, it retrieves the author with the specified ID and returns a response string. If the request method is PUT, it updates the author with the specified ID and returns a response string. If the request method is DELETE, it deletes the author with the specified ID and returns a response string.
By defining routes with specific HTTP methods, we can create a RESTful API or web application that handles different types of requests and performs the appropriate operations on the associated resources.
Redirects and Errors
As we go through the concept of routing in Flask, we also need to understand how to handle errors. Users will provide wrong URLs or incomplete information, and this will lead to errors occurring in our application. So for our application to be complete, we’ll need to handle errors gracefully — either by providing informative messages, or by redirecting users. Flask provides the redirect and abort functions.
The redirect function is used to take the user to a new URL. It can be used in scenarios such as successful form submission, authentication, or when we want to guide a user to a different section of the application. It takes in the URL as an argument or the route name. It returns a status code 302 by default, but we can define our own custom status codes.
To handle errors, the abort function is provided by Flask. It’s used to abort the processing of a request and return a HTTP error response. This will allow us to handle exceptional cases or errors in our application and respond with the appropriate HTTP status code and error page. Using this function, we can handle various errors in Flask, such as unauthorized access, invalid requests and other kinds of errors. We can choose the appropriate HTTP status code for the error, ensuring the client gets information about what went wrong.
Here’s an example that shows how to use the two functions:
from flask import Flask, redirect, render_template, request, abort

app = Flask(__name__)

@app.route('/')
def home():
 return render_template('home.html')

@app.route('/login', methods=['GET', 'POST'])
def login():
 if request.method == 'POST':
  # Perform login authentication
  username = request.form['username']
  password = request.form['password']

  # Check if the credentials are valid
  if username == 'admin' and password == 'password':
     # Redirect to the user's dashboard on successful login
           return redirect('/dashboard')
  else:
     # Abort the request with a 401 Unauthorized status code
     abort(401)

  return render_template('login.html')

@app.route('/dashboard')
def dashboard():
 return render_template('dashboard.html')

@app.errorhandler(401)
def unauthorized_error(error):
 return render_template('unauthorized.html'), 401

if __name__ == '__main__':
 app.run()
In this example, the /login route handles both GET and POST requests. When a POST request is received, it performs authentication with the provided credentials. If the credentials are valid, the user is redirected to the /dashboard route using the redirect function.
However, if the authentication fails (such as when the user provides the wrong login information), the request is aborted with a 401 Unauthorized status code using the abort function. The user is then directed to an error page specified in the unauthorized_error error handler, which renders the unauthorized.html template and returns a 401 status code.
By utilizing the redirect and abort functions together, we can effectively handle authentication failures and redirect users to appropriate pages or display relevant error messages, ensuring a secure and user-friendly login experience.
Best Practices for URL Routing in Flask
It’s important for our application to follow the best practices when creating URLs. Here are some of the most important to follow:
- Organize URLs and make them easy to read. Group the related routes. This will make it easier to navigate and manage our codebase.
- Make use of variables. Using variables in URL patterns will enable our application to handle dynamic requests from users. To do this, we can utilize rules such as
<variable_name>. We can couple variables with converters in order to handle different kinds of data in our URLs. - Clear error messages. Ensure that, when handling errors in routes, we give clear and informative error messages to users. This will go a long way towards helping users understand why the errors happened and to taking the appropriate actions.
- Utilize the
url_forfunction. Building URLs using theurl_forfunction ensures that our URLs are automatically generated and properly structured and consistent throughout the application, eliminating the need to hard code them.
By following these best practices, we can create well-organized and maintainable URL routing in our Flask applications. This leads to cleaner code, improved readability, better error handling, and more flexible and structured URLs.
Conclusion
In conclusion, understanding URL routing in Flask is essential for building user friendly and powerful web applications. By defining routes and mapping them to view functions, this allows developers to handle incoming requests and generate appropriate responses. When coupled with variables, we’re able to build more dynamic URL patterns, making the application more flexible and adaptable.
Defining the kind of HTTP methods a route accepts enables an application to accept different types of request depending on the method defined for a route.
Flask also provides features for handling errors and redirects. The redirect function enables us to redirect users to different URLs, while the abort function helps in handling errors and responding with appropriate HTTP status codes.
Some of the best practices for URL routing in Flask include keeping routes organized and easy to read, using variables for dynamic URL patterns, providing clear messages for common errors, and properly structuring and generating URLs using the url_for function.
By understanding URL routing concepts in Flask, and following these best practices, developers can create efficient, flexible and user-friendly web applications.