Integrating Bootstrap with Vue.js Using Bootstrap-Vue
In this article, we’ll explore how to integrate Bootstrap with Vue.js using Bootstrap-Vue.
React and Vue.js are two leading, modern JavaScript frameworks for front-end development. While React has a steep learning curve, and a complex build process (if you’re coming from the jQuery world), all you need to do to start using Vue.js is a simple import script:
<script src="https://unpkg.com/vue@2.5.17/dist/vue.min.js"></script>
Bootstrap has become a popular HTML/CSS framework for building mobile responsive websites. However, it relies mostly on jQuery for its core features as well as its extensive list of components — such as alerts, and modals. So we’ll explore how to use Bootstrap with Vue.js, thereby removing the need for jQuery.
Introducing Bootstrap
Originally created in late 2011 by Mark Otto and Jacob Thornton at Twitter Inc., Bootstrap soon found popularity outside Twitter after being open-sourced. It continued to grow as the fastest front-end framework for web developers worldwide.
Today, Bootstrap has become the de-facto standard for starting a new website project, with its CSS and JS architecture providing mobile responsive and common UI components, along with support for most modern browsers.
Connecting Bootstrap with Vue.js
As we mentioned earlier, using with Bootstrap with Vue.js is slightly tricky, because of Bootstrap’s dynamic components’ heavy dependency on jQuery. However, there are at least a couple of good projects that are in the process of bridging that gap:
We’ll explore the first option here, Bootstrap-Vue, since it’s the most updated and popular project.
Bootstrap-Vue
Bootstrap-Vue not only supports the Bootstrap components and grid system, but also includes support for Vue.js Directives, which gives us the full feature set from the Vue.js ecosystem.
One of the cool features of Bootstrap-Vue is that it has an online Playground. This playground is hot-reloaded and also lets us export our code to JSFiddle. Isn’t that cool!
I believe a good documentation and developer ecosystem is necessary for the success of any software project, and Bootstrap-Vue ticks all the checkboxes.
Getting Started with Bootstrap-Vue Using the Command Line
If you’ve been following modern web development trends, you’d definitely know about npm and installing libraries with it. Bootstrap-Vue can be installed with npm through the following command:
npm i bootstrap-vue
Bootstrap-Vue also provides two vue-cli templates that can scaffold our projects without too much hassle:
- webpack simple: quick scaffold for a small application.
- webpack: for larger production capable projects.
First, we install the vue-cli by:
npm i -g vue-cli
Then, we initialize our project — let’s call it getting-started — using the webpack-simple template by typing the following in the terminal:
vue init bootstrap-vue/webpack-simple getting-started
A wizard will open. You can press Return to accept the defaults.
Then, type:
cd getting-started
npm install
npm run dev
Let’s look at this code line by line:
- The first line starts with
vue initcreates a new directory calledgetting-started, where a new Bootstrap-Vue project is initialized. - With
cd getting-started, we access the new project’s directory. npm installtakes care of installing all the project’s dependencies.- Finally, with
npm run dev, the app is compiled and launched in the browser.
Your local environment should now contain the following files and folders:
├── index.html
├── node_modules
│   └── lots of files
├── package.json
├── package-lock.json
├── README.md
├── src
│   ├── App.vue
│   ├── assets
│   │   └── logo.png
│   └── main.js
└── webpack.config.js
Here, App.vue and main.js are the primary files of interest. If we fire up our text editor and open main.js, we’ll see the following code, which imports the Bootstrap style sheet and Bootstrap-Vue:
import Vue from 'vue'
import BootstrapVue from "bootstrap-vue"
import App from './App.vue'
import "bootstrap/dist/css/bootstrap.min.css"
import "bootstrap-vue/dist/bootstrap-vue.css"

Vue.use(BootstrapVue)

new Vue({
  el: '#app',
  render: h => h(App)
})
At the same time, the App.vue document loads up the front-end code.
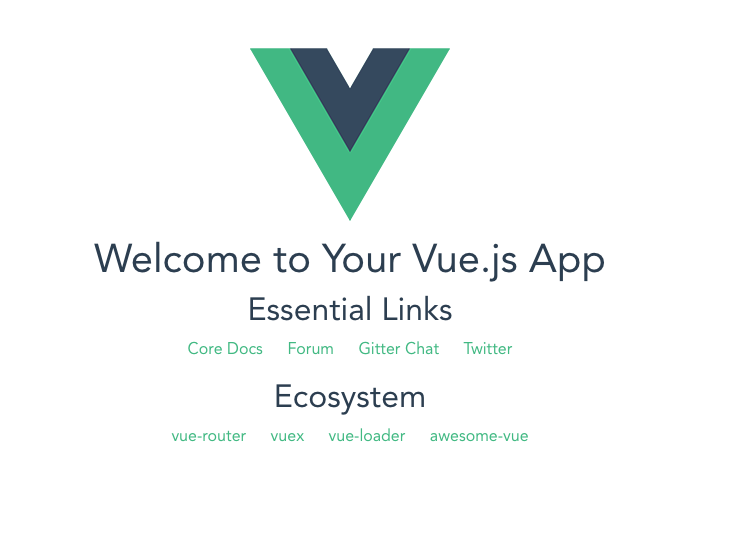
After running the npm run dev command, the project’s index.html page should render a page like the one below:
Importing Bootstrap-Vue with a script Tag in the Document <head> Section
While we saw the npm way of installing and working with Bootstrap-Vue, let’s also look at the simpler option: including Bootstrap-Vue using a script tag in our HTML document:
<!-- Add Bootstrap and Bootstrap-Vue CSS to the <head> section -->
<link type="text/css" rel="stylesheet" href="https://unpkg.com/bootstrap/dist/css/bootstrap.min.css"/>
<link type="text/css" rel="stylesheet" href="https://unpkg.com/bootstrap-vue@latest/dist/bootstrap-vue.min.css"/>

<!-- Add Vue and Bootstrap-Vue JS just before the closing </body> tag -->
<script src="https://unpkg.com/vue/dist/vue.min.js"></script>
<script src="https://unpkg.com/bootstrap-vue@latest/dist/bootstrap-vue.min.js"></script>
This will pull in the minified, latest version of each library. At the time of writing, this is Bootstrap v4.1.3, Bootstrap-Vue v2.0.0-rc.11, and Vue v2.5.17.
If for some reason you need to support legacy browsers, you can also include the @babel/polyfill, which will emulate a full ES2015+ environment:
<script src="https://unpkg.com/babel-polyfill@latest/dist/polyfill.min.js"></script>
Now we can work with Vue.js, Bootstrap, and Bootstrap-Vue on our local machine.
Working With Bootstrap-Vue Components
For the demos in this article, we’ll use CodePen. To set it up, let’s create our Pen, click on the settings icon, and import the following CSS in the CSS tab:
https://unpkg.com/bootstrap@4.1.3/dist/css/bootstrap.min.css
https://unpkg.com/bootstrap-vue@2.0.0-rc.11/dist/bootstrap-vue.css
In the JavaScript tab, let’s import the Vue and Bootstrap Vue libraries:
https://unpkg.com/vue@2.5.17/dist/vue.min.js
https://unpkg.com/bootstrap-vue@2.0.0-rc.11/dist/bootstrap-vue.min.js
Also, make sure to select Babel as the JavaScript preprocessor.
Finally, let’s click the Save & Close button. Now we’re ready to start playing with Bootstrap-Vue components.
Building a Bootstrap-Vue Alert Component
To create a Bootstrap-Vue alert component, we’re going to add the following to our CodePen HTML area:
<div id='app'>
  <b-alert show> Hello {{ name }}! </b-alert>
</div>
Next, we add the Vue instance to the JS area:
new Vue({
  el: "#app",
  data: {
    name: "Sitepoint"
  }
});
As a result, we should see the “Hello Sitepoint!” alert in the output view area:
See the Pen Getting Started with Bootstrap Vue by SitePoint (@SitePoint) on CodePen.
The above code displays a simple Bootstrap alert component using Vue.js and Bootstrap-Vue. Next, we’re going to change some of the parameters for this alert box to make it more interesting. For example, to make the alert box dismissible, let’s add the keyword dismissible next to the show directive:
<b-alert show dismissible> Hello {{ name }}! </b-alert>
Now the alert displays a dismiss icon button, which, when clicked, removes the alert from the page. Try it out for yourself!
Refer to the official documentation for Bootstrap-Vue alerts for more configurable props.
Building a Dynamic Bootstrap-Vue Listview Component
So now that we have got a good idea of how to use Bootstrap-Vue, let’s build a list component. This is perhaps the most common piece of UI you’ll find in web and mobile apps.
Bootstrap-Vue provides two components that together help us to build a list: <b-list-group> and <b-list-group-item>. We can think of the former as the HTML equivalent of a <ul> or <ol> tag, while the latter renders a <li> element.
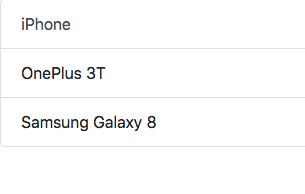
We start by building a static list of some smartphones:
<div id='app'>
  <b-list-group>
    <b-list-group-item href="http://apple.com">iPhone</b-list-group-item>
    <b-list-group-item>OnePlus 3T</b-list-group-item>
    <b-list-group-item>Samsung Galaxy 8</b-list-group-item>
  </b-list-group>
</div>
Now, we add our Vue instance in the JavaScript panel:
new Vue({
  el: '#app'
});
And here’s our simple list:
However, this is nowhere close to being a dynamic list. Let’s add the Vue.js v-for directive inside the list component’s markup to render a few list items from an array:
<b-list-group-item v-for="item in items">
  {{ item.message }}
</b-list-group-item>
Next, let’s add the items array to the Vue instance:
new Vue({
  el: '#app',
  data: {
    items: [
      { message: 'Nokia 8' },
      { message: 'OnePlus 5T' },
      { message: 'Samsung Galaxy S9' }
    ]
  }
});
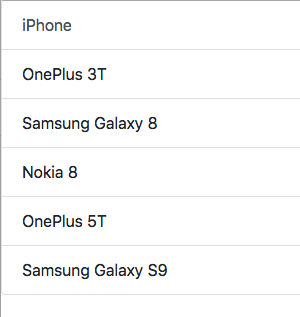
And here’s our smartphone data displayed in the Bootstrap-Vue list component:
Have a play with the live demo:
See the Pen ListView with Bootstrap Vue by SitePoint (@SitePoint) on CodePen.
As a challenge for you, try making this list even more dynamic by adding an Ajax call to pull in content from an API or from an RSS feed.
Listening to Events on Bootstrap Badges
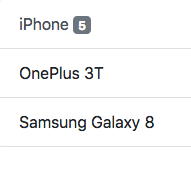
Bootstrap has a badge component which is useful for keeping count of items or labeling them. For example, in the list example above, we could add a badge to the iPhone list item indicating the number of variants (five versions of iPhone).
With Bootstrap-Vue, we can use the <b-badge> component as a child of the <b-list-group-item> element to indicate the number of the various iPhone types as follows:
<b-list-group-item href="http://apple.com">iPhone <b-badge>5</b-badge></b-list-group-item>
This should render the list looking like this:
Now, let’s add a share this button on our page to keep track of the page’s number of shares. To accomplish this, we can use the <b-button> component to create a Bootstrap button and within the button we’ll nest the <b-badge> child element:
<div class="text-center">
  <b-button variant="primary" size="sm">
    Share on Twitter <b-badge variant="light">{{ share_count }}</b-badge>
  </b-button>
</div>
We modify our JavaScript code by adding a share_count variable, which will keep track of the number of times our page is shared:
new Vue({
  el: '#app',
  data: {
    share_count:0
  }
});
This should give us the following output:
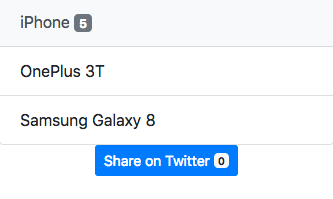
Note, the button is still not dynamic. That is, it won’t increment the share counter when we click on the Share on Twitter button, as we haven’t added an event listener to the button yet. We’ll use the Vue.js v-on directive to listen to the button click event:
<b-button variant="primary" size="sm" v-on:click="share_count += 1">
This makes the share_count variable increment whenever we click on the button. The code for the badge need not change, since it’s already bound to the share_count variable. Therefore, whenever the button is clicked, the share_count variable is incremented and so is the badge.
That’s the beauty of Vue.js data binding!
See the Pen Listening to Events on Badges. by SitePoint (@SitePoint) on CodePen.
Conclusion
In this tutorial, we’ve seen how to use Bootstrap-Vue to add Bootstrap-like components to Vue.js applications.
Now it’s over to you: build the next awesome Bootstrap-Vue web page and share it with the world!
If you’ve got the basics of Bootstrap under your belt but are wondering how to take your Bootstrap skills to the next level, check out our Building Your First Website with Bootstrap 4 course for a quick and fun introduction to the power of Bootstrap.
