Creating a Barcode and Metadata Reader in iOS

More than ever, users expect iOS apps to be connected. Data flows through iOS apps at a blistering pace. It can come via an API, through messaging or communication with servers. Scanning the many types of available barcodes is another form of data apps can benefit from.
As of iOS 7, Cocoa Touch supports reading data from barcodes and other types of metadata natively. In this tutorial, I’ll show how to set up barcode scanning in iOS apps through the built in frameworks available.
Let’s take a quick look at the app we will be building. Download the starter project from github here. I kept the user interface and architecture intentionally minimal so we can focus on how to code the barcode scanning.
When completed, the app will automatically show a live feed of the iPhone’s rear camera. It will actively look for barcode metadata. When it finds some, it’ll display information about it on the labels at the top and bottom of the live feed:
Let’s talk about the frameworks involved.
AVFoundation
AVFoundation is a mature framework that has been a part of Cocoa Touch for some time. While it can be intimidating to implement due to its extensive uses, setting it up for capturing metadata is refreshingly easy.
Here are some of the key objects that are used to implement barcode scanning:
AVCaptureSession
Coordinates the flow of data from audio or video input devices and can translate them to outputs. In short, this drives the whole process.
AVCaptureDevice
This class represents a physical device to capture input to feed back into a initialized AVCaptureSession instance. For this tutorial, this class will represent the rear facing camera on an iPhone.
AVCaptureVideoPreviewLayer
A subclass of CALayer that displays video as it’s captured by an input device. In this tutorial that’s the AVCaptureDevice instance.
AVCaptureMetaDataOutput
Intercepts metadata objects from a capture connection and forwards them to a delegate for processing. This class can also specify the types of metadata to capture. It’s intended to be added as an output for an AVCaptureSession.
The types of metadata it can intercept are as follows:
- UPC-A
- UPC-E
- Code 39
- Code 39 mod 43
- Code 93
- Code 128
- EAN–8
- EAN–13
- Aztec
- PDF417
- QR
- Face
Now objects involved are clear, let’s look at the process at a high level. The workflow to capture barcodes, or any metadata using AVFoundation, looks like this:
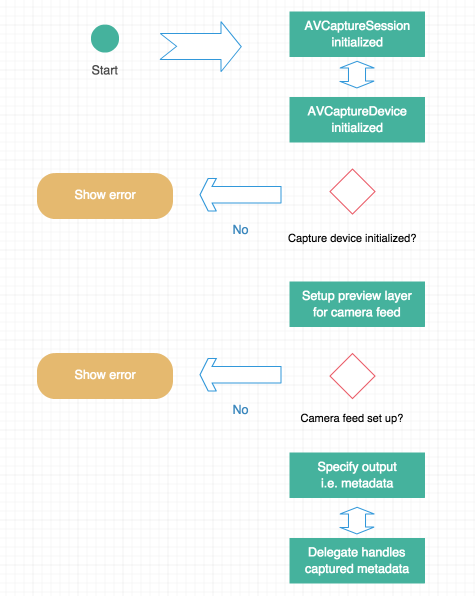
Great, now let’s get to the code!
Setting up a Session
Open up ViewController.swift and take a look at the boilerplate code I’ve included. I’ve added a few properties, IBOutlets, and stubbed out functions to get things started. If a developer builds and runs now, it won’t do much. Let’s change that.
The first step is to ensure the session is created. This is as easy as initializing the property, which I’ve done:
let captureSession = AVCaptureSession()Later, we’ll call the startRunning() function to actually begin I/O from the captureSession and it’s input.
Preparing the Input Device
Inside viewDidAppear: add a call to the stubbed out function called setupCaptureSession.
The viewDidAppear: method body should look like this:
override func viewDidAppear(animated: Bool)
{
        super.viewDidAppear(animated)
        self.setupCaptureSession()
}
Now, add the code for that function:
private func setupCaptureSession()
    {
        self.captureDevice = AVCaptureDevice.defaultDeviceWithMediaType(AVMediaTypeVideo)
        var setupError:NSError?

        if let deviceInput = AVCaptureDeviceInput.deviceInputWithDevice(self.captureDevice, error: &setupError) as? AVCaptureDeviceInput
        {
            //Add the input feed to the session and start it
            self.captureSession.addInput(deviceInput)
            self.setupPreviewLayer({
                self.captureSession.startRunning()
                self.addMetaDataCaptureOutToSession()
            })
        }
        else
        {
            self.showError(setupError!.localizedDescription)
        }

    }
Firstly set up the capture device and then check to see if it’s eligible to produce input. If it can’t, it initializes the pointer to the error variable and displays that to the user. Note that if this is attempted on the simulator, this check would fail since the simulator obviously has no means to produce any input.
If the device can produce input, add the input to the session and begin setting up the captureLayer property to show the camera’s live feed.
Displaying Input
To configure the layer of input, call the setupPreviewLayer function. Add the following code to this function now:
private func setupPreviewLayer(completion:() -> ())
    {
        self.captureLayer = AVCaptureVideoPreviewLayer.layerWithSession(self.captureSession) as? AVCaptureVideoPreviewLayer

    if let capLayer = self.captureLayer
    {
        capLayer.videoGravity = AVLayerVideoGravityResizeAspectFill
        capLayer.frame = self.cameraView.frame
        self.view.layer.addSublayer(capLayer)
        completion()
    }
    else
    {
        self.showError("An error occured beginning video capture."")
    }
}
At this stage it’s pointless to show a preview of the input source (the rear facing camera in this tutorial). There isn’t much for the programmer to do in this part of the process aside from adding the layer, setting its frame, and selecting the appropriate aspect ratio.
Assuming this was successful, a completion closure will execute. This was added in a previous code snippet inside setupCaptureSession. The two things the closure will do are identify the data to be captured, and set the view controller as the delegate to process that data.
Specifying Output
Up to this point, a session has begun, a device has been chosen to capture input, the input to the session was added and then the live input to the user was displayed. All that is left is to tell AVFoundation what to capture and to configure the delegate.
Go to the addMetaDataCaptureOutToSession function and add this code:
private func addMetaDataCaptureOutToSession()
{
    let metadata = AVCaptureMetadataOutput()
    self.captureSession.addOutput(metadata)
    metadata.metadataObjectTypes = metadata.availableMetadataObjectTypes
    metadata.setMetadataObjectsDelegate(self, queue: dispatch_get_main_queue())
}
This function begins by creating an instance of AVCaptureMetadataOutput and then it adds it to the session. From there, its metadataObjectTypes property is set with all of the things to be captured. The ordering here is important, because if the metadata types are sought before being added to the session, they won’t be available.
Note that though this will be tested with scanning barcodes, it will be looking for all types of metadata. For a higher degree of specificity, just pass the metadata types to be looked for to the metadataObjectTypes property.
Lastly, set this view controller as the delegate to process the metadata. It’s also necessary to tell it which thread is called in the delegate since AVFoundation is architected to support threaded operations.
AVCaptureMetadataOutputObjectsDelegate
Though this view controller is defined as the capture delegate, it is still necessary to conform to the protocol. Do this now at the top of the view controller file by adding AVCaptureMetadataOutputObjectsDelegate at the end of the creation string:
class ViewController: UIViewController, AVCaptureMetadataOutputObjectsDelegateThe last thing to do is process the data from the delegate method. Add this code anywhere in the view controller:
func captureOutput(captureOutput: AVCaptureOutput!, didOutputMetadataObjects metadataObjects: [AnyObject]!, fromConnection connection: AVCaptureConnection!)
    {
        for metaData in metadataObjects
        {
            let decodedData:AVMetadataMachineReadableCodeObject = metaData as! AVMetadataMachineReadableCodeObject
            self.lblDataInfo.text = decodedData.stringValue
            self.lblDataType.text = decodedData.type
        }
    }
This code works by looking for captured metadata objects and parsing them. Since it’s using a for-loop and not looking for a specific type of metadata, it’ll just show the last captured item in the user interface.
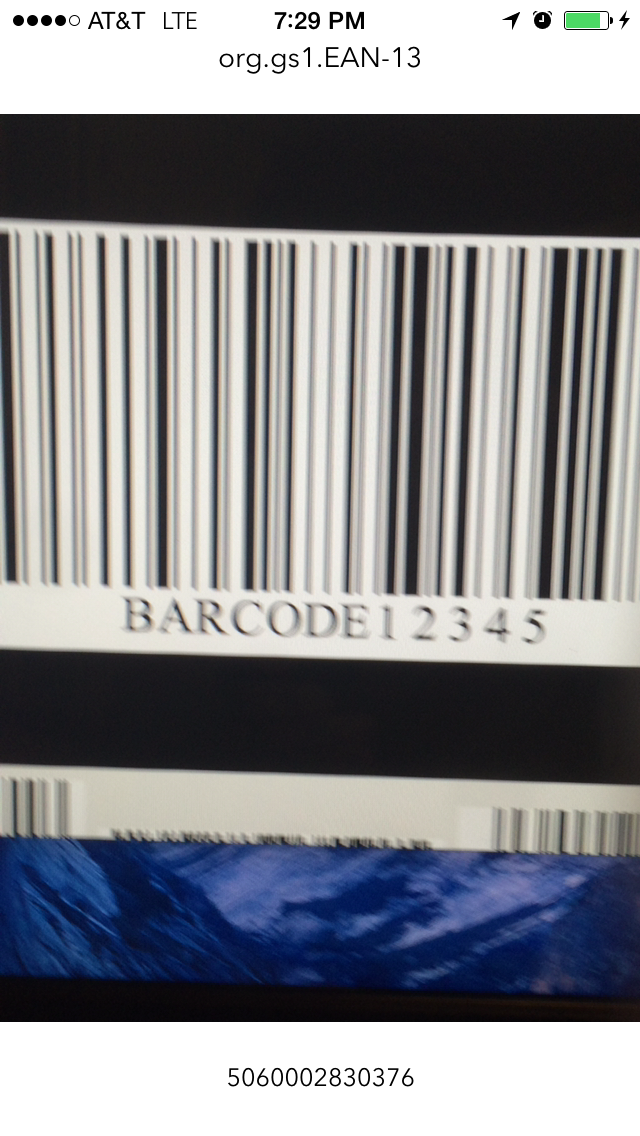
Now, build and run the app and point it at this barcode:

It should recognize the barcode and display the metadata type at the top of the user interface and its parsed information at the bottom.
Wrapping Up
Hopefully this tutorial has demonstrated that working with AVFoundation isn’t as bad as its reputation would have you believe. Getting up and running with parsing metadata was accomplished with only a few functions and one protocol. If this was too difficult, don’t worry, the finished project can be downloaded here.
There is a lot of data freely out there that’s manifested as one of the types of metadata discussed here. Now you can use them in your own app!