Accessing localhost from Anywhere
You’ve spent hours working locally on your computer, getting that new website design to look just right. Your CMS is nicely set up with sample content and you want to test it out on a few mobile devices and tablets. Your client also wants to take a look — but you don’t have time to migrate it all to a public server to give them a quick peek.
If you’re a web developer, chances are you’ve been in this situation plenty of times. And you probably spent those times burning a little midnight oil migrating things onto a public-facing server wishing there was an easier way.
To all those tired-eyed web developers out there, I’m here to tell you that an easier way has arrived! In fact, a whole slew of applications and services are available to help make this process easier by providing access to your localhost from the Web. The ones I’ll be discussing in this article are:
How is it Possible to Access localhost From Anywhere?
It’s possible through secure tunnel services online! These are services that provide you with a tunnel from the Internet to your machine.
What that means is that they provide a publicly accessible URL, watch for calls on that URL, and forward those calls to your localhost server. All the confusing setup has been done for you; all you need to do is install an application and point it to your localhost.
A Note About Using Virtual Hosts
On my localhost, I’ve got virtual hosts set up. Without having the address from each service below listed as a ServerAlias, my server would refuse to play nicely. A few hours of confusion ensued. If you’re in the same boat, add a ServerAlias to your httpd.conf, replacing the ngrok address you see below with the address from the service you’re using:
<VirtualHost *:80>
  DocumentRoot "/Users/patcat/Web"
  ServerName mytestsite.test
  ServerAlias 350c0f8e.ngrok.com
</VirtualHost>
ngrok
ngrok is an application for Windows, macOS and Linux that creates a tunnel but also allows you to inspect all traffic that goes through the tunnel and replay that traffic for testing.
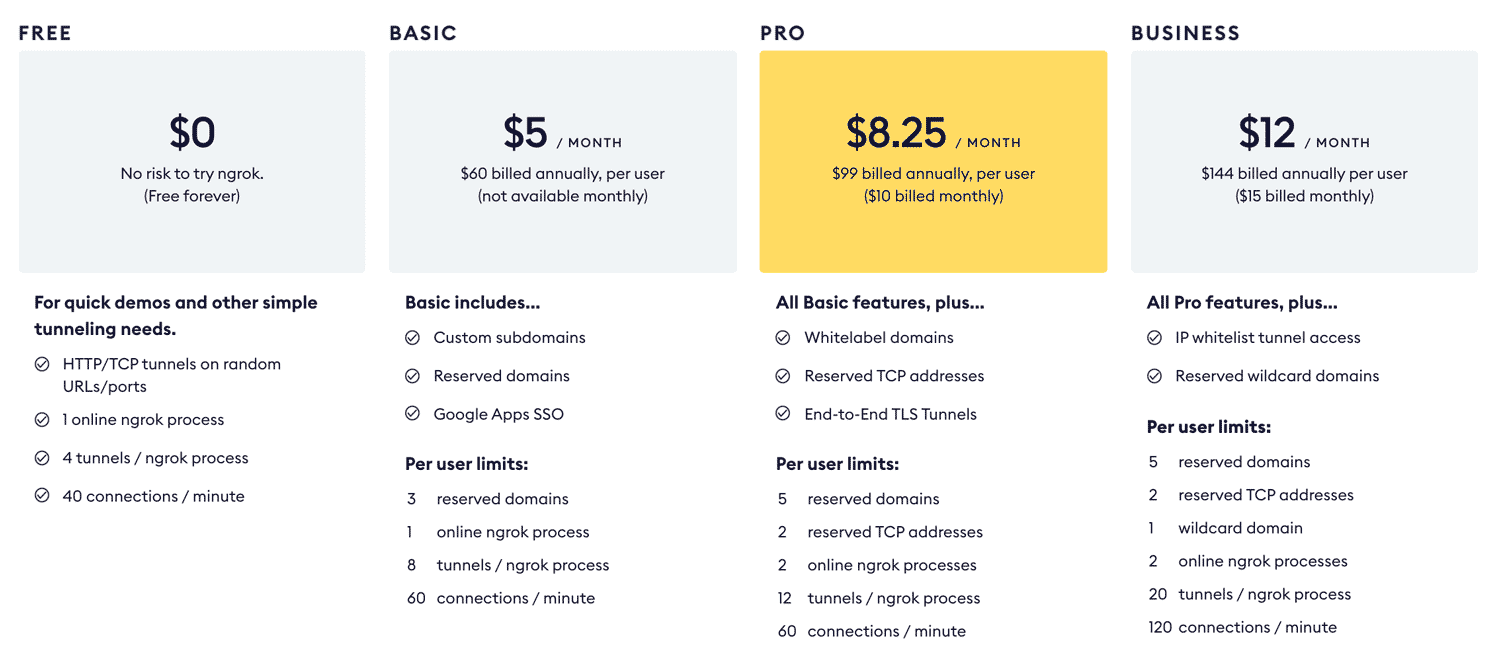
You can use basic features for free and then sign up to access more advanced features. In order to use custom subdomains and reserved domains, you’ll need to sign up for a paid plan. Otherwise, you’ll be able to use the service, but will be given a random domain such as the 350c0f8e.ngrok.com URL in the virtual host sample above.
Ngrok’s plans as of May 2021 look like so:
One key advantage to ngrok is that it has no dependencies. You install ngrok and run it. Nothing else is required.
How to use ngrok
Go to ngrok.com, download the archive and extract it to wherever you’d like ngrok to live on your computer. Below are the basic steps, but if you’d like more details, we have another article on “How to Use ngrok to Share a Local Development Site.”
Open up a command-line terminal and go to the folder you extracted ngrok to. Run the following command to create a tunnel to your localhost on port 80:
./ngrok http 80
You’ll see a screen like so:

In the example above, we’ve got traffic to a randomly generated ngrok address of http://42e474ef9799.ngrok.com being forwarded to our localhost on 127.0.0.1:80.
Open that URL on any device with an internet connection and you’ll be accessing your localhost from the Web!
One of the more unique offerings ngrok provides is the ability to inspect past traffic. To do that, go to http://localhost:4040/ on your computer. You’ll access a dashboard showing inbound requests. You can click each request on the left and see details on the right for the headers and other data. My favorite use of this is seeing JSON data returned back from requests. The very basic layout of this when loading a simple HTML page looks like this:
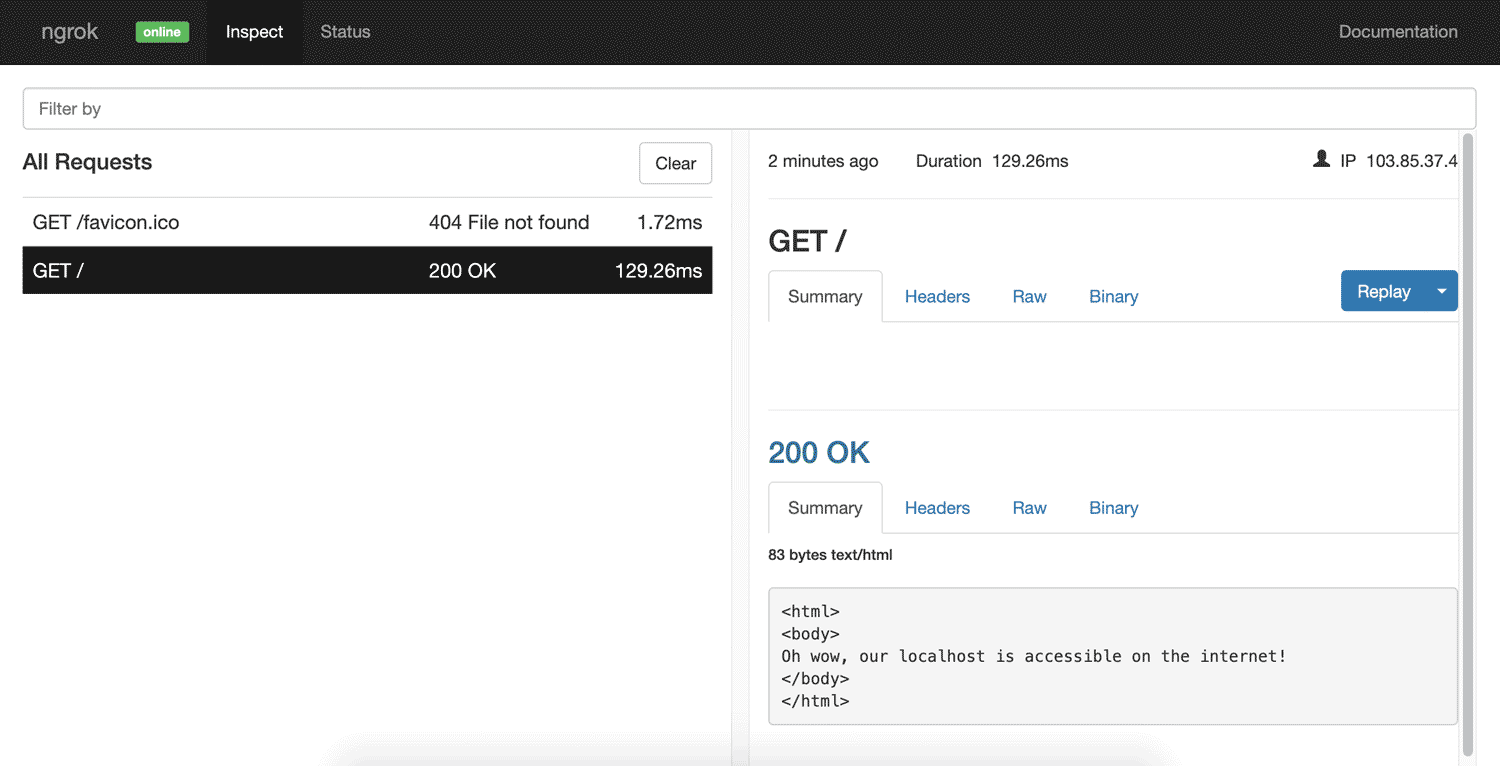
You can even replay a request by clicking the Replay button on the right. That will re-run a request for you over the tunnel.
ngrok’s advanced features
Password protection allows you to prevent random members of the public from accessing your site:
ngrok http -auth="username:password" 80
Custom subdomains are for when you don’t want to have to remember that randomly generated URL! If you sign up to a paid ngrok plan, you can reserve a subdomain so others can’t take it. The following allows you to view your localhost at nogophersinmytunnel.ngrok.com:
ngrok http -subdomain nogophersinmytunnel 80
Custom domains are for when you’d prefer to not have “ngrok” in your URL for the tunneled project. Paid plans allow you to use your own domains, rather than needing to use ngrok.com:
ngrok http -hostname="tunnel.yourdomain.com" 80
You can even tunnel to an IP address on your local network that otherwise would not be accessible to the outside world:
ngrok http 192.168.0.27:80
Or you can create a tunnel for other non-HTTP services:
ngrok tcp 22
There are a bunch of other things you can do, from running multiple tunnels at once to creating a config file to save all these settings for future use.
To read up on all that is possible, see ngrok’s documentation.
PageKite
PageKite is a Python-based “dynamic tunnel based reverse proxy” that works on Windows, macOS, Linux, and even Android devices! It’s very similar to ngrok but has been around for quite a bit longer, and it appears quite a bit more battle-tested for a larger set of uses. They’ve even got it working with the Minecraft protocol to allow people to run a Minecraft server on their local machine.
You can sign up for a free trial for a month and 2.5GB of transfer quota. After that it has a pay-what-you-want system (a minimum of USD$4 a month, or free if you work on free open-source software). You do need to pay more to get more in this case though, with those paying larger amounts getting a larger quota, a longer term of service, custom subdomains, and so forth.
PageKite doesn’t appear to have a traffic inspector like ngrok, but it does have rather incredible features like a built-in firewall that blocks access to common attack targets like /wp-admin, /xampp, phpMyAdmin pages … and so on. It can be disabled if you’re okay with these being public.
They’ve even got a front-end relay server in Sydney, Australia, so this could potentially provide faster speeds for Australian developers.
How to use PageKite
Go to PageKite.net and download the version for your OS. For Windows users, you’ll need to make sure you have Python installed first. For macOS and Linux, you can use a simple cURL command to install it straight from your command line.
Once downloaded, run this command to run a tunnel to your localhost server. You choose a specific subdomain which you use each time (rather than the random allocation in ngrok). I’ve chosen hurrygetintothefancytunnel here:
pagekite.py 80 hurrygetintothefancytunnel.pagekite.me
On my Mac recently, I needed to run with python3 at the start, so try that if the above doesn’t work:
python3 pagekite.py 80 hurrygetintothefancytunnel.pagekite.me
It’ll run through and sign you up to the service if you’re not already signed up. Then you’ll have localhost up and running for the world!

Advanced Features of PageKite
PageKite has some more impressive additional features.
One example: there’s no need for a web server. If you don’t have a server running, it has an inbuilt web server that can run your static files like this:
pagekite.py /path/to/folder igotthattunnelvision.pagekite.me
Like ngrok, you can restrict access via password:
pagekite.py 80 terelekkayatuneli.pagekite.me +password/username=password
Or restrict access via IP addresses:
pagekite.py 80 arcadefirecamethroughmywindow.pagekite.me +ip/1.2.3.4=ok +ip/4.5.6=ok
As mentioned above, you can even run all of this on your phone. I installed an Android web server called kWS and then ran PageKite to expose it to the Web:
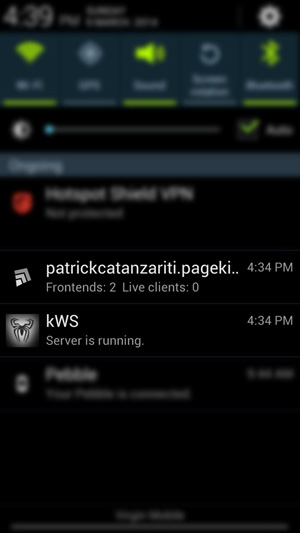
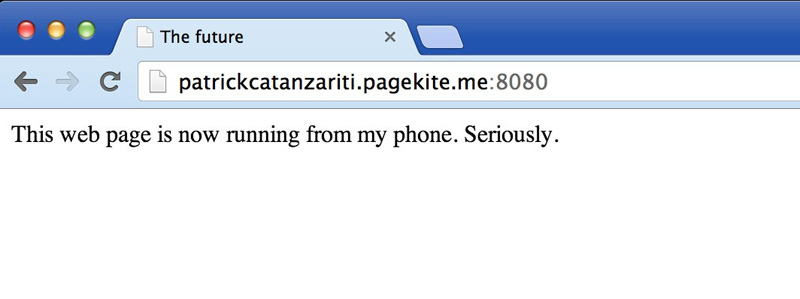
It’s definitely not something I’ll be doing every day, but it’s pretty neat to see that this stuff is now possible solely on a smartphone!
Just like ngrok, PageKite can do multiple tunnels at once, and it supports having your own domain, and supports setting up a configuration file for your tunnels. For more on this, check out their Quick start guide and their more comprehensive how-to page.
localtunnel
localtunnel is a tunneling service that was initially built in Node but also has Go-based and C#/.NET clients.
How to use localtunnel
You can install it globally on your device like most npm packages:
npm install -g localtunnel
In order to start a tunnel to your localhost on port 80, you run this command:
lt --port 80
It’ll run just like ngrok and PageKite! It gives you a subdomain something like the one I was given: https://loud-ladybug-21.loca.lt.

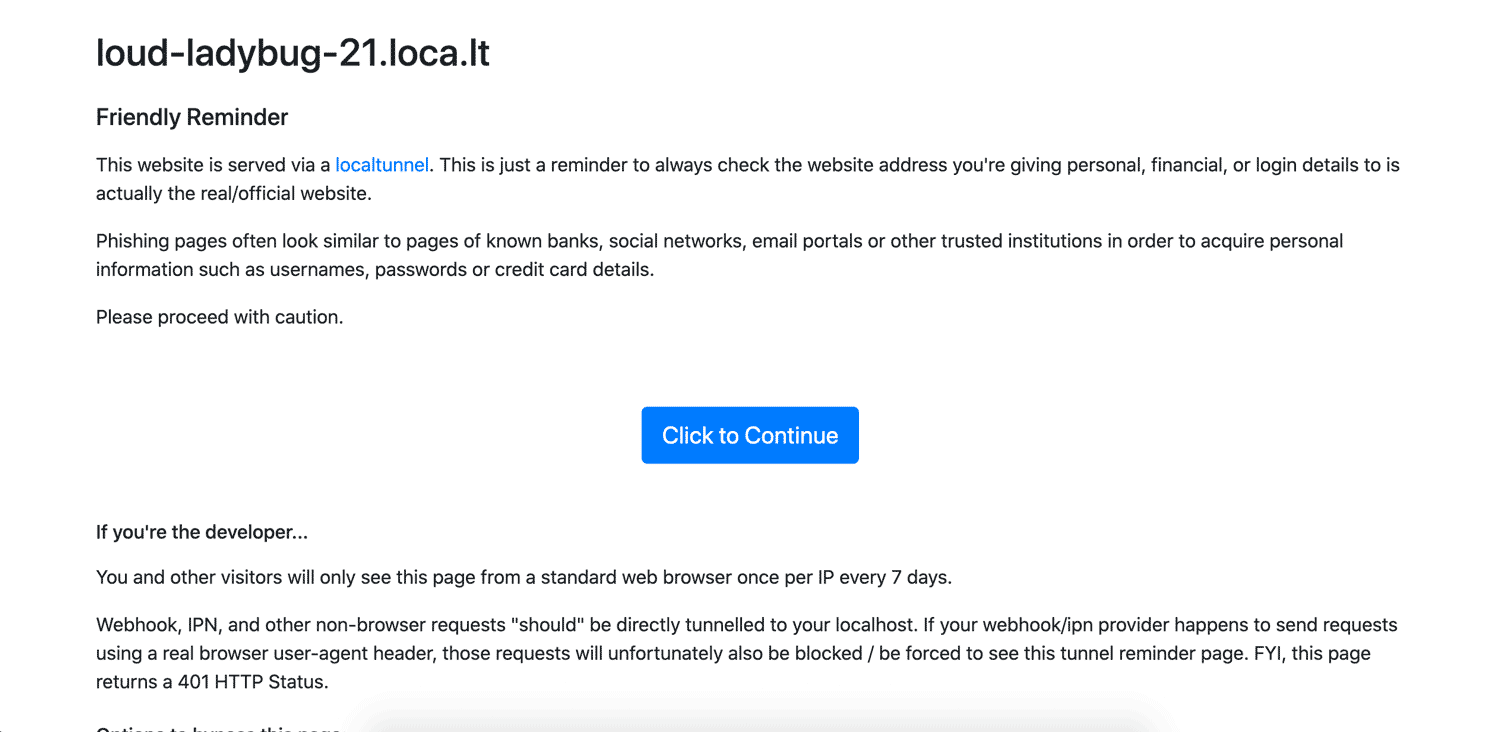
When first running localtunnel, you’ll receive a friendly reminder that this action is making your assets public to the Web. Just hit Click to Continue.
Advanced features of localtunnel
Getting a free custom subdomain is totally doable here, as long as the subdomain hasn’t been taken. To use a custom subdomain, just run it with the --subdomain parameter:
lt --port 80 --subdomain platypusestunneltoo
One of the very handy features localtunnel provides is a Node API that allows you to generate localtunnels via JavaScript to use in your automated tests:
const localtunnel = require('localtunnel');

(async () => {
  const tunnel = await localtunnel({ port: 3000 });

  // Your tunnel URL will appear as tunnel.url

  tunnel.on('close', () => {
    // Do something once the tunnel is closed
  });
})();
boringproxy
boringproxy is a newer option that’s totally free and open source under the MIT license! Its main focus appears to be making it easier for people to self host websites on their computers. It comes as a single executable file that works as the server and the client in one. There’s an executable for a range of Linux systems and Windows. macOS is listed as “untested”. I haven’t been able to get it to work on my Mac personally, but if you have access to a Linux box or a Raspberry Pi, this just might be the solution for you. It’s all written in Go and is open for contributors.
Its features in brief:
- 100% free and open source under the MIT license
- can be completely self hosted
- has built-in reverse proxy
- supports custom domains/subdomains
How to Use boringproxy
The main steps are easiest followed on the boringproxy documentation, as it’s different for different platforms.
Overall, it involves:
- downloading the server instance via
curl(for example,curl -LO https://github.com/boringproxy/boringproxy/releases/download/v0.6.0/boringproxy-linux-x86_64) chmoding the executable that was downloaded (for example,chmod +x boringproxy-linux-x86_64)- setting up binding to ports 80 and 443 (for example,
sudo setcap cap_net_bind_service=+ep boringproxy-linux-x86_64) - setting up the executable on the client too
This video from the creator of boringproxy covers the how-to best:
Advanced features of boringproxy
Auto HTTPS certificates are automatically managed for you via Let’s Encrypt. No need to stress about getting certificates for testing, as it happens behind the scenes.
Web interface for configuration is automatically set up to allow you to manage users, access tokens and tunnels.
You can tunnel web applications with ease. Self host web apps like Etherpad (shown in the video above), give them their own subdomain, and then you can access them from anywhere.
BrowserStack
BrowserStack provides provides automated screenshots and virtual machines to test your website against a range of devices and browsers. If the reason you’re wanting to access localhost is for testing, BrowserStack might be of interest to you.
You can use the above methods to test localhost sites in the BrowserStack virtual machines, but it also has a browser extension for Chrome and Firefox allowing you to provide access to your localhost from their servers.
However, this functionality is only for the BrowserStack services and isn’t accessible to the general public. BrowserStack comes with a free trial, after which it will cost you a monthly fee to use the service. It’d be handy for cases where the sole reason you’re looking to access localhost is to do device testing.
How to use BrowserStack
Sign up for a trial at BrowserStack.com. They’ve actually got the process of local testing documented quite well on their website, so have a read of that if you’re interested in going this route.
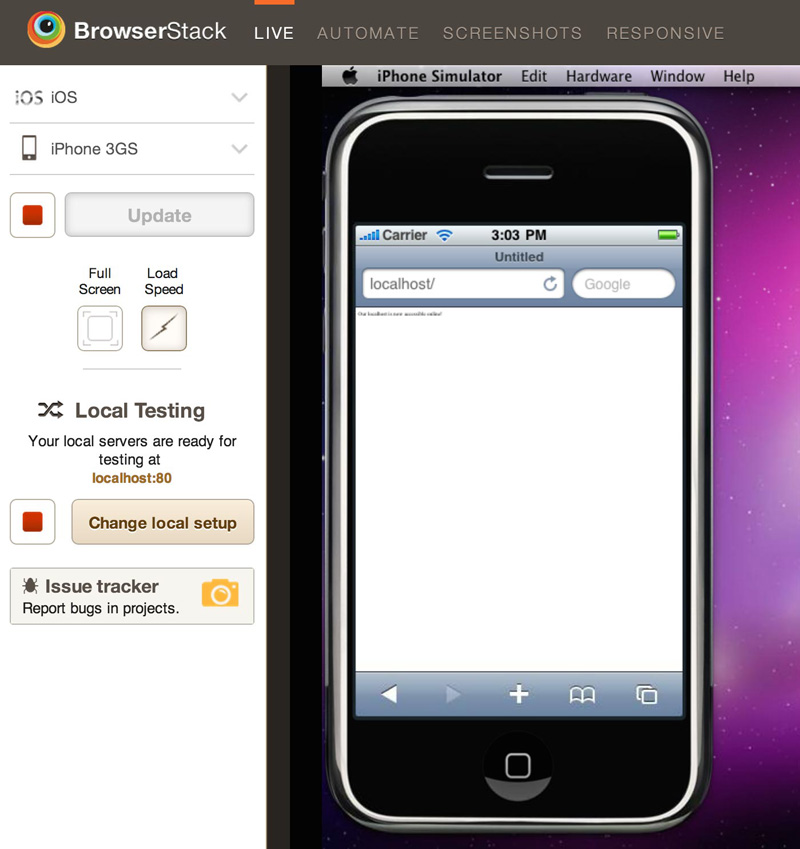
In the end, though, it’ll allow you to test your localhost sites in virtual machines run over the Web like so:
Playing Favorites
After playing around with all of these options, my personal favorites would have to be ngrok and PageKite.
PageKite seems like the most multifaceted solution with a huge amount of potential. It’s been developed and extended to fit a range of uses over the years, making it a really impressive application!
ngrok is great too for its simplicity and the traffic inspector. It has more than enough features for most web developers looking to access their localhost from the Web.
Conclusion
If you’re working on a computer with an active internet connection, you can now set up access to your localhost from anywhere in only a few minutes! It’s incredibly simple to get started and, as you’ve seen, there’s no shortage of solutions!
Have you used any of these services? Do you have any others you prefer? I’d love to know your thoughts on Twitter!
FAQs about accessing localhost from anywhere
To access localhost from anywhere, you need to expose your local server to the internet using techniques like port forwarding, ngrok, or a reverse proxy. This involves making your local server accessible through a public IP or domain name.
“Localhost” refers to the current device you are using. It’s a hostname that typically resolves to the loopback IP address (127.0.0.1) in IPv4 or (::1) in IPv6. It’s commonly used to access services running on the same device.
Probably the easitest solution is to use ngrok. It is a tool that creates secure tunnels from a public endpoint to a locally running service. It allows you to expose a local server to the internet without complex network configurations.
Exposing localhost can be risky as it makes your local service accessible over the internet. Make sure your software is secure and updated. Consider using authentication, firewalls, and encryption to protect your data.
Port forwarding is a network configuration that directs incoming network traffic to a specific device and port on your local network. It allows external devices to access services hosted on your local machine.
Yes, you can associate a domain name with your local server using dynamic DNS services or by modifying your hosts file. This can make it easier to remember and access your local service.
