How to Create Animated GIFs from GSAP Animations

In this article, I’m going to explain how you can convert animations created using GSAP into animated GIFs using modern-gif.
Here’s a sneak peek of one I made earlier. 👇
On the links below, you’ll find a live preview and all the code I’ll be referencing throughout this article:
- 🚀 Preview:
- ⚙️ Repo: github.com/PaulieScanlon/gsap-animation-to-gif
There are two “pages” in the repo. index contains all the code for the GIF seen above, and simple is a starting point for the steps covered in this post.
How to convert GSAP Animations into GIFs
The method I’m using to convert a GSAP animation into a GIF involves capturing SVG data on each “update” of the Tween and writing it to an HTML canvas. After the Tween completes I’m then able to convert SVG data into Rasterized image data which can be used by modern-gif to create each frame of an animated GIF.
Getting Started
Here’s the code I’ve used in the simple example, and it’s what I’ll be using to explain each of the steps required to create an animated GIF from a GSAP animation:
<html lang='en'>
<head>
  <meta charset='utf-8' />
  <title>Simple</title>
  <script>
    const canvas = document.getElementById('canvas');
    const ctx = canvas.getContext('2d');

    let animationFrames = [];
    let canvasFrames = [];

    gsap.timeline({
      onUpdate: () => {},
      onComplete: () => {},
    })
    .fromTo('#rect', { x: -50 }, { duration: 2, x: 350, ease: 'power.ease2' });
  </script>
</head>
<body>
  <main>
    <section>
      <svg
        id='svg'
        xmlns='http://www.w3.org/2000/svg'
        viewBox='0 0 400 200'
        width={400}
        height={200}
        style={{ border: '1px solid red' }}
      >
        <rect id='rect' x='0' y='75' width='50' height='50' fill='red'></rect>
      </svg>
      <canvas id='canvas' style={{ border: '1px solid blue' }} width={400} height={200}></canvas>
      <img id='image' width={400} height={200} style={{ border: '1px solid green' }} />
      <a id='link' download='simple.gif'>Download</a>
    </section>
  </main>
  <script src='https://unpkg.com/modern-gif'></script>
  <script src='https://cdnjs.cloudflare.com/ajax/libs/gsap/3.12.2/gsap.min.js'></script>
</body>
</html>
There are a couple of things I’d like to explain about the above code.
Inline Script
At the top of the file I create a reference to the canvas element in the HTML (below) and define a new reference to the canvas context called ctx. This will allow me to reference the canvas element and write data to it.
There are two arrays defined to hold the captured data (I’ll explain where each is used in a later step):
animationFramescanvasFrames
And last, but not least, an instance of a GSAP Timeline and Tween that animates an SVG rect element in the HTML (below).
HTML
- The HTML contains an
svgelement with an ID ofsvgwith a redrectelement with an ID ofrect. Therectis the element I’ll be animating. - Below the
svgelement is acanvaselement. This is where I’ll write the captured SVG data for use later on. - Below the
canvaselement is animgelement. This is where the final animated GIF will be displayed. - Lastly, there’s an a element which can be used to “download” the GIF.
Script elements
The two script elements at the bottom are for the modern-gif library and GSAP library. Both need to be included in the page so you can use them.
Capturing SVG Data
Locate the GSAP Timeline and make the following changes:
gsap.timeline({
  onUpdate: () => {
+    const xml = new XMLSerializer().serializeToString(svg);
+    const src = `data:image/svg+xml;base64,${btoa(xml)}`;
+    animationFrames.push(src);
  },
  onComplete: () => {
+    console.log(animationFrames);
  },
})
.fromTo('#rect', { x: -50 }, { duration: 2, x: 350, ease: 'power.ease2' });
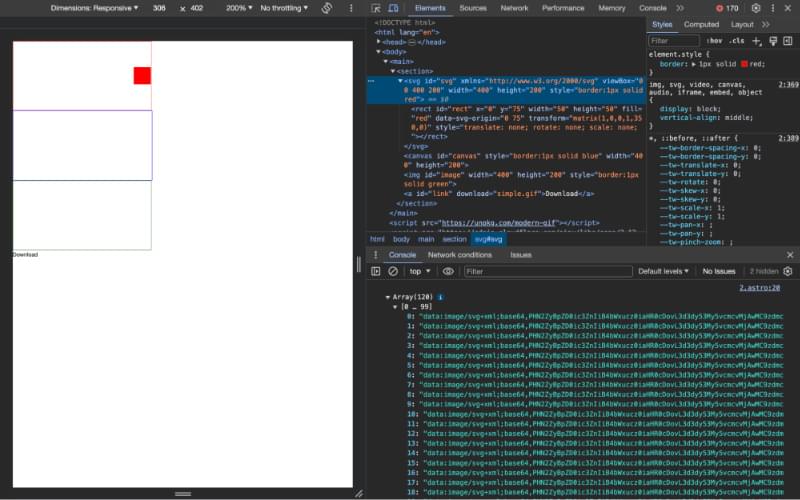
The above code serializes the HTML svg element and converts the data to an svg+xml;base64 string. At this point, the “image data” isn’t quite what I need, but by converting it to a string I can store it in the animationFrame array for use later on.
If you’ve added the console.log in the onComplete function, you should see something similar to the image below in the console of your browser.
Convert SVG Data to Rasterized Data
gsap.timeline({
  onUpdate: () => {
    const xml = new XMLSerializer().serializeToString(svg);
    const src = `data:image/svg+xml;base64,${btoa(xml)}`;
    animationFrames.push(src);
  },
  onComplete: () => {
-    console.log(animationFrames);
+    let inc = 0;
+    const renderSvgDataToCanvas = () => {
+      const virtualImage = new Image();
+      virtualImage.src = animationFrames[inc];
+      virtualImage.onload = () => {
+        ctx.clearRect(0, 0, 400, 200);
+        ctx.drawImage(virtualImage, 0, 0, 400, 200);
+        canvasFrames.push(canvas.toDataURL('image/jpeg'));
+        inc++;
+        if (inc < animationFrames.length - 1) {
+          renderSvgDataToCanvas();
+        } else {
+          console.log(canvasFrames);
+        }
+      };
+    };
+    renderSvgDataToCanvas();
  },
})
.fromTo('#rect', { x: -50 }, { duration: 2, x: 350, ease: 'power.ease2' });
This step is slightly more involved and requires that I perform an action for each index of the animationFrames array.
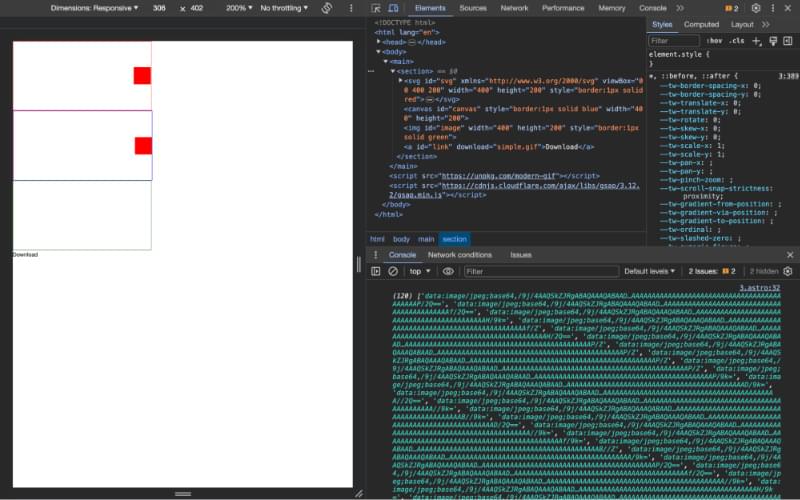
By using a recursive function, renderSvgDataToCanvas, I can use the image data from the animationFrames array, write it to the canvas. Then, by using canvas.toDataURL('image/jpeg') I can store rasterized data of each frame of the animation in the canvasFrames array.
If you’ve added the console.log in the onComplete function, you should see something similar to the below in the console of your browser. This time, however, note the MIME type of the data: instead of svg+xml, it’s image/jpeg. This is important for what I need to do next.
Convert Rasterized Data to GIF
This is the last step and involves passing each index of the canvasFrames array onto modern-gif.
gsap.timeline({
onUpdate: () => {
  const xml = new XMLSerializer().serializeToString(svg);
  const src = `data:image/svg+xml;base64,${btoa(xml)}`;
  animationFrames.push(src);
},
onComplete: () => {
  let inc = 0;
  const renderSvgDataToCanvas = () => {
    const virtualImage = new Image();
    virtualImage.src = animationFrames[inc];
    virtualImage.onload = () => {
      ctx.clearRect(0, 0, 400, 200);
      ctx.drawImage(virtualImage, 0, 0, 400, 200);
      canvasFrames.push(canvas.toDataURL('image/jpeg'));
      inc++;
      if (inc < animationFrames.length - 1) {
        renderSvgDataToCanvas();
      } else {
-          console.log(canvasFrames);
+          generateGif();
      }
    };
  };
+    const generateGif = async () => {
+      const gif = await modernGif.encode({
+        width: 400,
+        height: 200,
+        frames: canvasFrames.map((frame) => {
+          return { imageData: frame, delay: 0 };
+        }),
+      });
+      const frames = await gif;
+      const blob = new Blob([frames], { type: 'image/gif' });
+      const src = URL.createObjectURL(blob);

+      const image = document.getElementById('image');
+      const link = document.getElementById('link');

+      image.src = src;
+      link.href = src;
+    };
    renderSvgDataToCanvas();
  },
})
.fromTo('#rect', { x: -50 }, { duration: 2, x: 350, ease: 'power.ease2' });
Using modernGif.encode you can pass an array of data onto frames and define a delay for each frame, I’ve chosen to add a delay of 0 seconds.
The next part of the code deals with converting the modernGif.ecode data and converting it to “yet another” MIME type, this time image/gif.
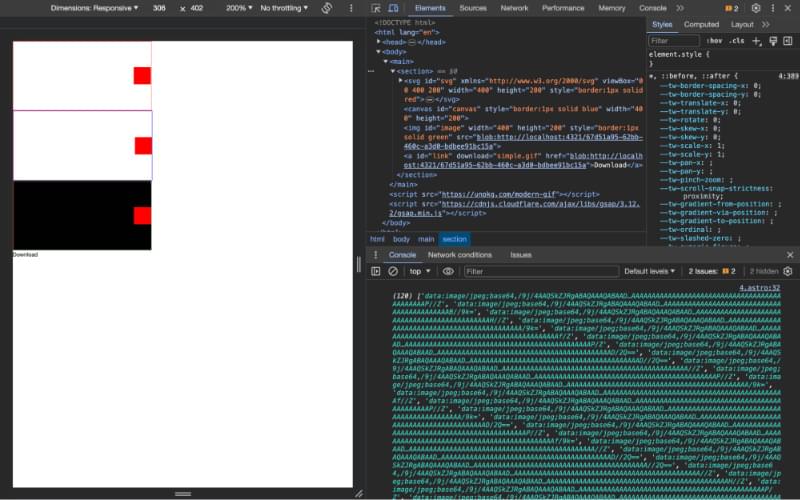
Once I have a final “blob” of data that represents my animated GIF I convert it to a URL and then set the src and href of the image and link elements so I can see and download the GIF in the browser.
Frame Rate
You might notice the final GIF runs quite slowly, this is because animations that run in the browser will typically play back at 60 frames per second (fps), whereas GIFs typically run at a much slower frame rate, 12 or 24fps.
To “drop” some frames of the animation I use an array filter and JavaScript remainder operator to determine if the index is divisible by a certain number, in my case, I chose 6. Indexes that aren’t divisible by 6 are filtered out of the array. The resulting animated GIF, while a little clunky, will play back much faster.
const generateGif = async () => {
  const gif = await modernGif.encode({
    width: 400,
    height: 200,
    frames: canvasFrames
+       .filter((_, index) => index % 6 === 0)
      .map((frame) => {
        return { imageData: frame, delay: 0 };
      }),
    });
  const frames = await gif;
  const blob = new Blob([frames], { type: 'image/gif' });
  const src = URL.createObjectURL(blob);

  const image = document.getElementById('image');
  const link = document.getElementById('link');

  image.src = src;
  link.href = src;
};
And that’s how you can go from GSAP SVG animation to animated GIF via the HTML canvas!
If you have any questions about anything I’ve described in this post feel free to find me on Twitter/X: @PaulieScanlon.