Turn Your Vue App into an Offline-ready Progressive Web App

In this tutorial, we’ll guide you through the process of creating a Vue.js app and transforming it into a progressive web app.
In a digital landscape where users increasingly demand seamless experiences irrespective of network conditions, progressive web apps (PWAs) emerge as a transformative solution. Progressive web apps are web applications that leverage modern web capabilities to deliver an app-like experience to users. They combine the best of web and mobile applications, providing fast loading, offline functionality, and seamless user experiences.
Key Concepts: Service Workers and Manifest Files
In PWAs, service workers and manifest files are fundamental components that contribute to the enhanced performance and offline capabilities of web applications.
Service workers
Service workers are JavaScript files that operate as background processes, separate from the main browser thread. They empower your Vue app with the ability to handle tasks like caching resources, intercepting network requests, and enabling features such as push notifications.
Manifest files
Manifest files, typically named manifest.json, serve as a blueprint for your PWA. They contain metadata about the app, defining how it should appear and behave when installed on a user’s device. manifest files specify essential details such as the app’s name, icons, start URL, and display preferences.
Now that you have a solid understanding of these key concepts, let’s start turning your Vue.js app into an offline-ready progressive web app.
Preparing Your Vue.js App
Before transforming your Vue.js app into a progressive web app, you need to set up a Vue.js project. If you haven’t created a Vue.js app yet, follow the steps below. Alternatively, if you have an existing Vue.js app, you can skip the installation section.
Creating a new Vue.js app
To create a new Vue.js app, you’ll need Vue CLI (command line interface). If you don’t have it installed globally, you can do so by running the following command:
# Install Vue CLI globally
npm install -g @vue/cli
Once Vue CLI is installed, you can create a new Vue app using the following commands:
# Create a new Vue app
vue create my-vue-pwa
This command initiates an interactive setup process where you can choose various configurations for your Vue.js app. Make sure to select the default preset, and when prompted to manually select features, ensure that you choose the PWA option.
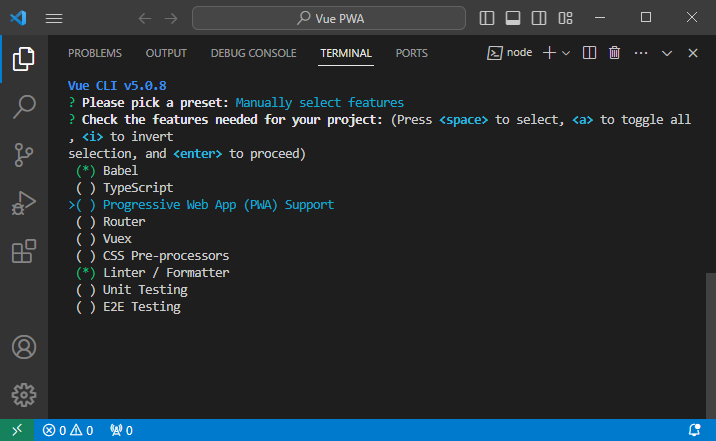
This will set up your project with the necessary configurations for progressive web app features.
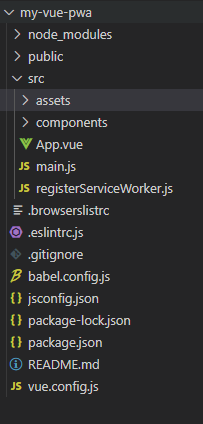
Notably, the selection of the PWA option during app creation will automatically generate a registerServiceWorker.js file. If, for any reason, this file isn’t created, you can utilize the following command to add the progressive web app features to your Vue.js project:
# Add PWA plugin to an existing Vue app
vue add pwa
This additional command ensures that the necessary dependencies and configurations for progressive web app features are seamlessly integrated into your project.
Create a simple todo list app
For demonstration purposes, let’s create a simple todo list app on the home page of your Vue app. Replace the contents of App.vue with the following code:
<template>
  <div class="home">
    <h1>Todo List</h1>
    <div>
      <input v-model="newTodo" @keyup.enter="addTodo" placeholder="Add a new todo" />
      <button @click="addTodo">Add</button>
    </div>
    <ul>
      <li v-for="todo in todos" :key="todo.id">
        <input type="checkbox" v-model="todo.completed" />
        <span :class="{ 'completed': todo.completed }">{{ todo.text }}</span>
      </li>
    </ul>
  </div>
</template>

<script>
export default {
  data() {
    return {
      newTodo: '',
      todos: [
        { id: 1, text: 'Learn Vue.js', completed: false },
        { id: 2, text: 'Build a PWA', completed: false },
        { id: 3, text: 'Deploy to Netlify', completed: false },
      ],
    };
  },
  methods: {
    addTodo() {
      if (this.newTodo.trim() === '') return;
      this.todos.push({ id: this.todos.length + 1, text: this.newTodo, completed: false });
      this.newTodo = '';
    },
  },
};
</script>

<style scoped>
.completed {
  text-decoration: line-through;
}
</style>
In the above code:
- We are modifying the content of the
App.vuefile to create a todo list. - The template includes an input field for adding new todos, a button to add them, and a list to display existing todos.
- Todos are represented by objects with properties like
id,text, andcompleted. - The
v-fordirective dynamically renders each todo item in the list. - Checkboxes are included for each todo, and their completion status is managed by the
completedproperty. - The checkboxes are bound to the
completedproperty using thev-modeldirective, enabling interactive marking of tasks as completed or incomplete. - The
addTodomethod allows the addition of new todos to the list, with input validation to prevent empty todos. - A simple styling is applied to completed tasks, visually indicated by a line-through text decoration.
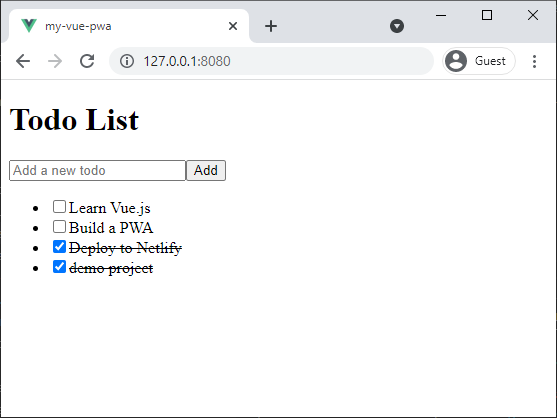
This todo list app serves as a baseline for transforming your Vue.js application into an offline-ready progressive web app.
Modify the Manifest File
Now that you have your Vue.js app set up, including a basic feature, the next step is to enhance its progressive web app capabilities by configuring the manifest.json file.
The manifest.json file plays a crucial role in defining how your PWA appears and behaves when installed on a user’s device. Due to the PWA module being utilized, this file will be automatically generated during the build process, ensuring it contains the necessary information for a seamless PWA experience.
Configure app metadata
The manifest.json file includes crucial elements that contribute to the PWA experience. To update this information, you can modify your vue.config.js file, which acts as the configuration hub for your Vue.js app. Open the vue.config.js file (create one if not already present) in the root directory of your project and add or modify the following section:
// vue.config.js

module.exports = {
  // ... other configurations

  pwa: {
    name: 'My ToDo App',
    short_name: 'ToDo',
    description: 'A ToDo progressive web app',
    start_url: '/',
    display: 'standalone',
    background_color: '#ffffff',
    theme_color: '#41b383',
    icons: [
      {
        src: '/img/icons/icon-72x72.png',
        sizes: '72x72',
        type: 'image/png',
      },
      // Add more icons for different resolutions as needed
    ],
  },
};
Manifest file properties:
- name: the full name of your app.
- short_name: a short version of your app’s name for limited-space environments.
- description: a brief description of your app.
- start_url: the page that loads when your PWA is launched.
- display: defines the display mode; here, standalone ensures it appears as a standalone app.
- background_color: the background color of the app.
- theme_color: the color of the app’s theme.
- icons: an array of icons for different device resolutions.
By updating the vue.config.js file, you ensure that your Vue.js app’s PWA module generates the manifest.json file with the specified configurations during the build process. This dynamic generation simplifies the maintenance of your PWA metadata, allowing you to make changes directly in your project’s configuration.
Implement Service Workers
Service workers are a vital component of progressive web apps (PWAs) responsible for enabling advanced features such as offline capabilities, background synchronization, and push notifications.
The service worker file will be automatically generated during the build process, ensuring its inclusion in the production environment. In development mode, service workers are not included by default. This omission is intentional and serves to prevent potential issues.
Enabling service workers in development could lead to cached assets being used, potentially causing discrepancies with the latest local changes.
To build the Vue.js app and generate the service worker file, the following command can be utilized:
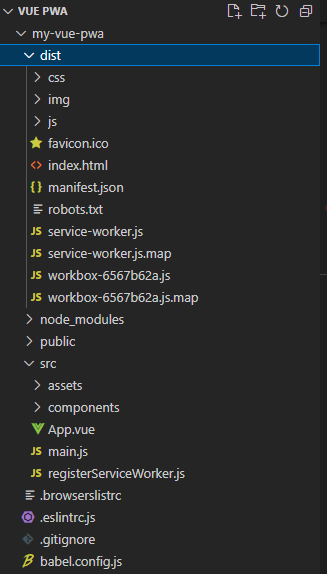
npm run build
Executing this command triggers the Vue build process, which includes the creation of the service worker file in a dist directory for production deployment.
Register the service workers
The registerServiceWorker.js file is automatically included in your Vue.js project when generated with Vue CLI or pwa module. This file plays a crucial role in integrating service workers into your Vue.js application. Its primary purpose is to facilitate the registration of the service worker script, enabling your app to leverage progressive web app features, such as caching and offline capabilities.
Let’s delve deeper into the code and understand its key components:
/* eslint-disable no-console */

import { register } from 'register-service-worker'

if (process.env.NODE_ENV === 'production') {
  register(`${process.env.BASE_URL}service-worker.js`, {
    ready () {
      console.log(
        'App is being served from cache by a service worker.\\n' +
        'For more details, visit <https://goo.gl/AFskqB>'
      );
    },
    registered () {
      console.log('Service worker has been registered.');
    },
    cached () {
      console.log('Content has been cached for offline use.');
    },
    updatefound () {
      console.log('New content is downloading.');
    },
    updated () {
      console.log('New content is available; please refresh.');
    },
    offline () {
      console.log('No internet connection found. App is running in offline mode.');
    },
    error (error) {
      console.error('Error during service worker registration:', error);
    }
  });
}
Code explanations:
-
Environment check. The
if (process.env.NODE_ENV === 'production')condition ensures that the service worker is registered only in production mode. This is a critical consideration, as service workers are meant to enhance the performance and offline capabilities of the app in the production environment. -
Registration function. The
registerfunction is imported from'register-service-worker'and is responsible for the actual registration of the service worker script. -
Callbacks. The callbacks within the configuration object handle various lifecycle events of the service worker.
ready. This callback is triggered when the app is being served from the cache by a service worker. It indicates that the app is successfully operating offline.registered. Signals that the service worker has been successfully registered.cached. Indicates that content has been cached for offline use. This is a key feature of PWAs, ensuring that users can access the app even without an internet connection.updatefound. Informs that new content is currently being downloaded. This is part of the service worker’s ability to fetch and cache updated assets in the background.updated. Alerts that new content is available, prompting the user to refresh the app to load the latest version.offline. Notifies the user when there’s no internet connection, and the app is running in offline mode. This ensures a seamless user experience even in challenging network conditions.error. Logs any errors that may occur during the service worker registration process.
Customize Service Worker
The registerServiceWorker.js file in your Vue.js project provides a flexible framework that allows you to customize the behavior of your service worker. While the default configuration uses console.log statements for logging, you can enhance the user experience by incorporating popups or notifications. Let’s explore how you can achieve this level of customization.
Using popup notifications
You can replace the console.log statements with popup notifications to provide a more visually engaging experience for users. To achieve this, you can leverage popular libraries like SweetAlert or native browser APIs.
Using SweetAlert
-
First, install SweetAlert in your project:
npm install sweetalert2 -
Modify the
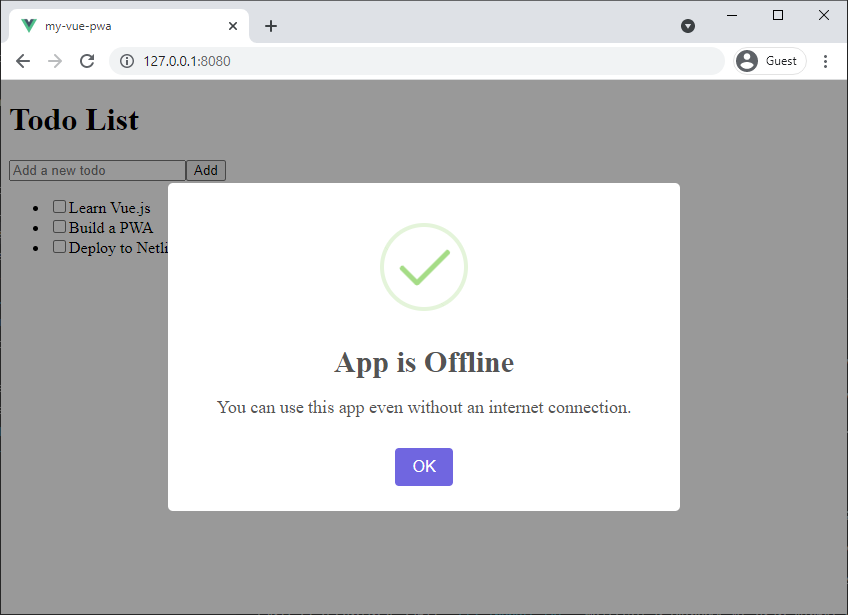
registerServiceWorker.jsfile:/* eslint-disable no-console */ import { register } from 'register-service-worker'; import Swal from 'sweetalert2'; if (process.env.NODE_ENV === 'production') { register(`${process.env.BASE_URL}service-worker.js`, { ready() { Swal.fire({ title: 'App is Offline', text: 'You can use this app even without an internet connection.', icon: 'success', }); }, registered() { Swal.fire('Service worker has been registered.'); }, cached() { Swal.fire('Content has been cached for offline use.'); }, updatefound() { Swal.fire('New content is downloading.'); }, updated() { Swal.fire({ title: 'New Content Available', text: 'Please refresh to load the latest version.', icon: 'info', }); }, offline() { Swal.fire({ title: 'No Internet Connection', text: 'App is running in offline mode.', icon: 'warning', }); }, error(error) { console.error('Error during service worker registration:', error); }, }); }
In this example, we’ve replaced the console.log statements with SweetAlert notifications. You can customize the appearance and behavior of these notifications according to your design preferences.
Make Your App Installable
Progressive web apps offer a seamless installation experience, allowing users to add your app to their device’s home screen for quick access. In this section, we’ll guide you through prompting users to install your PWA.
Prompt users to install your PWA
Encouraging users to install your PWA enhances user engagement and provides a native app-like experience. You can trigger an installation prompt based on certain conditions, such as user interactions or time spent on your site.
To implement this feature, you can use the @owliehq/vue-addtohomescreen plugin. This plugin is designed exclusively for Vue 3, offering a hassle-free solution for integrating an Add to Home Screen button in your application.
Install the plugin
To get started, install the plugin using npm or yarn:
# Using npm
npm install @owliehq/vue-addtohomescreen
Add the plugin
In your src/main.js file, initialize the plugin by importing it and passing any desired customization parameters. This example sets the button color to blue:
// src/main.js

import { createApp } from 'vue';
import App from './App.vue';
import AddToHomescreen from '@owliehq/vue-addtohomescreen';
import './registerServiceWorker'

const app = createApp(App);
app.use(AddToHomescreen, {
  buttonColor: 'blue',
});

app.mount('#app');
This code ensures that the plugin is integrated into your Vue 3 application with the specified customization.
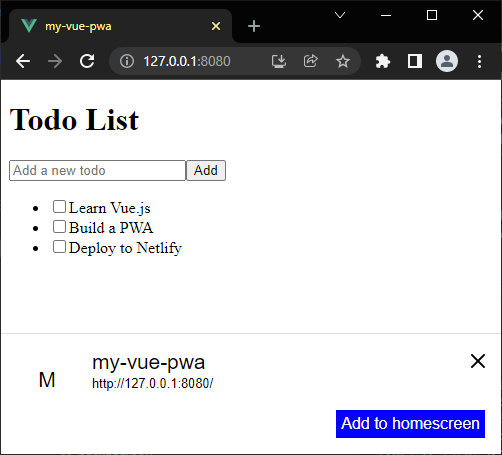
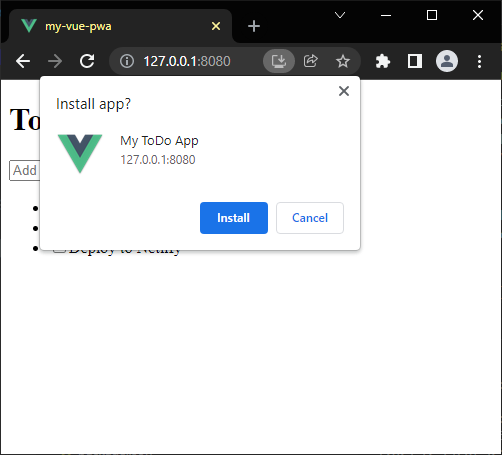
These implementations provide users with clear options to install your PWA, creating a more user-centric experience and increasing the likelihood of app adoption. Users can choose to install the app programmatically or follow a visual cue to add it to their device’s home screen.
Testing Your Offline-ready PWA
To locally test your offline-ready progressive web app, begin by installing the http-server using the command:
npm install -g http-server
Next, navigate to the dist directory in your terminal and serve the files using the following command:
http-server -o
This command will open the PWA in your default browser.
If your PWA is already deployed, access it by opening the link provided by your hosting provider after the deployment process is completed.
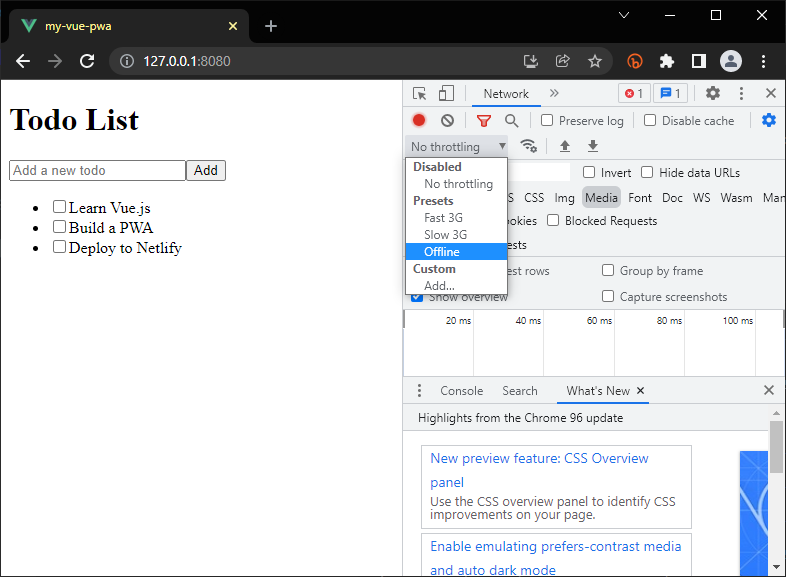
Offline testing with browser developer tools
Simulating offline conditions for testing can be achieved through browser developer tools. In Google Chrome, open DevTools (F12 or right-click and select Inspect), go to the Network tab, and check the Offline option to simulate an offline environment. Similarly, in Microsoft Edge, open DevTools, navigate to the Network conditions tab, and check the Offline option to simulate an offline scenario.
Conclusion
In conclusion, transforming your Vue.js app into a progressive web app brings a multitude of benefits, including enhanced user experience, offline functionality, and improved performance. By implementing service workers, manifest files, and caching strategies, your app becomes resilient to varying network conditions and provides users with a seamless experience.